OwnCloud is an open-source, self-hosted file sync and share solution that allows you to access your data from anywhere. It offers a web interface for easy file management and also provides apps for various platforms.
In this tutorial, we will guide you through the process of installing OwnCloud on your Ubuntu 22.04 VPS.
You can install Ubuntu 22.04 on your VPS by using the automatic OS install templates in your AlphaVPS clients' area panel or you can manually install it via an ISO /if your VPS supports ISOs/.
If you prefer a manual approach, you can refer to our manual installation guide for Ubuntu 22.04 here.
Similar to NextCloud, OwnCloud has dependencies, which need to be installed in advance - web server, database, and PHP modules.
For additional details about LAMP stack installation, you can refer to our guide here.
Updating the system
Update your system by running:
apt update && apt upgrade -yContinue with issuing a reboot command if the upgrade command installed a new kernel.
Create the occ Helper Script
Paste the following block in your terminal:
FILE="/usr/local/bin/occ"
cat <<EOM >$FILE
#! /bin/bash
cd /var/www/owncloud
sudo -E -u www-data /usr/bin/php /var/www/owncloud/occ "\$@"
EOM
Make the script executable:
chmod +x $FILEInstalling necessary dependencies
apt install -y apache2 libapache2-mod-php mariadb-server openssl redis-server wget php-imagick php-common php-curl php-gd php-gmp php-bcmath php-imap php-intl php-json php-mbstring php-mysql php-ssh2 php-xml php-zip php-apcu php-redis php-ldap php-phpseclibOptionally, if you want to connect to external storage via SMB you need to install the smbclient php module.
apt-get install -y libsmbclient-dev php-dev php-pear
pecl channel-update pecl.php.net
mkdir -p /tmp/pear/cache
pecl install smbclient-stable
echo "extension=smbclient.so" > /etc/php/7.4/mods-available/smbclient.ini
phpenmod smbclient
systemctl restart apache2
You can check if it was successfully activated by running:
php -m | grep smbclientThe expected output is:
libsmbclient
smbclient
Additional useful tools include:
apt install -y unzip bzip2 rsync curl jq inetutils-ping ldap-utils smbclientApache and Database settings
First, you will need to create a new Virtual host.
FILE="/etc/apache2/sites-available/owncloud.conf"Add the configuration to the file. Simply paste the following into your terminal:
cat <<EOM >$FILE
<VirtualHost *:80>
# uncommment the line below if variable was set
#ServerName $my_domain
DirectoryIndex index.php index.html
DocumentRoot /var/www/owncloud
<Directory /var/www/owncloud>
  Options +FollowSymlinks -Indexes
  AllowOverride All
  Require all granted

 <IfModule mod_dav.c>
  Dav off
 </IfModule>

 SetEnv HOME /var/www/owncloud
 SetEnv HTTP_HOME /var/www/owncloud
</Directory>
</VirtualHost>
EOM
Now enable it by running:
a2dissite 000-default
a2ensite owncloud.conf
Now you will need to configure the database.
Securing your installation and setting up a secure password is mandatory.
mysql_secure_installation allows you to set a password for the root user and remove anonymous users, which helps to secure the MySQL installation.
As of 2022, if you try to run the mysql_secure_installation script without additional configuration, an error will occur, which will loop the script.
We will prevent this by doing the following:
sudo mysql
mysql> ALTER USER 'root'@'localhost' IDENTIFIED WITH mysql_native_password BY 'your-password-here';
mysql> exit
Note the password. It will be required during the first step of the script.
You can continue with the mysql_secure_installation script by running:
mysql_secure_installationThis is a shell script available on Unix systems, and enables you to improve the security of your MySQL installation.
Create the database and set a password for the user:
sed -i "/\[mysqld\]/atransaction-isolation = READ-COMMITTED\nperformance_schema = on" /etc/mysql/mariadb.conf.d/50-server.cnf
systemctl start mariadb
mysql -u root -e "CREATE DATABASE IF NOT EXISTS owncloud; \
GRANT ALL PRIVILEGES ON owncloud.* \
  TO owncloud@localhost \
  IDENTIFIED BY 'your-password-here'";
Enable recommended Apache modules
a2enmod dir env headers mime rewrite setenvif
systemctl restart apache2
Downloading and installing OwnCloud
Download OwnCloud in your web root directory by running the following commands:
cd /var/www/
wget https://download.owncloud.com/server/stable/owncloud-complete-latest.tar.bz2 && \
tar -xjf owncloud-complete-latest.tar.bz2 && \
chown -R www-data. owncloud
Paste the following lines in your terminal.
You will need to set a strong secure password for your admin user and you will need to provide the same database password, which you set during the database configuration.
The admin password will be required to log-in to your OwnCloud instance via your web browser.
Of course, you can switch the name of the admin user as well.
occ maintenance:install \
    --database "mysql" \
    --database-name "owncloud" \
    --database-user "owncloud" \
    --database-pass your-db-password-here \
    --data-dir "/var/www/owncloud/data" \
    --admin-user "admin" \
    --admin-pass your-admin-password-here
OwnCloud Configuration
Configure ownCloud’s Trusted Domains
my_ip=$(hostname -I|cut -f1 -d ' ')
occ config:system:set trusted_domains 1 --value="$my_ip"
occ config:system:set trusted_domains 2 --value="$my_domain"
If you do not have an active domain, it will be set to an empty string.
Configure the cron Jobs
occ background:cron
echo "*/15  *  *  *  * /var/www/owncloud/occ system:cron" \
  | sudo -u www-data -g crontab tee -a \
  /var/spool/cron/crontabs/www-data
echo "0  2  *  *  * /var/www/owncloud/occ dav:cleanup-chunks" \
  | sudo -u www-data -g crontab tee -a \
  /var/spool/cron/crontabs/www-data
Configure Caching and File Locking
occ config:system:set \
   memcache.local \
   --value '\OC\Memcache\APCu'
occ config:system:set \
   memcache.locking \
   --value '\OC\Memcache\Redis'
occ config:system:set \
   redis \
   --value '{"host": "127.0.0.1", "port": "6379"}' \
   --type json
Configure Log Rotation
FILE="/etc/logrotate.d/owncloud"
sudo cat <<EOM >$FILE
/var/www/owncloud/data/owncloud.log {
  size 10M
  rotate 12
  copytruncate
  missingok
  compress
  compresscmd /bin/gzip
}
EOM
Finalize the installation by running:
cd /var/www/
chown -R www-data. owncloud
This is it!
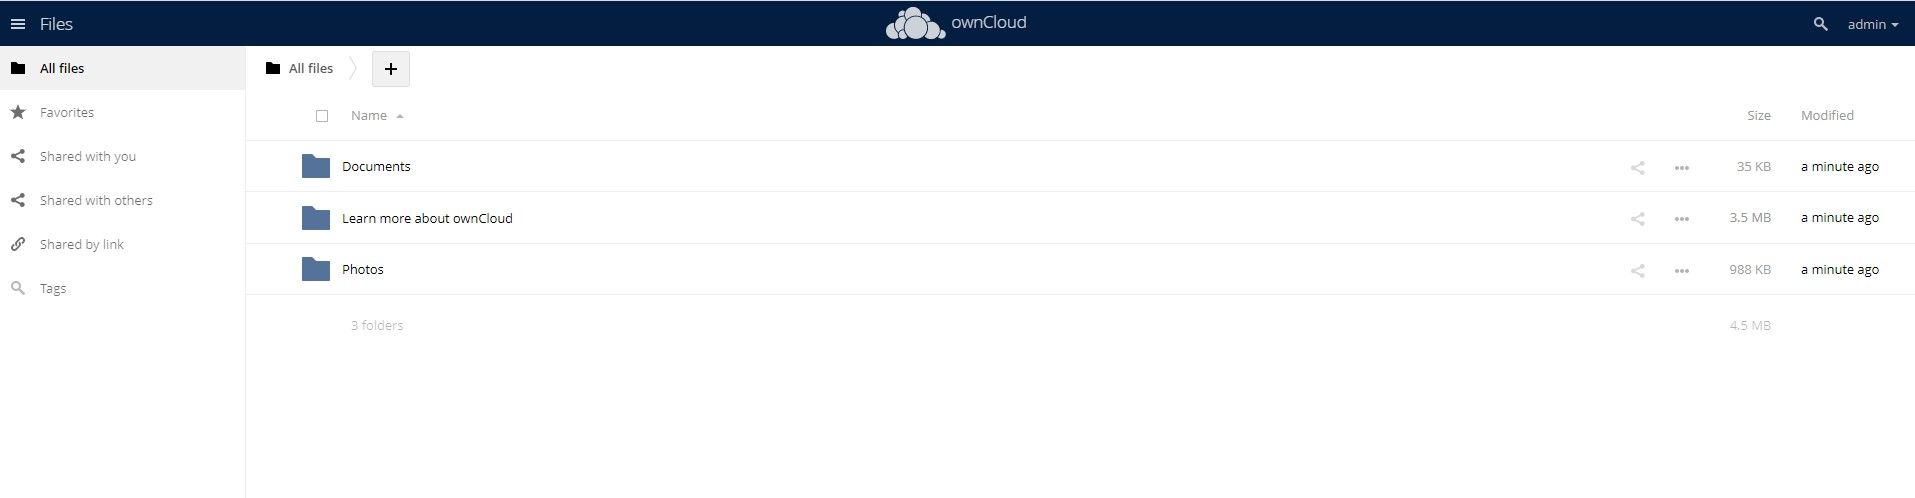
You can now log in to your own OwnCloud instance from your browser.
Navigate to http://your-AlphaVPS-ip/index.php/login
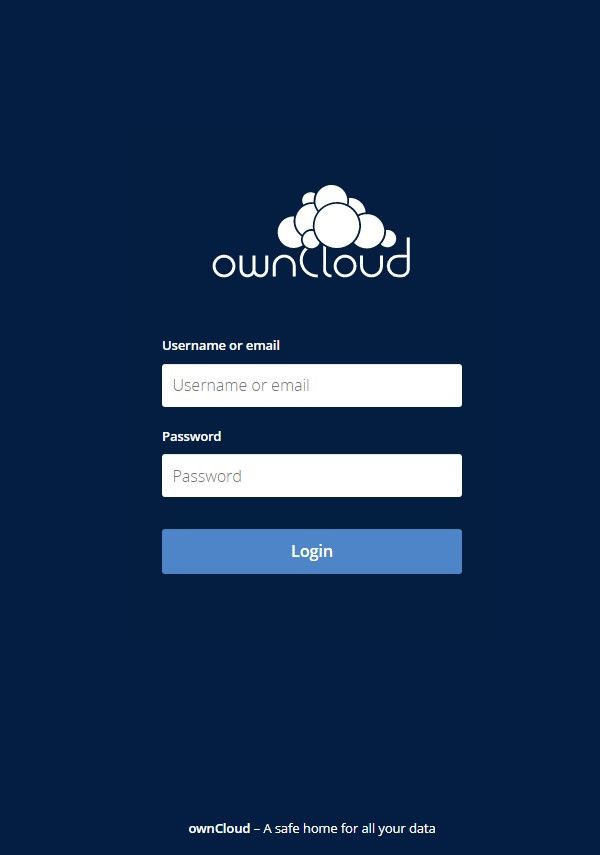
Log in with the admin user and your admin password.
Once logged in, it's all up to you.