A LAMP stack is a combination of software that is used together to run dynamic websites and web apps on a server.
The combination is represented by a Linux operating system, Apache web server, MySQL database, and PHP.
In this tutorial, we will be walking through the process of installing a LAMP stack on an Ubuntu server.
We will go with Ubuntu 22.04, but the process is pretty much the same for all Debian-based distributions.
You will need to have an Ubuntu 22.04 server with a non-root sudo-enabled user. You can either proceed with an automatic installation from your clients' area panel or you can manually install the OS via an ISO.
For a manual installation, you can refer to our guide here.
We will entirely work from the terminal.
Installing Apache
The Apache HTTP Server is a widely-used free and open-source cross-platform web server.
A web server is software and the underlying hardware that accepts requests via the HTTP protocol or its secure variant HTTP.
In a nutshell, it is software that is used to host and serve web pages and web applications over the internet.
To proceed with this step you will need to update your apt cache and install Apache via these two commands.
sudo apt update
sudo apt install apache2
Press Y/y and confirm the installation by pressing ''Enter''.
If the installation is successfully completed, your web server is now working.
Test the installation: Open a web browser and navigate to http://your-server-ip/ . You should see the default Apache web page, which confirms that Apache is running correctly.
You can check your IP from your AlphaVPS clients' area panel or you can simply run a command.
Example commands to find out your IP are:
ip addr
ifconfig
ip a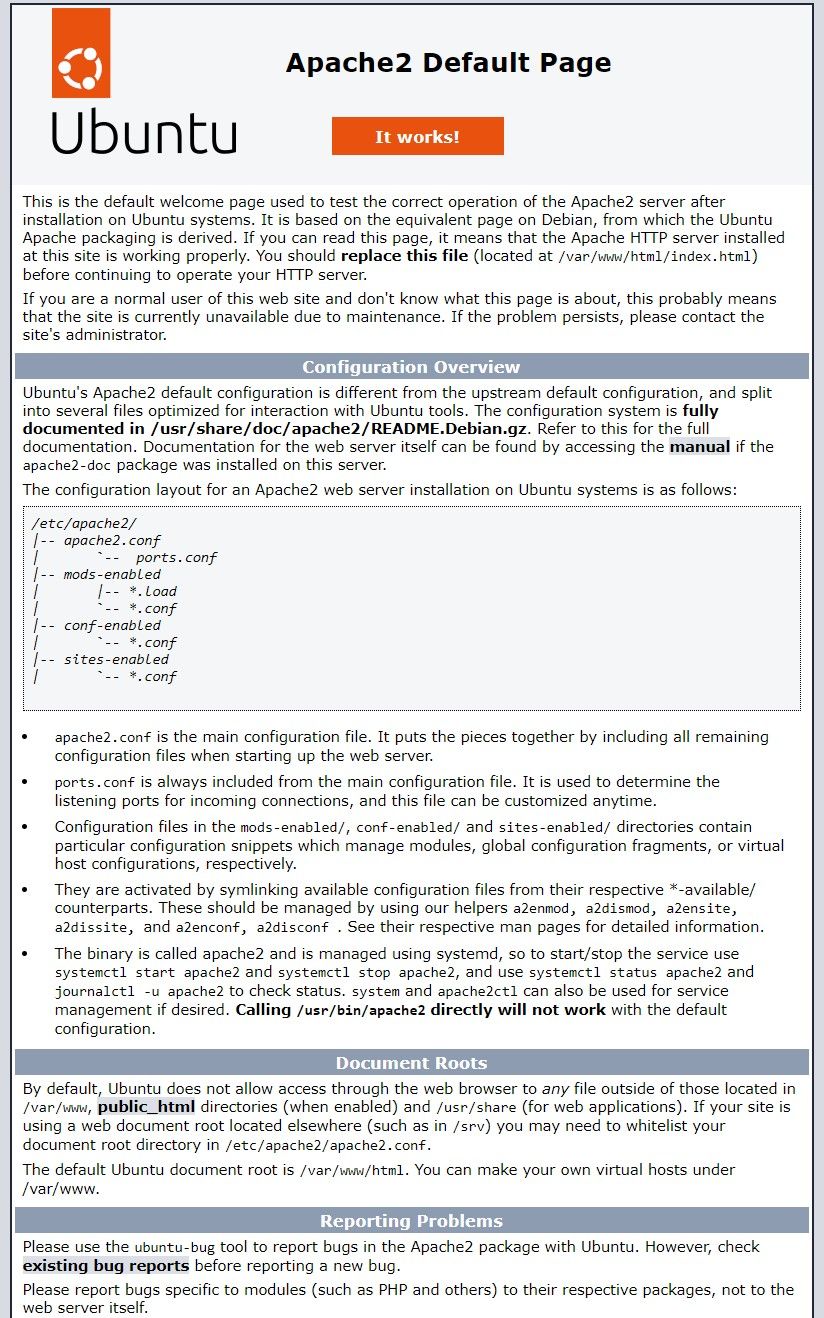
Installing MySQL
MySQL is a widely used open-source relational database management system (RDBMS) that is designed for managing and storing data in a structured format. It is based on the SQL (Structured Query Language) language, which is used to create, modify and query databases.
In short, MySQL is a popular and powerful relational database management system that is widely used for storing and managing data in web applications and other systems.
To install MySQL, you will need to run the following command:
sudo apt-get install mysql-serverWhen you install MySQL, a default root user is created without a password. This is a security vulnerability because anyone can connect to the MySQL server as the root user without providing a password. mysql_secure_installation allows you to set a password for the root user and remove anonymous users, which helps to secure the MySQL installation.
As of 2022, if you try to run the mysql_secure_installation script without additional configuration, an error will occur, which will loop the script.
We will prevent this by doing the following:
sudo mysql
mysql> ALTER USER 'root'@'localhost' IDENTIFIED WITH mysql_native_password BY 'your-password-here';
mysql> exit
Note the password. It will be required during the first step of the script.
mysql_secure_installation is a command-line tool provided by MySQL that lets you secure your MySQL installation. It is used to set a root password, remove anonymous users, disable remote root logins, and remove test databases.
Run the following command:
mysql_secure_installationSimply answer everything with a yes by clicking 'Y/y'.
You will be prompted to select a level of a password validation policy.
Make sure that your password covers the requirements when you provide it. Otherwise, an error will occur.
LOW    Length >= 8
MEDIUM Length >= 8, numeric, mixed case, and special characters
STRONG Length >= 8, numeric, mixed case, special characters and dictionary

Please enter 0 = LOW, 1 = MEDIUM and 2 = STRONG:
The installation is now completed.
Installing PHP
PHP stands for Hypertext Preprocessor. It is a server-side scripting language that is widely used to create dynamic websites and web applications. It can interact with databases and support various data and protocols.
Except for the regular php package, you will also need to install the libapache2-mod-php and php-mysql packages. These two realize PHP's proper communication with your MySQL database and Apache webserver.
Run the following command:
sudo apt install php libapache2-mod-php php-mysqlAfter the installation is completed, your LAMP stack is functional.
Creating an Apache virtual host and testing out the functionality
An Apache virtual host is a way to host multiple websites on a single server using a single IP address. Each virtual host is configured with its domain name and document root, allowing Apache to serve the correct website content for each incoming request. This will enable your server to host multiple websites.
A virtual host can be created following these steps:
- Create a new directory for your virtual host's web content. This is usually located in the /var/www/ directory and should be named after your domain name.
sudo mkdir /var/www/"domain_name"
2. Create a new virtual host configuration file. This file is usually located in the /etc/apache2/sites-available/ directory and should be named after your domain name.
sudo nano /etc/apache2/sites-available/"domain_name".conf3. In the virtual host configuration file, specify the server name and server alias(es) for your virtual host, along with the document root directory.
You will need to assign ownership of the document root directory with the $USER environment variable.
sudo chown -R www-data:www-data /var/www/"domain_name"
A sample configuration looks like this:
<VirtualHost *:80>
    ServerName "domain_name"
    ServerAlias "www.domain_name"
    DocumentRoot /var/www/"domain_name"
    ErrorLog ${APACHE_LOG_DIR}/"domain-name"-error.log
    CustomLog ${APACHE_LOG_DIR}/"domain-name"-access.log combined
</VirtualHost>
Save and close the file.
4. Enable the virtual host and reload apache.
sudo a2ensite "domain-name"
sudo systemctl reload apache2
5. Add content to your web root directory.
Create a new HTML file, an index.html, and add some content like this HTML boilerplate.
<!DOCTYPE html>
<html lang="en">
  <head>
    <meta charset="UTF-8">
    <meta name="viewport" content="width=device-width, initial-scale=1.0">
    <meta http-equiv="X-UA-Compatible" content="ie=edge">
    <title>HTML</title>
  </head>
  <body>
	<h1>Greetings from AlphaVPS</h1>
  </body>
</html>
Save and close the file.
Once again, access your browser and go to http://your-server-ip/
Your web server will serve your HTML page.
Testing out PHP Processing
Now, let's create a PHP test script to confirm that Apache is able to serve requests for PHP files.
First, we create a new file named info.php inside our web root folder:
nano /var/www/"domain-name"/info.phpIn it, paste the following valid PHP code:
<?php
phpinfo();
Save and close it.
To test it out, go to your browser and access your server by typing:
http://"domain-name-or-ip-address"/info.phpOf course, don't forget to provide your IP address or domain name.
You will be presented with the following page:
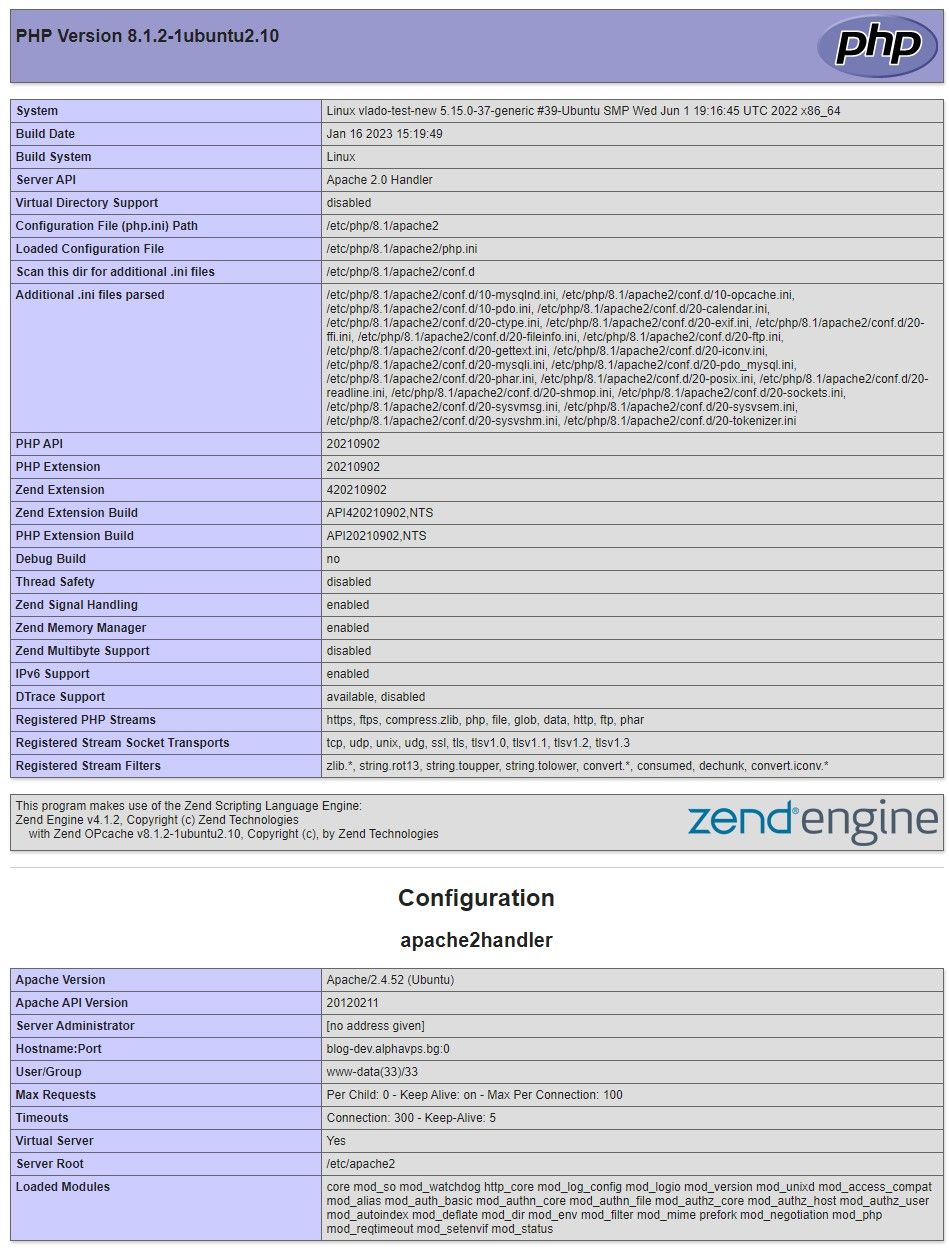
If you seeing this than your Apache webserver is properly processing Php files.