
Modern cloud applications require reliable and efficient object storage. MinIO is a leading alternative to Amazon S3 that offers lightning-fast storage, which can be used on-premises and in the cloud. MinIO is a simple solution for enterprise-grade performance, whether you are hosting backups, managing containerized workloads, or serving media files.
This tutorial will show you how to configure and install MinIO on your Linux VPS. This guide will help you to set up an S3-compatible solution quickly and easily.
What Is MinIO?
MinIO is an open-source, high-performance object storage server that's fully compatible with the Amazon S3 API. It is a high-performance, open-source object storage server that can store unstructured data like photos, videos, and logs.
Key Features of MinIO:
- S3 API compatibility: Easily integrates AWS SDKs, CLI tools, and SDKs.
- High performance: Optimized for large-scale and cloud-native workloads.
- Scalable: Supports clustering, replication, and distributed mode.
- Secure: Supports TLS, encryption, and identity-based access.
- Lightweight: Simple binary deployment that requires minimal dependencies.
How to Install MinIO on a Linux VPS (S3-Compatible Storage)
MinIO is an S3-compatible object store that can be installed on Linux VPSs. It's fast, reliable, and secure. MinIO is a flexible and scalable cloud service that can be used to host backups, manage static files, or manage containers.
Prerequisites
- Install MinIO only after you have installed the following:
- Linux VPS (Ubuntu, CentOS o Debian).
- The root or sudo privilege
- Firewall access to port 9000 (MinIO API), and 9001 (Web console)
- Minimum 1 GB RAM, 2 GB of disk space
Step 1: Create a Dedicated MinIO User
This creates a user system called minio-user, without login rights. It improves security by isolating MinIO from root access.
It is best to use a user other than root for MinIO.
sudo useradd -r minio-user -s /sbin/nologin
Step 2: Download and Install MinIO
Install the MinIO Server binary on your computer, allowing it to be accessed by all users.
Download the latest stable MinIO binary by using wget.
wget https://dl.min.io/server/minio/release/linux-amd64/minio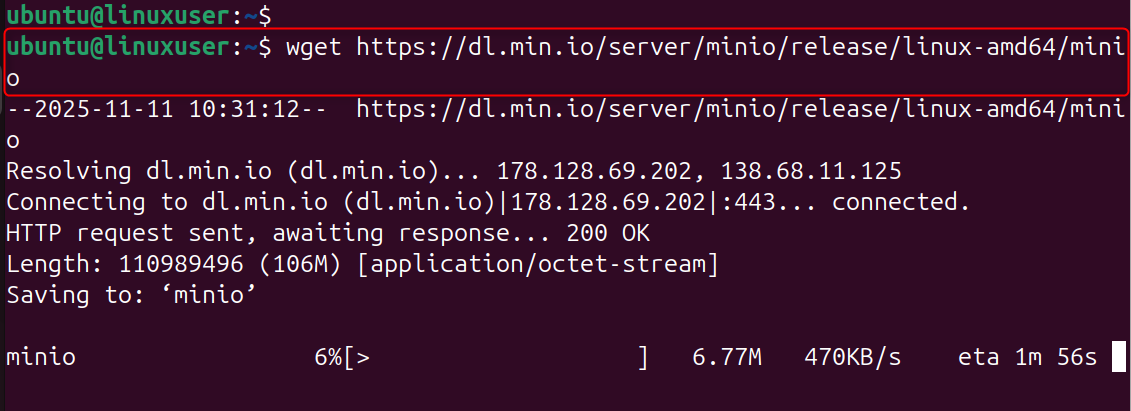
Make it executable:
chmod +x minio
Move it to a global executable path:
sudo mv minio /usr/local/bin/
Step 3: Create Storage and Configuration Directories
Set up directories to store MinIO configuration and data:
sudo mkdir -p /usr/local/share/minio
sudo mkdir -p /etc/minio
Set the MinIO user as owner:
sudo chown -R minio-user:minio-user /usr/local/share/minio /etc/minio
Separated from the system directories, these directories contain MinIO's object files and configuration files.
Step 4: Set Environment Variables for Access
You've now configured MinIO to use admin credentials, and you've also designated ports for the API and web interface.
Create a configuration file to define MinIO's access credentials:
sudo nano /etc/default/minioAdd the following lines:
MINIO_ROOT_USER=admin
MINIO_ROOT_PASSWORD=Password
MINIO_VOLUMES="/usr/local/share/minio/"
MINIO_OPTS="--address :9000 --console-address :9001"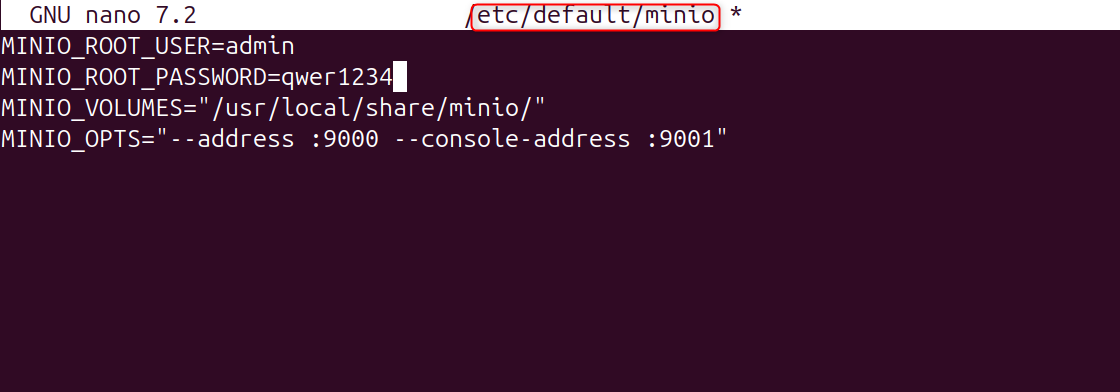
Save and close the file.
Step 5: Create a Systemd Service for MinIO
It will start MinIO automatically at boot-up, and you can manage it using systemd commands.
Create a service file to manage MinIO as a system service:
sudo nano /etc/systemd/system/minio.serviceCopy the configuration below:
[Unit]
Description=MinIO Object Storage
Documentation=https://docs.min.io
Wants=network-online.target
After=network-online.target
[Service]
User=minio-user
Group=minio-user
EnvironmentFile=/etc/default/minio
ExecStart=/usr/local/bin/minio server $MINIO_OPTS $MINIO_VOLUMES
Restart=always
LimitNOFILE=65536
[Install]
WantedBy=multi-user.target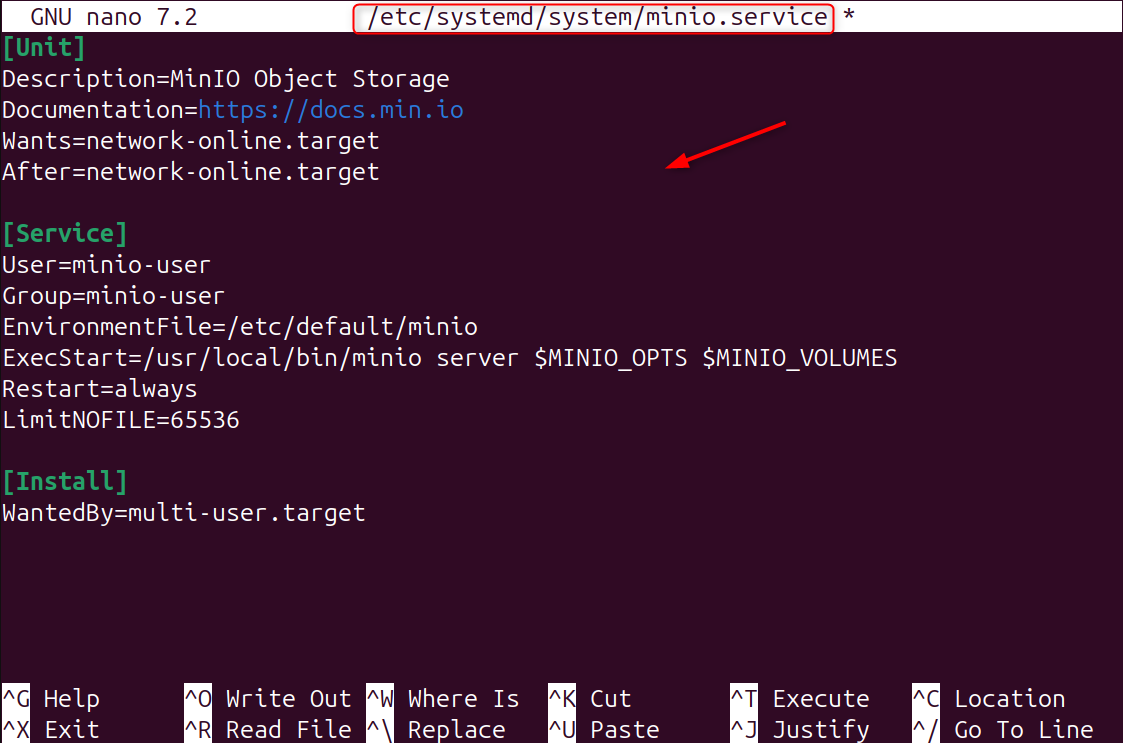
Save, exit, and then reload the systemd daemon.
sudo systemctl daemon-reload
sudo systemctl enable minio
sudo systemctl start minio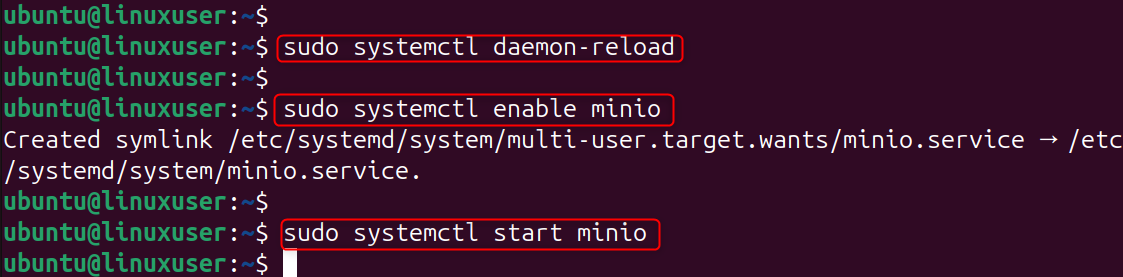
Check the service status:
sudo systemctl status minio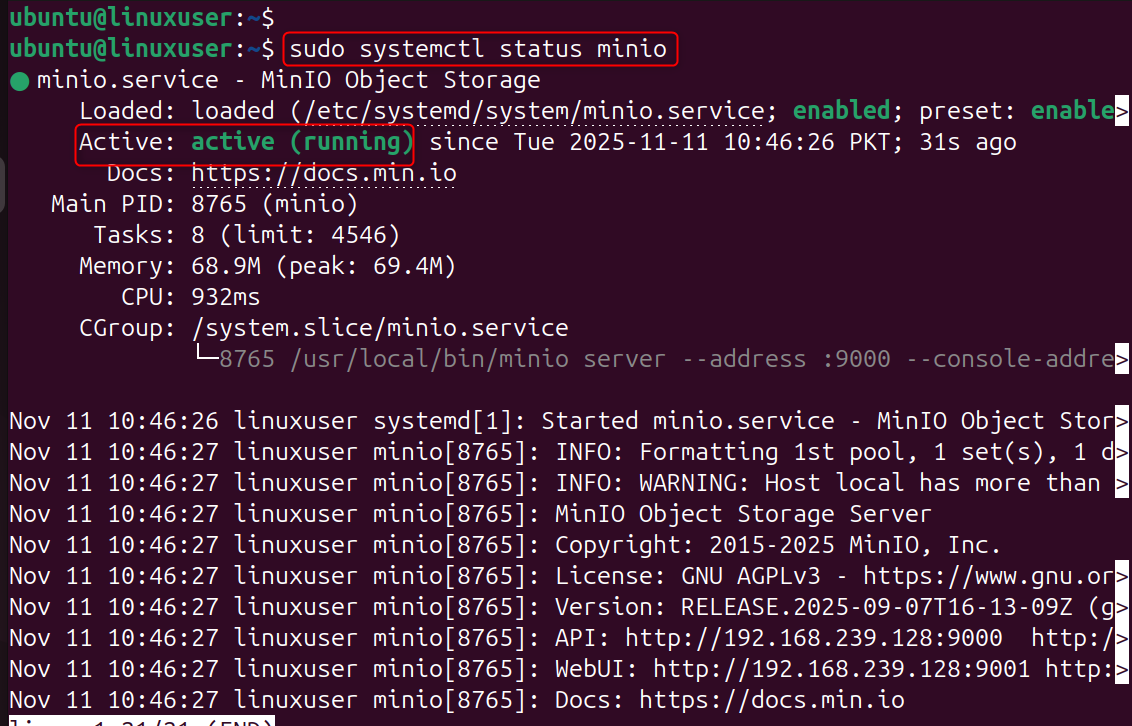
Step 6: Configure Firewall Access
This step allows external access to the MinIO dashboard, API endpoints, and secure storage. Allow MinIO API ports and web console through the firewall
sudo ufw allow 9000
sudo ufw allow 9001
sudo ufw reload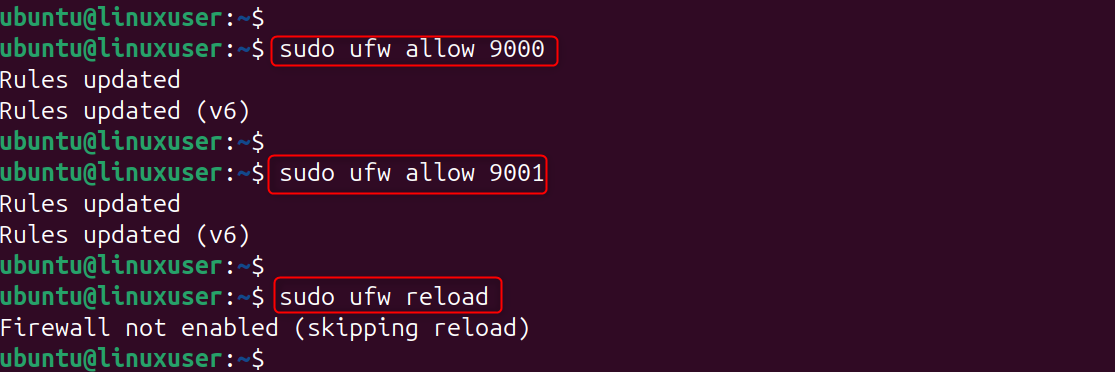
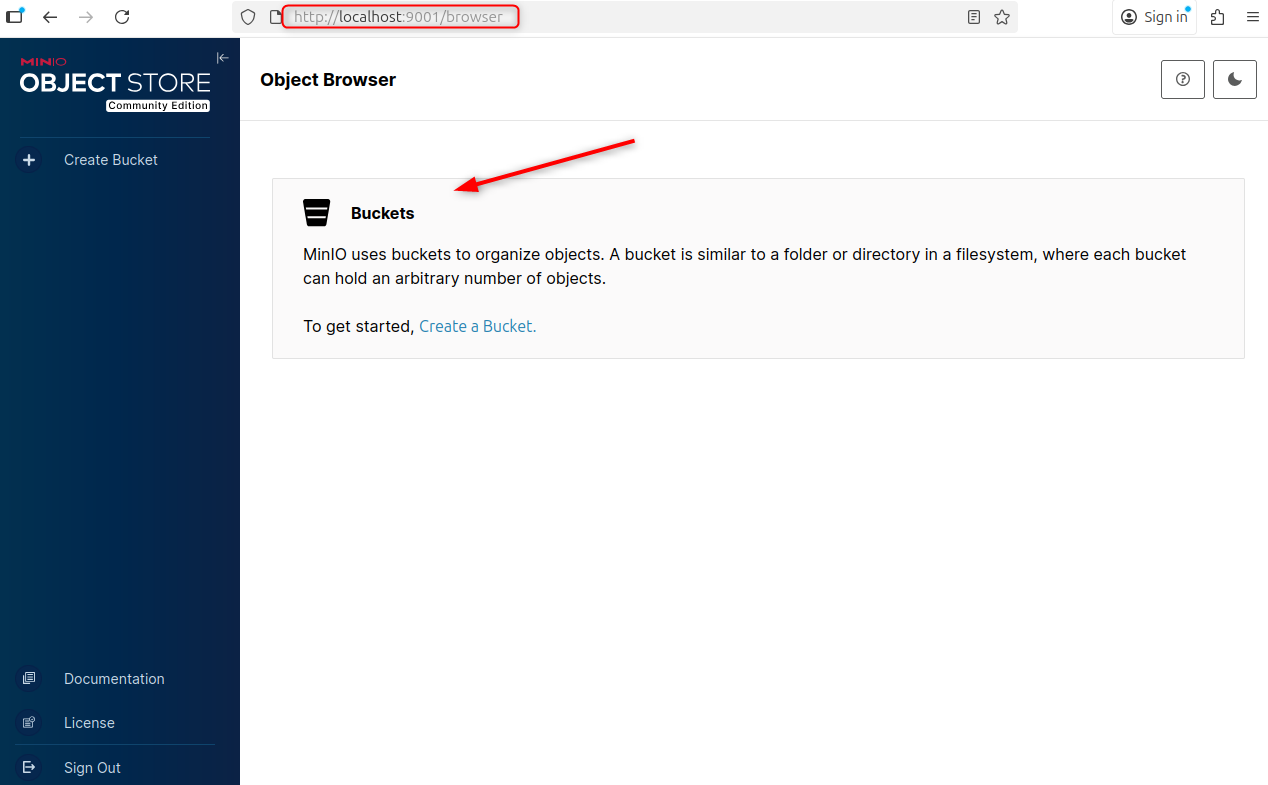
Step 7: Access MinIO Web Console
The web console is a simple graphical interface that allows you to manage your object-storage system without having to use command-line tools.
Navigate to the following URL in your browser:
http://<your-server-ip>:9001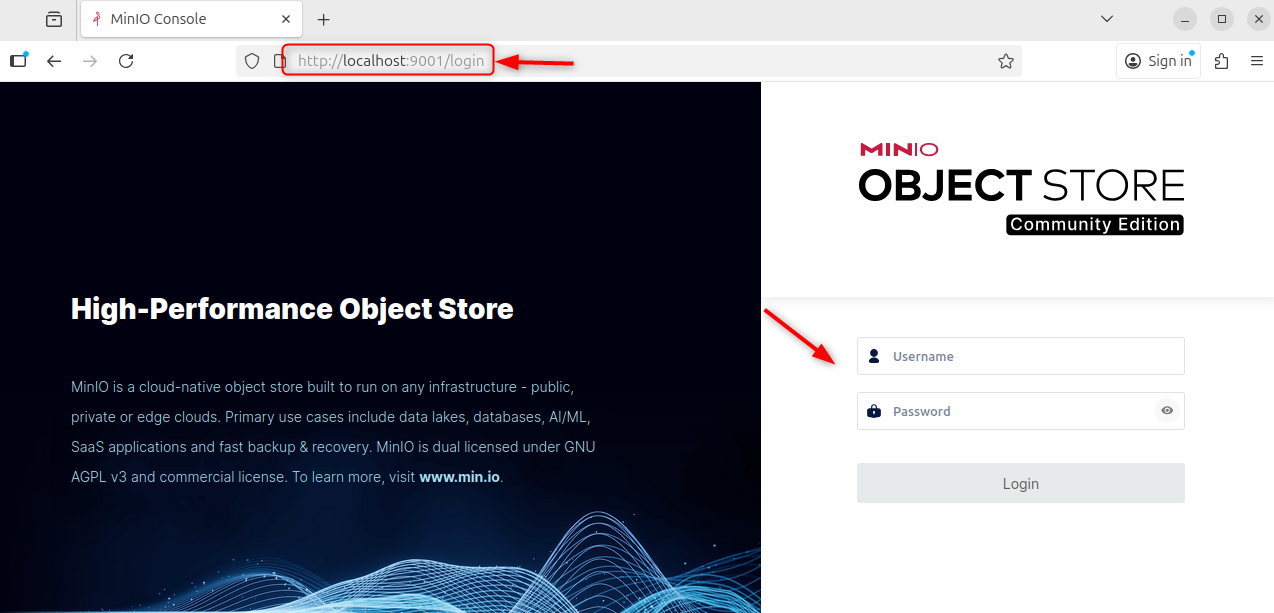
Log in with the credentials that you have set in /etc/default/minio
- Username: admin
- Password: Password
Now you should see the MinIO Web console, where you can upload files, create buckets, and manage permissions.
Step 8: Test S3 Compatibility with AWS CLI
Install the AWS command line to test MinIO S3 compatibility. This confirms that MinIO can be integrated with AWS tools and SDKs.
sudo snap install aws-cli --classic
Configure AWS CLI using your MinIO credentials.
aws configure
Enter:
AWS Access Key ID: admin
AWS Secret Access Key: Password
Default region name: us-east-1
Default output format: json
Test the connection:
aws --endpoint-url http://<your-server-ip>:9000 s3 ls
Conclusion
To install MinIO on a Linux VPS, start by updating your system using sudo apt update && sudo apt upgrade -y, then download the MinIO binary with wget https://dl.min.io/server/minio/release/linux-amd64/minio and move it to /usr/local/bin/ after making it executable. Create storage directories using sudo mkdir -p /usr/local/share/minio /etc/minio and assign ownership to a dedicated MinIO user. Set environment variables in the /etc/default/minio file to define storage paths, access credentials, and ports.
Create a systemd service file at /etc/systemd/system/minio.service to manage MinIO, then enable and start it using sudo systemctl enable --now minio. Allow ports 9000 & 9001 to pass through your firewall, and you can access the web-based console at http://server-address:9001 with the credentials that you have set. Finally, you can test S3 compatibility using the AWS CLI. This will confirm that your MinIO instance runs as a fully-functional, S3-compatible object storage solution on a Linux VPS.
Do you need Storage VPS for your project? Consider our hosting solution tailored to meet your expectations.
