Joomla is an open-source content management system (CMS). It allows you to build and manage websites and online applications.
Some of its noticeable features are:
- User-friendly Interface, which is also suitable for people with less technical expertise.
- A wide range of extensions, plugins, and templates for website customization - both visually and in terms of functionality.
- Multilingual Support: Joomla is designed to handle websites with multiple languages, making it suitable for international projects.
- Regular security updates, which address and resolve potential vulnerabilities.
- Joomla is used for various types of websites, including blogs, e-commerce sites, and many more.
- Joomla is used for various types of websites, including blogs, e-commerce sites, and many more.
Joomla is an open-source platform which is built using PHP and MySQL. It is freely available to anyone.
In this tutorial, we are going to show you how to install Joomla 4 on your AlmaLinux 9 server from AlphaVPS.
Installing the LAMP stack
Joomla requires an Apache webserver to serve its content on the internet, PHP for handling almost all of its functionality, and a MySQL database for persisting data.
For a more detailed explanation of the installation process, you can refer to our guide here. Do note that will use the dnf package manager for AlmaLinux 9.
First, we will update the system packages by running the following commands:
sudo dnf updateInstall, start, and enable Apache.
sudo dnf install httpd
sudo systemctl enable httpd
sudo systemctl start httpd
You can check the status of Apache by running:
sudo systemctl start httpdYou will receive similar output:
● httpd.service - The Apache HTTP Server
     Loaded: loaded (/usr/lib/systemd/system/httpd.service; enabled; preset: disabled)
     Active: active (running) since Fri 2023-08-04 13:50:22 EEST; 9s ago
       Docs: man:httpd.service(8)
   Main PID: 57764 (httpd)
     Status: "Total requests: 0; Idle/Busy workers 100/0;Requests/sec: 0; Bytes served/sec:   0 B/sec"
      Tasks: 213 (limit: 24796)
     Memory: 29.2M
        CPU: 84ms
     CGroup: /system.slice/httpd.service
             ├─57764 /usr/sbin/httpd -DFOREGROUND
             ├─57765 /usr/sbin/httpd -DFOREGROUND
             ├─57766 /usr/sbin/httpd -DFOREGROUND
             ├─57767 /usr/sbin/httpd -DFOREGROUND
             └─57768 /usr/sbin/httpd -DFOREGROUND

Aug 04 13:50:22 meta-trader-test systemd[1]: Starting The Apache HTTP Server...
Aug 04 13:50:22 meta-trader-test httpd[57764]: AH00558: httpd: Could not reliably determine the server's>
Aug 04 13:50:22 meta-trader-test systemd[1]: Started The Apache HTTP Server.
Aug 04 13:50:22 meta-trader-test httpd[57764]: Server configured, listening on: port 80
To enable http/https access, AlmaLinux 9 requires the ports to be open in the firewall. This can be done by running:
sudo firewall-cmd --zone=public --add-service=http --permanent
sudo firewall-cmd --zone=public --add-service=https --permanent
sudo firewall-cmd --reload
Installing PHP
You can install PHP and all the required extensions by running:
sudo dnf install php php-cli php-fpm php-curl php-mysqlnd php-gd php-readline php-mbstring php-apcu php-xml php-dom php-opcache php-zip php-intl php-common php-bcmath php-json
Confirm the PHP installation by running:
php -vYou will receive a similar output:
PHP 8.0.27 (cli) (built: Jan  3 2023 16:17:26) ( NTS gcc x86_64 )
Copyright (c) The PHP Group
Zend Engine v4.0.27, Copyright (c) Zend Technologies
    with Zend OPcache v8.0.27, Copyright (c), by Zend Technologies
Installing MySQL
Install, start, and enable your MySQL database by running:
sudo dnf install mysql-server mysql
sudo systemctl start mysqld
sudo systemctl enable mysqld
The installation can be confirmed by running:
sudo systemctl status mysqldand its respective output should look like:
● mysqld.service - MySQL 8.0 database server
     Loaded: loaded (/usr/lib/systemd/system/mysqld.service; enabled; preset: disabled)
     Active: active (running) since Fri 2023-08-04 14:22:15 EEST; 12s ago
   Main PID: 60267 (mysqld)
     Status: "Server is operational"
      Tasks: 39 (limit: 24796)
     Memory: 455.4M
        CPU: 4.724s
     CGroup: /system.slice/mysqld.service
             └─60267 /usr/libexec/mysqld --basedir=/usr

Aug 04 14:22:07 meta-trader-test systemd[1]: Starting MySQL 8.0 database server...
Aug 04 14:22:08 meta-trader-test mysql-prepare-db-dir[60194]: Initializing MySQL database
Aug 04 14:22:15 meta-trader-test systemd[1]: Started MySQL 8.0 database server.
Now we will need to secure the MySQL installation by running the mysql_secure_installation shell script.
As of 2022, if you try to run the mysql_secure_installation script without additional configuration, an error will occur, which will loop the script.
We will prevent this by doing the following:
sudo mysql
mysql> ALTER USER 'root'@'localhost' IDENTIFIED WITH mysql_native_password BY 'your-password-here';
mysql> exit
Now we can safely start the script by running:
sudo mysql_secure_installationThe whole process is visualized below:
Securing the MySQL server deployment.

Enter password for user root:

VALIDATE PASSWORD COMPONENT can be used to test passwords
and improve security. It checks the strength of password
and allows the users to set only those passwords which are
secure enough. Would you like to setup VALIDATE PASSWORD component?

Press y|Y for Yes, any other key for No:

There are three levels of password validation policy:

LOW    Length >= 8
MEDIUM Length >= 8, numeric, mixed case, and special characters
STRONG Length >= 8, numeric, mixed case, special characters and dictionary                  file

Please enter 0 = LOW, 1 = MEDIUM and 2 = STRONG: 0
Using existing password for root.

Estimated strength of the password: 50
Change the password for root ? ((Press y|Y for Yes, any other key for No) :

 ... skipping.
By default, a MySQL installation has an anonymous user,
allowing anyone to log into MySQL without having to have
a user account created for them. This is intended only for
testing, and to make the installation go a bit smoother.
You should remove them before moving into a production
environment.

Remove anonymous users? (Press y|Y for Yes, any other key for No) :
Success.


Normally, root should only be allowed to connect from
'localhost'. This ensures that someone cannot guess at
the root password from the network.

Disallow root login remotely? (Press y|Y for Yes, any other key for No) :
Success.

By default, MySQL comes with a database named 'test' that
anyone can access. This is also intended only for testing,
and should be removed before moving into a production
environment.


Remove test database and access to it? (Press y|Y for Yes, any other key for No) :
 - Dropping test database...
Success.

 - Removing privileges on test database...
Success.

Reloading the privilege tables will ensure that all changes
made so far will take effect immediately.

Reload privilege tables now? (Press y|Y for Yes, any other key for No) :
Success.

All done!
It is advisable to confirm all of the suggested settings with a y|Y and set your password validation policy to STRONG.
Create a Joomla database and user
We will need to create a database and MySQL user for our Joomla installation.
We can do this by accessing the MySQL CLI and executing the following commands:
mysql -u root -p
Enter password:
mysql>CREATE DATABASE joomla;
mysql>CREATE USER 'joomla'@'localhost' IDENTIFIED BY 'provide-password-here';
mysql>GRANT ALL PRIVILEGES ON joomla.* TO 'joomla'@'localhost';
mysql>FLUSH PRIVILEGES;
mysql>exit;joomla or similar. You are able to specify their names as you wish. Simply note the credentials down, because you will need to provide them during the web GUI setup in the later steps.Install Joomla
Navigate to your webroot directory and download the latest stable release of Joomla /At the moment of making this tutorial, it is 4.3.3/.
You can check the latest Joomla versions at https://downloads.joomla.org/
cd /var/www/html
wget https://downloads.joomla.org/cms/joomla4/4-3-3/Joomla_4-3-3-Stable-Full_Package.zipnano, wget, unzip can be easily installed with the dnf or yum package managers. Unzip the downloaded package with unzip and remove the downloaded package.
sudo unzip Joomla_4-3-3-Stable-Full_Package.zip
sudo rm Joomla_4-3-3-Stable-Full_Package.zip
Set the required permissions with the following command:
sudo chown -R apache:apache /var/www/html/
sudo chmod -R 775 /var/www/html/
Setup Apache Virtual Host
Navigate to your Apache webserver directory.
cd /etc/httpd/conf.d/Create an Apache virtual host configuration file
sudo nano joomla.confand paste the configuration below in it
<VirtualHost *:80>
     ServerName replace-domain-here.com
     DocumentRoot /var/www/html/
     <Directory /var/www/html/>
          Options FollowSymlinks
          AllowOverride All
          Require all granted
     </Directory>

     ErrorLog /var/log/httpd/replace-domain-here.com_error.log
     CustomLog /var/log/httpd/replace-domain-here.com.log combined
</VirtualHost>replace-domain-here.com part with your actual domain.You can check for eventual syntax errors by running:
httpd -tEverything is fine if you are receiving output, which includes Syntax OK.
Restart Apache.
sudo systemctl restart httpdWeb Setup
The final steps of the Joomla installation are processed via its Web GUI, which should be now accessible. Navigate to your VPS IP or domain via your browser. Some of the possible ways to find out your IP by running ip addr or curl icanhazip.com.
You can disable SELinux temporarily /until a reboot/ by running the following commands:
setenforce 0To disable it permanently, you also need to modify its configuration file.
$ sudo nano /etc/selinux/configModify the SELINUX line and set it to disabled.

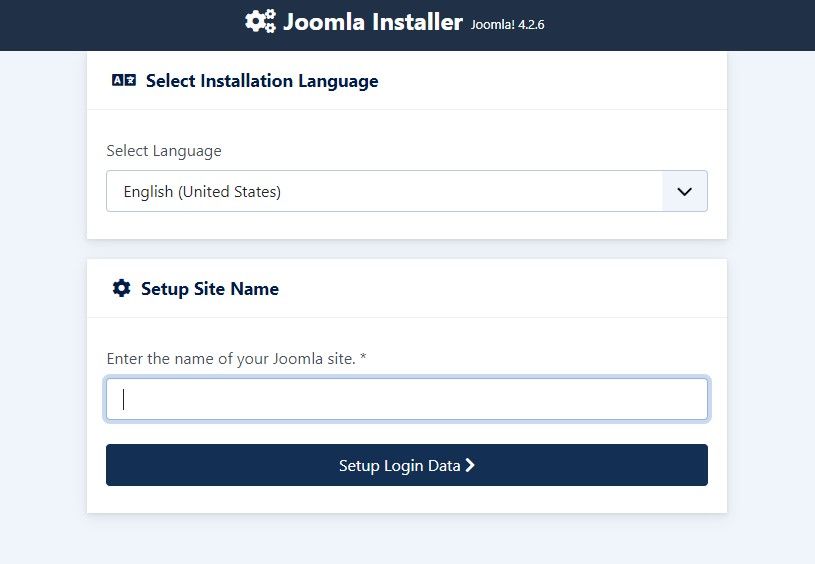
Proceed with the installer from your browser.
Select the language and provide your domain name.
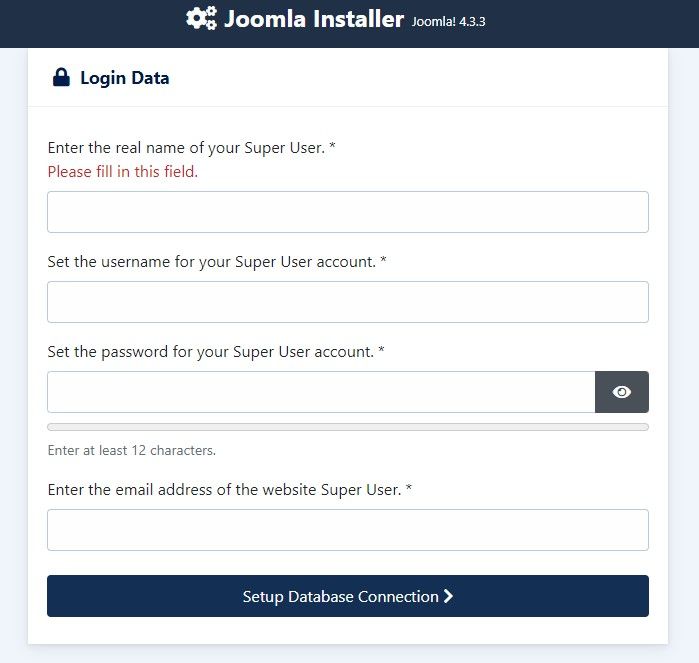
Create your user and set credentials.
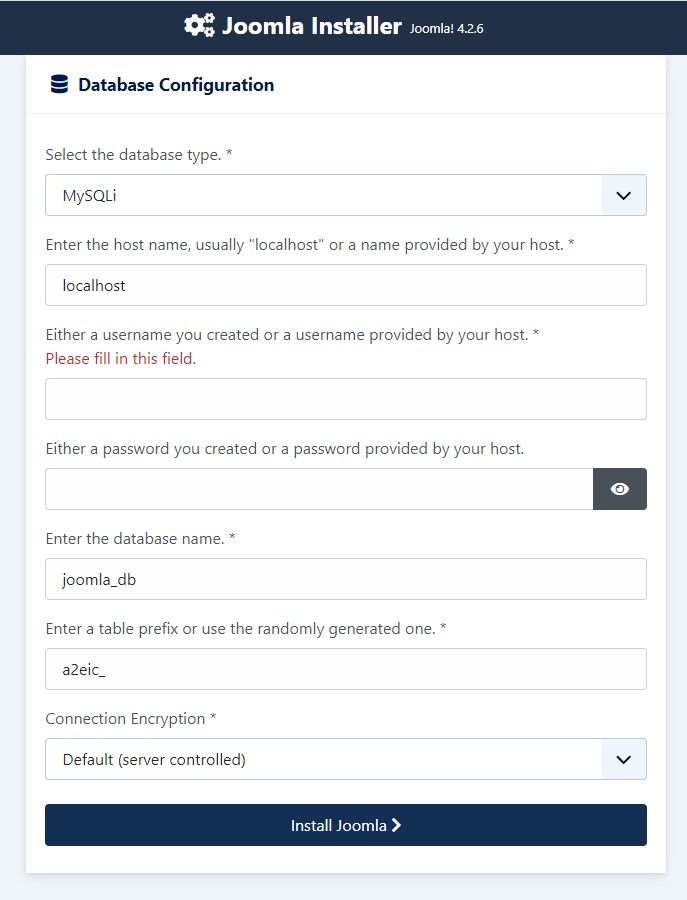
Provide your database credentials. Provide the credentials, which you have set during the MySQL setup process.
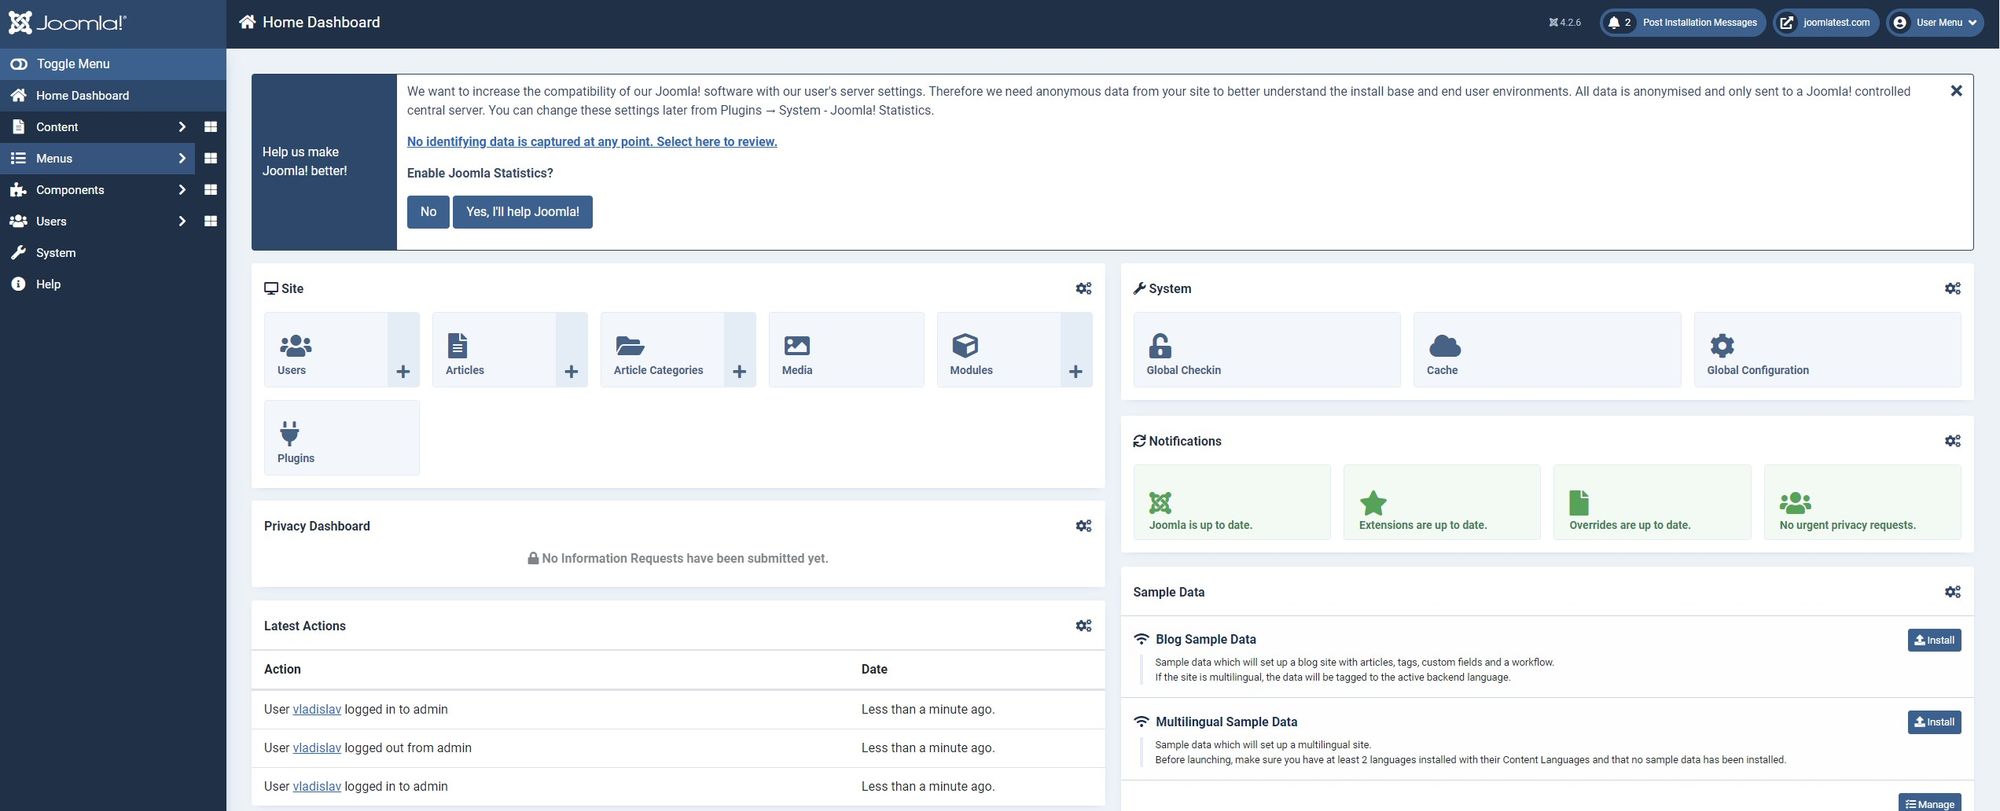
Click on the Install button and wait for the process to finish. Once ready, you will be automatically redirected to the login screen.
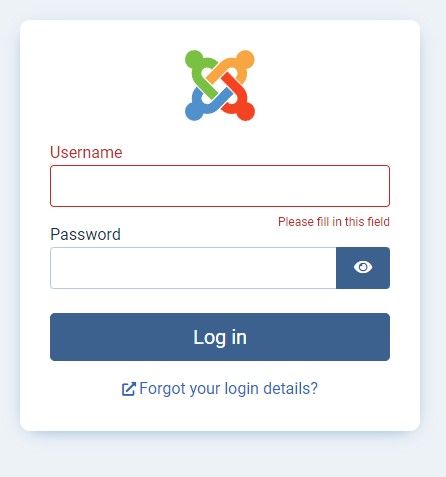
Log in with your user credentials and that's it. You now have full access to your Joomla installation via its web GUI.