
For VPS users who operate websites, applications, and databases, file synchronization is extremely important. One missed backup can result in data loss, downtime, and recovery expenses. System administrators are constantly on the lookout for effective ways to keep data synced between servers, easily back-up data each day, and promote high availability.
Rsync is one of the most trusted tools for Linux servers, because it transfers only what was changed instead of copying large files thousands of times. Rsync saves the time and bandwidth. It is often used for VPS backup, file transfers, and server migrations.
With rsync run in daemon mode, it supercharges the sync process. It allows the admin to sync more quickly from one host to the other via TCP while supporting multiple directories in isolation of each other through modules. It is also a dedicated service that runs in the background. This is perfect for automated workflows where speed and reliability with minimal overhead costs is important.
What is Rsync Daemon Mode and How It Works
The rsync daemon mode provides a dedicated mechanism for synchronizing files without having to rely on SSH for each transfer. The shared directories are organized as modules specified in the rsyncd.conf file, allowing different backup locations to have controlled access.
After a client connects, rsync checks the module whether things have changed, will check the metadata of the file to see what has changed since the last backup, and with its delta-transfer algorithm, it will only transfer the changed blocks of the part of the file that changed. This process is very fast, minimizes bandwidth usage, and keeps the file permissions and timestamps intact.
Rsync follows a client-server model, which allows a single server to support multiple backup paths, or it can simply run a cron job or script (automating) the rsync command. Rsync is a solid option for backing up a VPS, remotely mirroring files, and for any disaster recovery processes.
If you’re setting up rsync for backups or synchronization, choosing reliable infrastructure is just as important as the sync method itself. At AlphaVPS, our Storage VPS plans are designed specifically for large, redundant data storage — perfect for rsync-based backups and replication. With high-capacity disks, RAID protection, and consistent network performance, your backups will transfer quickly and remain safe no matter where your primary server is located.
Step 1: Installing Rsync on Ubuntu
Let’s start by installing rsync. Open your terminal — this is where you will run all commands.
First, update the package list so your system knows about the latest available software:

This tells Ubuntu’s apt package manager to refresh its database of software packages.
Next, install rsync with:
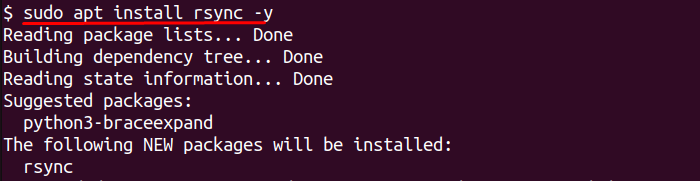
The -y flag automatically confirms the installation so you don’t have to type “yes” manually. Ubuntu will download and install rsync for you.
After installation, check if rsync is installed correctly by running:
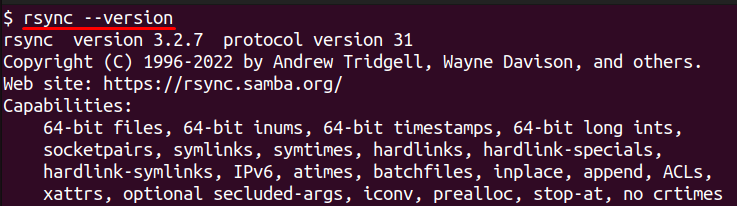
You should see rsync’s version number and some information about how it was built. This confirms that rsync is ready to use on your system.
Step 2: Configuring Rsync Daemon
Once rsync is installed, the next step is to configure it to run in daemon mode. This requires creating a configuration file called rsyncd.conf. Open the file in a text editor with root privileges by typing:
Inside the file, define a module that tells rsync which folder to share. A simple configuration looks like this:
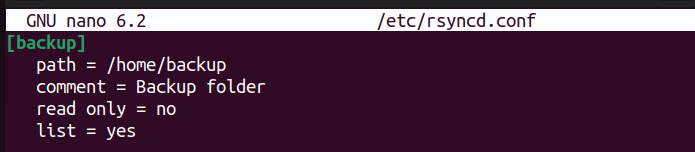
The name inside the square brackets, [backup], is the module name. This is what the client will use to connect. The path points to the folder you want to sync. The comment is just a description and helps you remember what the module does. Setting read only to no allows files to be written to this directory. The list option makes the module visible when a client requests a list of available shares.
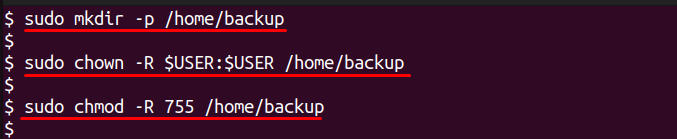
Save the file and exit the editor. If the /home/backup directory does not exist yet, create it with:
Make sure the folder is writable so rsync can store files. You can adjust ownership and permissions with:
This completes the basic daemon configuration. Your server is now ready to start rsync as a background service.
Step 3: Starting Rsync Daemon
After creating and saving the configuration file, you need to start the rsync daemon so it can begin listening for incoming connections. The simplest way to do this is to run:
This launches rsync as a background process using the settings you defined in /etc/rsyncd.conf. To keep rsync running even after a reboot, enable it as a systemd service. Type:
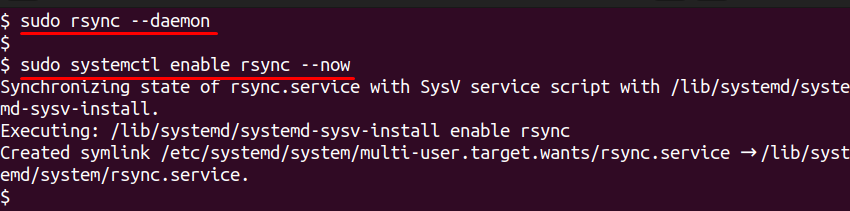
This command tells Ubuntu to start the rsync service right away and also make it start automatically every time the server boots.
To confirm that rsync is running correctly, check its status with:
If it is active, you will see “active (running)” in green text. This means the daemon is running and ready to accept connections. If you make any changes to the configuration file in the future, reload the service with:
Your rsync daemon is now up and running, waiting for client requests.
Step 4: Testing Rsync Daemon with Client Command
With the daemon running, it’s time to test if everything is working. First, create a test folder with a sample file to see if the synchronization works. Run:

Now use rsync to send this folder to the module you created earlier. Since we are testing on the same machine, connect to localhost with:
The -a option preserves file permissions and timestamps, -v shows detailed output, and -z compresses the data during transfer to make it faster. If everything is set up correctly, you will see rsync list the file it transferred and show a summary at the end with the transfer speed and number of files copied.
Check the /home/backup directory to confirm that the file has been copied:
You should see sample.txt inside that folder. This confirms that the rsync daemon is working correctly and ready for real backups or file synchronization tasks.
Conclusion
Rsync daemon mode is an excellent option for anyone who wants a fast and reliable file sync tool on a VPS or local server. You can install rsync and set it up once with a clear configuration file, and then you can start it as a fixed background service, creating a bespoke object for your backups and data transfers. Rsync daemon mode can save bandwidth, maintain file integrity, and not create overhead for separate SSH sessions each time you transfer files.
Once you have verified your setup with a test folder, you are ready to start automating it for the real deployment data. After validating that it works, rsync daemon mode can automate your daily backups, replicate files on remote systems, and/or automate disaster recovery tasks with very little work for you or file transfers. The rsync daemon mode is an important tool for the sysadmin who wants to create automations, is efficient and wants complete control over their file sync solution.
