
Keeping track of login attempts on a Linux VPS is one of the most effective ways to prevent unauthorized access to your VPS. Every VPS on the internet is constantly under attack by bots looking for websites to invade. When someone executes a brute-force attack and you don't consider it, data can be stolen, applications hacked, or even the entire server can be compromised.
Being aware of SSH access events in real-time will allow you to detect a potential attack as it is occurring and take steps to stop it from happening before damage occurs. Whether you are running several websites, hosting a game server, or running a private seedbox, understanding who is trying to login is important for server security and performance.
In this article, you will learn to monitor SSH login attempts on an Ubuntu VPS in real-time using only built-in Linux tools. This article will show you the location of logs, tail -f logs, filtering logs with journalctl, how to find a report of historical logins, and optionally install additional protection with a tool such as Fail2ban.
Understanding Login Attempt Logs on Linux
Before you can monitor login attempts in real time, you need to know where Linux stores authentication activity. On Ubuntu and most Debian-based systems, this information is kept in a file called /var/log/auth.log. This file is automatically updated whenever someone tries to connect through SSH, log in locally, or perform any authentication-related action.
You can open this file and view its contents using the nano text editor by running the following command:
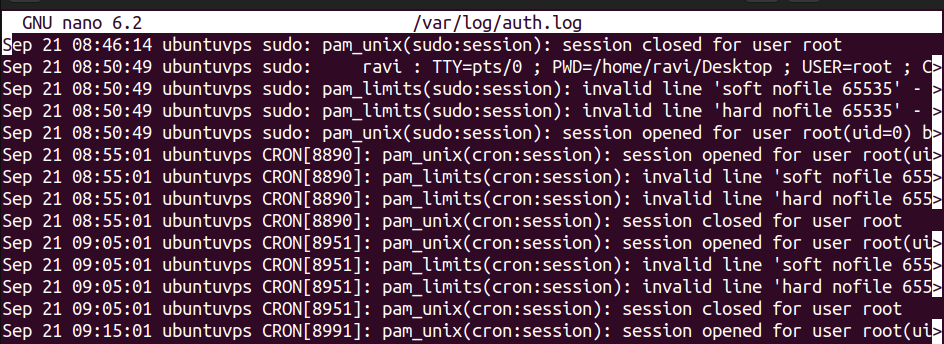
Inside this file, you will see lines containing a timestamp, the source of the login attempt, the username that was used, and a message showing if the login succeeded or failed. Scroll through the file and you will notice repeated patterns, such as multiple failed attempts from the same IP address. These are signs of brute-force attacks or unauthorized access attempts.
Understanding this file is the first step to real-time monitoring because the live methods you will learn next simply read updates from this log as new events are added.
Real-Time Monitoring with tail -f
Once you understand where login activity is stored, the next step is to watch these events as they happen. This allows you to react immediately if you notice suspicious login attempts. On Ubuntu, you can use the tail command with the -f option to follow new entries being added to /var/log/auth.log.
Open your terminal and run:

After running this command, the terminal will stay open and display every new authentication event in real time. To see how it works, try opening another terminal window and attempt to log in with SSH, even with an incorrect username or password. You will see a new line appear instantly, showing details of the attempt, including the source IP address.
Using journalctl for Filtered Login Monitoring
If your VPS uses systemd, you can view login attempts with the journalctl command. This tool reads logs directly from the system journal and lets you filter specific messages without opening the entire log file manually. It is especially useful when you want to focus only on SSH activity.
To see all recent SSH login events, run:
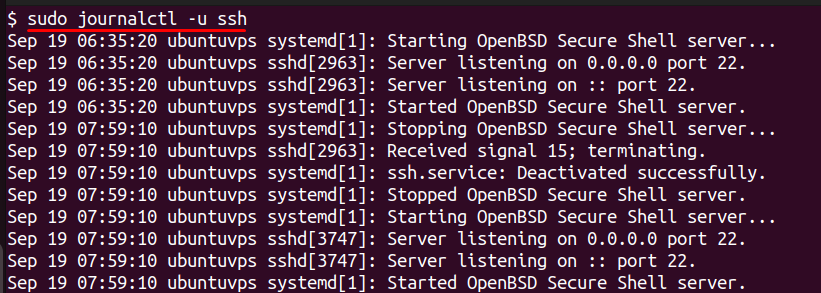
This shows the entire log history for the SSH service, including successful and failed logins. If you want to monitor in real time, add the -f option at the end:
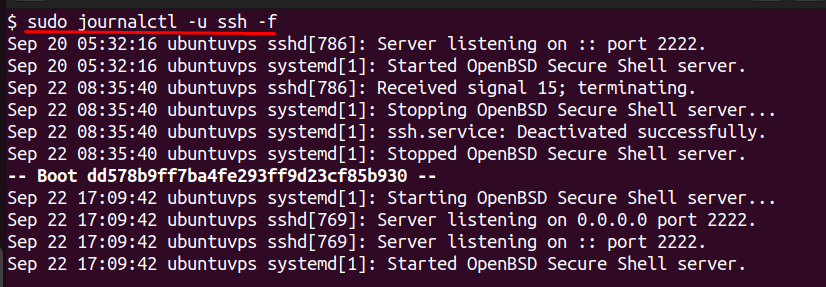
The output will stay open and print new events as they occur, similar to tail -f, but with cleaner formatting. Try connecting to your VPS from another device or use an invalid username in a test SSH login to see new entries appear instantly.
Generating Historical Login Reports with last and lastb
Real-time monitoring is important, but you may also need to review past login activity to investigate security issues. Linux provides two built-in commands that make this process easy. The first command is last, which displays a list of all successful logins on your server. To use it, open the terminal and run:
You will see a clear report showing usernames, IP addresses, and timestamps for each login session. This information is helpful when you need to verify when an authorized user accessed the server.
To view failed login attempts, use the lastb command. This command reads from a special log file that records every unsuccessful login attempt. Run it by typing:

The output will show which usernames were tried, from which IP addresses, and at what time the attempts occurred. This is especially useful for identifying brute-force attacks where the same IP is repeatedly trying different usernames or passwords. Reviewing these reports regularly helps you spot unusual patterns that may indicate an ongoing security threat.
Enhancing Security with Fail2ban
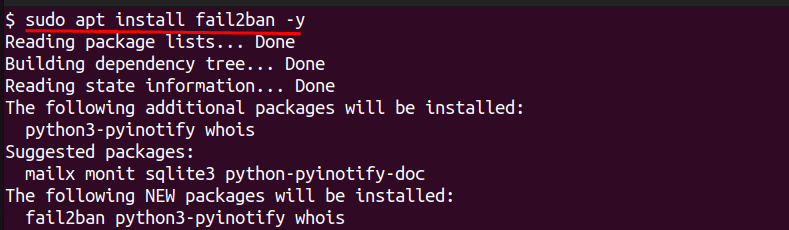
Monitoring login attempts manually is useful, but it can be difficult to keep watching logs all the time. A better approach is to automatically block IP addresses that fail to log in repeatedly. Fail2ban is a lightweight intrusion prevention tool designed for this purpose. It monitors log files for suspicious patterns, such as multiple failed SSH login attempts, and automatically adds a firewall rule to block the offending IP address for a set period of time.
To install Fail2ban on Ubuntu, update your package list and install the software by running:
Once installed, Fail2ban runs as a service in the background. The default configuration already protects SSH, but you can create a custom jail file for additional control. Open the configuration file for SSH jail settings by running:
Inside this file, enable the SSH jail by setting enabled = true. You can also adjust the maxretry value to control how many failed attempts are allowed before banning an IP and the bantime value to define how long the IP remains blocked. After making changes, save the file and restart the service with:
You can check which IPs are currently banned by running:
This shows you a live list of blocked IPs and confirms that Fail2ban is actively protecting your VPS. With this setup, you no longer need to manually track every failed attempt, and your server gains an automated first line of defense against brute-force attacks.
Conclusion
Keeping your Linux VPS secure starts with reliable infrastructure.
If you’re learning server administration or running lightweight workloads, a Cheap VPS from AlphaVPS is a great starting point — affordable, full root access, and ready for SSH hardening with tools like Fail2ban.
As your projects grow, you can easily scale up to our High-Performance VPS for additional speed and stability while keeping the same secure Linux setup.
In this article, you learned how to monitor your Linux VPS for login attempts in real time, as well as the importance of doing so for server security. We covered the location and contents of log files for authentication, how to view your login attempts in real time using the tail -f and journalctl commands, and how to view previous login information using last and lastb. This provides you with a quick way to discover any attempted unauthorized access while being able to observe legitimate logins as well.
In addition, we set up a program called Fail2ban that is able to automatically ban the IP address of users that attempt to log in unsuccessfully. This is an additional layer of security and provides total peace of mind as it will ban users without manually observing login attempts. Following this guide will allow you to discover attacks early, react to suspicious activity, and have a more secure and reliable Linux VPS system overall.
