Linux is a popular operating system known for its stability, security, and flexibility. While it is generally considered to be more secure than other operating systems, it's still important to take steps to secure your system and protect it from potential threats. In this blog post, we'll cover some basic Linux security configurations that you can implement on your Linux VPS to enhance the security of your system.
Securing SSH
SSH stands for Secure Shell. It is a network protocol used for secure communication between two devices over an unsecured network.
Your initial remote method for accessing your AlphaVPS service is SSH.
SSH is commonly used for remote access and managing servers, routers, and other network devices. It allows you to securely log in to a remote system, execute commands, and transfer files between devices.
SSH uses encryption to ensure that data is protected during transmission.
It is considered secure by default, but a standard protocol without additional customization is no match for an eventual abuser, hacker, or malicious software.
In this specific section, we will guide you through some SSH configuration steps which will help you add a few layers of security to your service at AlphaVPS.
The SSH protocol uses the OpenSSH service, which comes pre-installed in almost every Linux distribution out there, if not specified otherwise during a custom installation.
The OpenSSH configuration file is located in the /etc/ssh directory - sshd_config
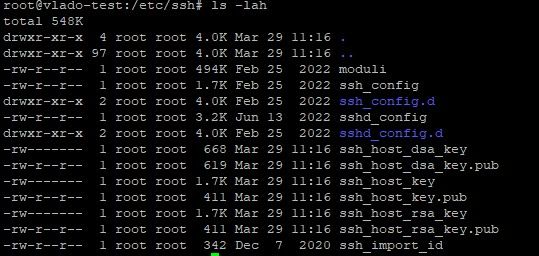
The file will provide you with the ability to configure your OpenSSH service as per your own preferences.
Changing the default SSH port
The default SSH port is 22, which is known or will be known to almost everybody in this field, including malicious bots, which scan throughout the internet for eventual weak spots. This is why changing your SSH port should be one of the priorities when securing your VPS.
Open the sshd_config file by running:
nano /etc/ssh/sshd_configSearch for the line that specifies your SSH port.
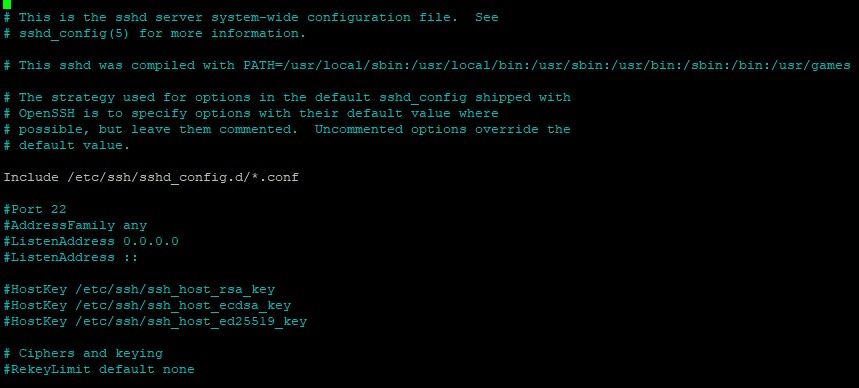
You need to uncomment it and specify the desired port.
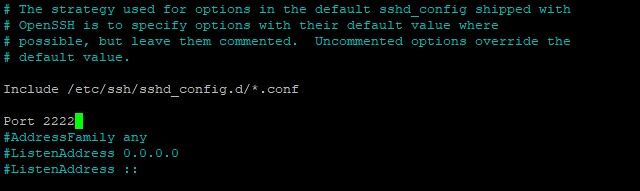
Save and Exit.
After every change to the configuration file, you will need to restart OpenSSH.
systemctl restart sshDisabling remote root logins
The root user is something that is always there, on each Linux system.
As you may know already, the root user is that user account that has the power to either create and modify everything or wipe it all with a single command.
By default, your VPS from AlphaVPS, if the OS is automatically installed via our templates, comes with enabled remote root logins. You will be able to directly login via SSH with the root user on port 22.
Indeed, it is a great feature for directly accessing the server as root, so you can start your configuration, but we definitely wouldn't want to leave the root user exposed to eventual malicious attacks.
For this, we can create another user and grant him sudo privileges, if we don't have one already (do not include the quotes).
adduser `username`
usermod -aG sudo `username`
Specify your password and note it down.
Go to the OpenSSH configuration file and search for PermitRootLogin line.

Change yes to no. Don't forget to save, exit, and restart the ssh service.
From now on, remote login attempts will not be possible with the root user.
You will need to log in with your secondary users and either use sudo for super-user privileges or change to the root user via the su command.
Setting up SSH keys
SSH keys are a pair of cryptographic keys used for secure communication between two devices over the SSH protocol. They are used for authenticating a user to a remote system without the need for a password.
SSH keys come in two parts: a private key and a public key. The private key is kept on your local machine and should be kept secret. The public key is uploaded to the server and is used for authentication when you attempt to connect to it.
SSH keys provide a more secure way of authenticating users than using passwords, as they are much more difficult to guess or brute-force.
An SSH key pair can be generated in various ways.
For example, you can use the ssh-keygen utility on Linux and Windows or if you prefer a GUI approach, you can use PuTTYgen, which comes packed with the PuTTY SSH client.
The output of ssh-keygen command should resemble this:
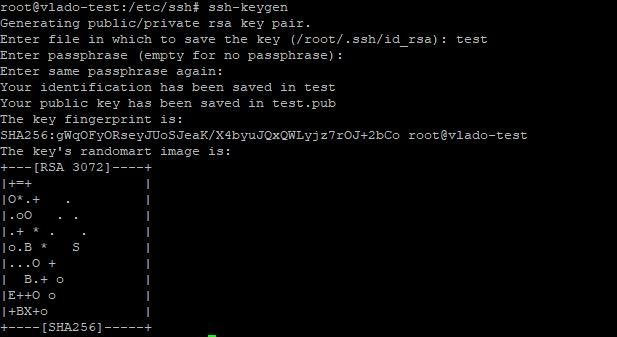
If you press Enter, you will save the key pair into the .ssh/ subdirectory in your home directory. Alternatively, specify the filename and location where your keys will be stored and if you want to add an additional layer of security to your keys, you can specify a passphrase. Every time you log in with your ssh keys, you will be prompted to enter the passphrase.
In all cases, make sure that your private key is kept secure!
The contents of your public key will need to end up in the ~/.ssh/authorized_keys file in your AlphaVPS service, the private key should be kept safe with you.
You can do this by either manually applying the contents of your public keys to the file or if you are running Linux on your own PC, you can use the ssh-copy-id utility.
Approach 1
The ssh-copy-id utility comes included by default in many operating systems.
For this method to work, you must already have password-based SSH access to your server.
Simply type the following command /substitute the placeholders with your domain name or IP/:
ssh-copy-id username@hostname-or-ipYou will be prompted for the user password. Enter it so this can complete.
Approach 2
You can directly copy the public key via SSH with the following command.
cat ~/.ssh/id_rsa.pub | ssh username@hostname-or-ip "mkdir -p ~/.ssh && touch ~/.ssh/authorized_keys && chmod -R go= ~/.ssh && cat >> ~/.ssh/authorized_keys"Make sure that you are specifying the correct file location.
Approach 3
If password-based SSH access to your server is not available, you need to copy the key. You need to manually add the content of your public key file to the ~/.ssh/authorized_keys file on your remote machine.
To display the content of your public key, run the following command:
cat ~/.ssh/id_rsa.pubOf course, if, for some reason, your filename and location do not match, you will need to modify the command.
Copy the output, log in to your VPS, and run the following commands:
mkdir -p ~/.ssh
chmod -R go= ~/.ssh
echo `public-key-content` >> ~/.ssh/authorized_keys
In case you’re using the root account to set up keys for a user account, it’s also important that the ~/.ssh directory belongs to the user and not to root:
chown -R username:username ~/.sshDisabling password logins
Even if you have enabled ssh key authentication, you may have noticed that if it fails, you will be prompted to provide a password. This basically means that even if a malicious user does not have your private key to properly authenticate, he will be left with a chance of brute-forcing your password.
You can directly disable password authentication via the OpenSSH configuration file.
Find the PasswordAuthentication line, uncomment it, and change it to no

Don't forget to save and restart ssh once again.
Installing Fail2Ban
Fail2Ban is an open-source software program designed to prevent and detect brute-force attacks and other suspicious activities on Linux servers. When it detects such activity, it can take various actions, such as, for example, banning the IP address of the attacker using firewall rules.
Fail2Ban can be configured to monitor various and can be an effective tool for enhancing server security.
Installation
Fail2Ban can be easily installed on your VPS. For this tutorial, we are using an Ubuntu 22.04 server, but it is supported on almost, if not every Linux distribution out there.
For Debian-based distributions /Ubuntu, Debian/, run the following commands:
sudo apt update
sudo apt install fail2ban
For RHEL-based distributions /CentOS, Alma, Rocky/, run the following commands:
sudo yum update
sudo yum install fail2ban
Configuration
Once Fail2Ban is installed, make a copy of the default configuration file. It is located in the /etc/fail2ban/ directory.
The default configuration file, jail.conf, will be overwritten or improved during distribution updates. This is described in detail in it and settings should not be applied directly there.
Run the following command:
sudo cp /etc/fail2ban/jail.conf /etc/fail2ban/jail.localThis will copy the file in the same directory, renamed as jail.local
Under the [DEFAULT] section of the file, you can see the default settings of the service.
For example, we can modify the ban time, the number of retries before an IP gets banned, and the time frame in which these retries are counted.
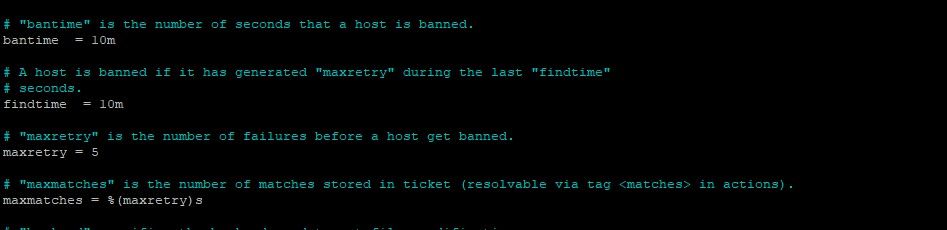
Simply change the values and save the file.
Your Fail2Ban is currently not running. You can check its status by running the following command :
systemctl status fail2banYou can enable it to start on server boot with:
systemctl enable fail2ban
systemctl start fail2ban
And there you have it. Your VPS now has authentication security, which will certainly come in handy in today's internet environment.
If you want to set up some firewall rules for an additional layer of security, you can also to our guide here.