Shadowsocks, a lightweight, fast, and secure encrypted proxy, is designed to protect your online privacy and bypass censorship. Shadowsocks is a SOCKS5 proxy optimized for performance, which avoids network filtering and bypasses censorship. Setting up Shadowsocks on a Linux VPS is a straightforward process. This guide will walk you through the installation, configuration, and security of your proxy server. Each step is explained clearly.
How to Install and Configure Shadowsocks Proxy on a Linux VPS for Private Browsing
Install the Shadowsocks package on your Linux VPS to enable private browsing. Next, create the /etc/shadowsocks-libev/config.json file with your preferred port, password, and encryption method, then enable and start the Shadowsocks service so it runs automatically. Install the simple-obfs plug-in to help disguise traffic and bypass censorship. Connect using any Shadowsocks Client by entering your server's IP, port number, password, and encryption details. Then, confirm that everything works by checking your IP address.
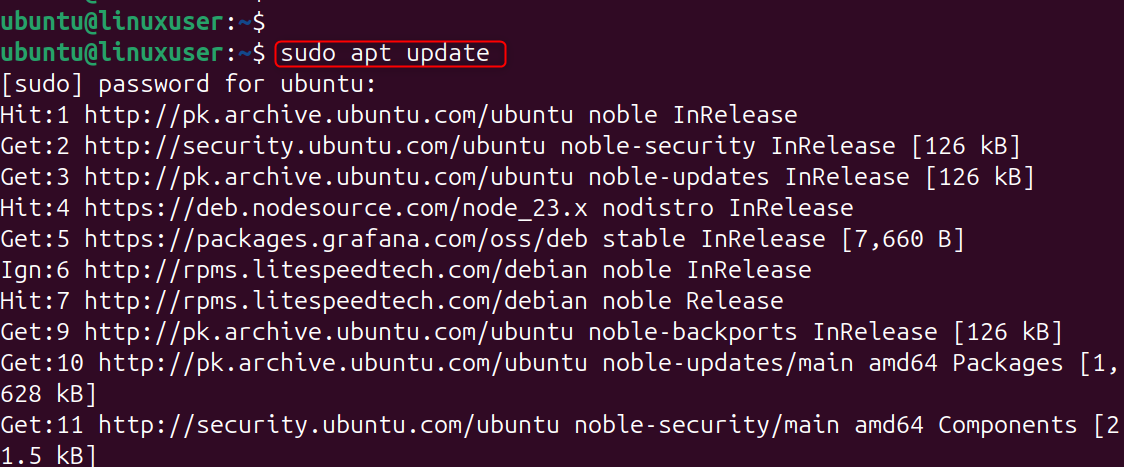
Step 1: Update Your Linux VPS
This ensures that you are using the most recent package lists and security updates. This prevents installation errors due to outdated repositories and broken dependencies.
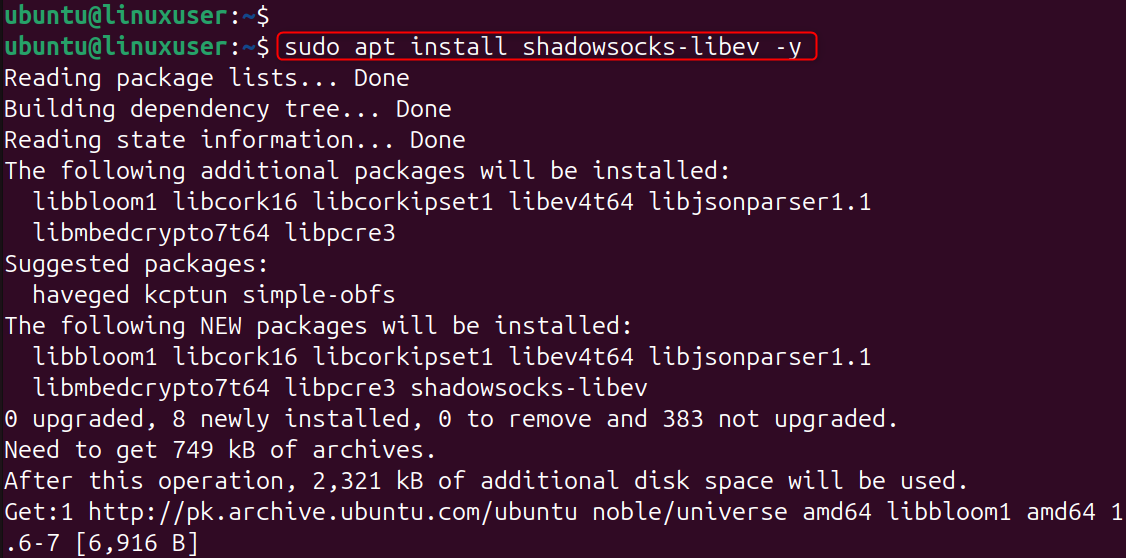
Step 2: Install Shadowsocks-libev
Shadowsocks is recommended as a lightweight implementation. This package will give you a resource-efficient and fast proxy server that is suitable for VPS systems with low power.
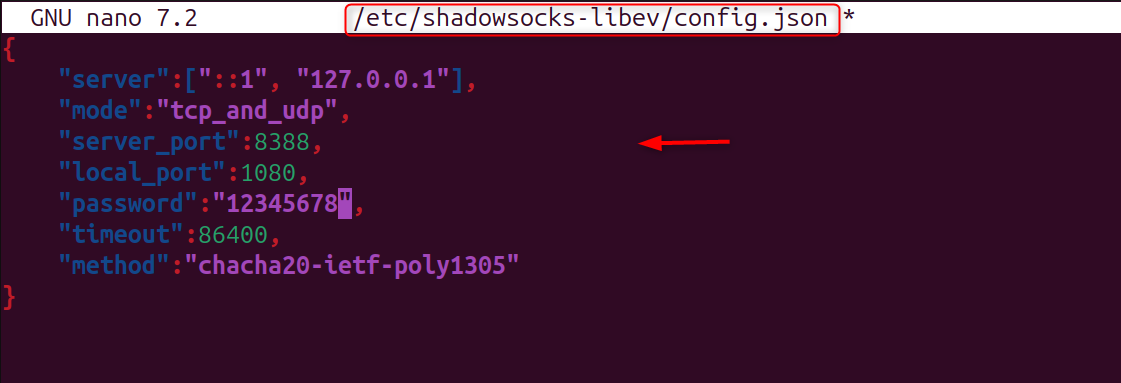
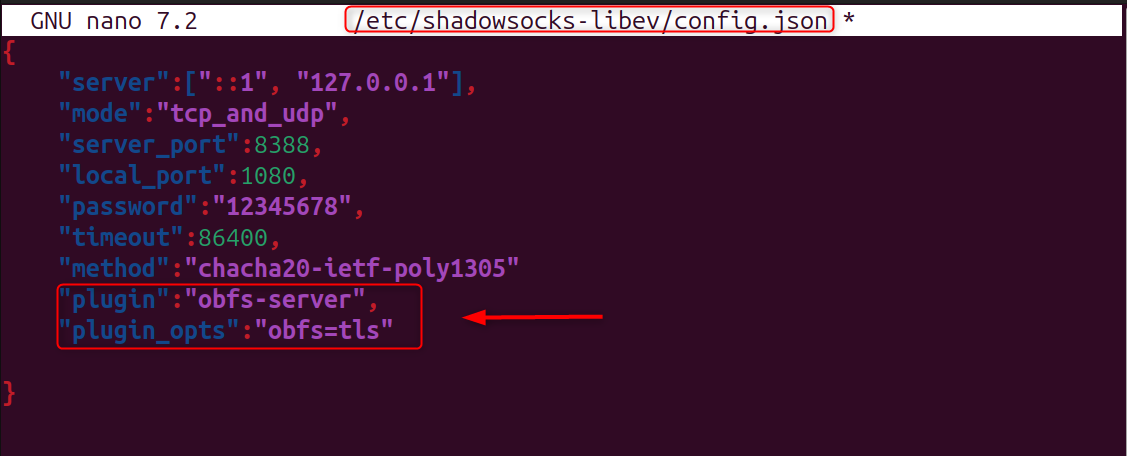
Step 3: Create the Shadowsocks Configuration File
The configuration file specifies how Shadowsocks behaves, including its port, encryption method, and password. It also defines connection settings. By editing this file, you can ensure that your server runs on a port of your choice and uses modern encryption.
Paste:
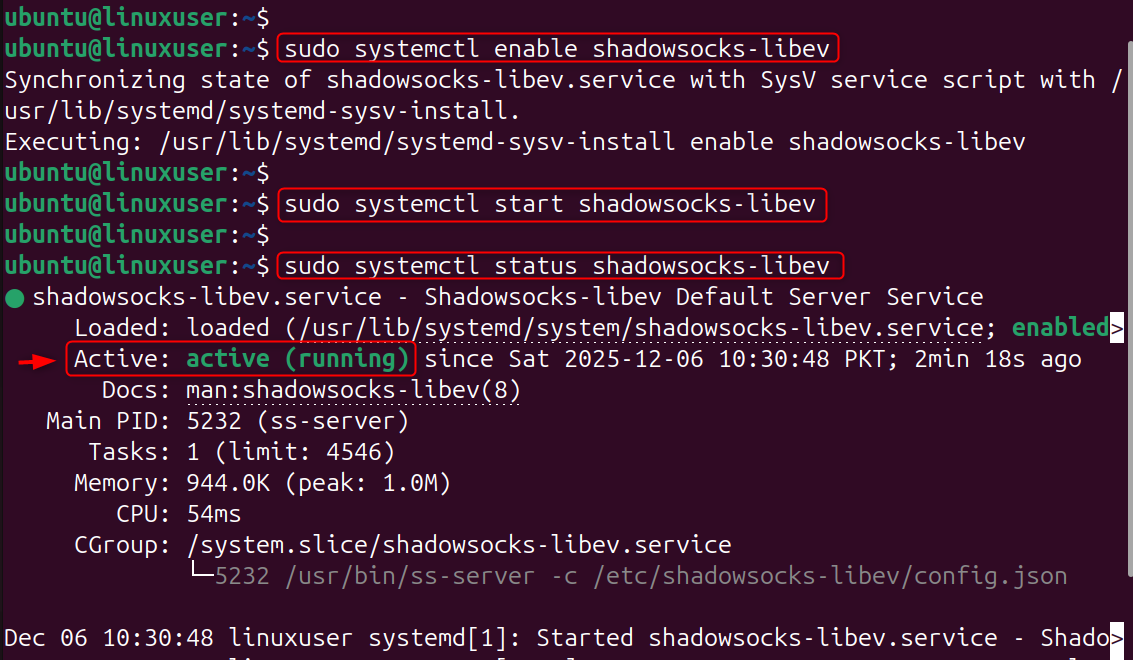
Step 4: Enable and Start Shadowsocks Service
By enabling the service, Shadowsocks will automatically start after a restart. This reduces downtime. The proxy is activated immediately after starting the service, so that clients can start connecting.
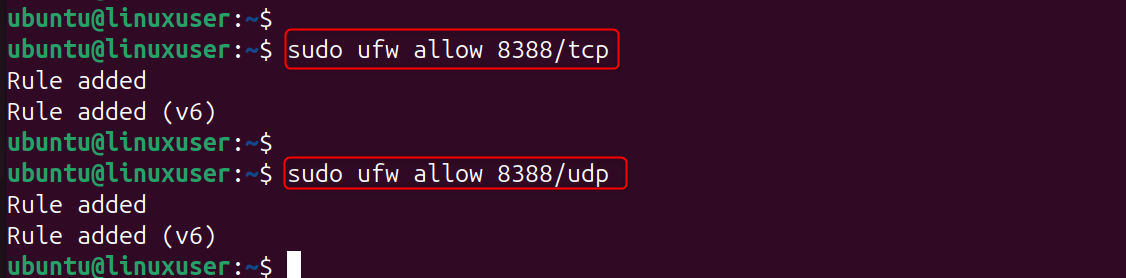
Step 5: Open Firewall Ports for Shadowsocks
External devices will not be able to connect to the proxy if the firewall blocks that port. Shadowsocks will work without interruptions if you allow TCP and UDP traffic.
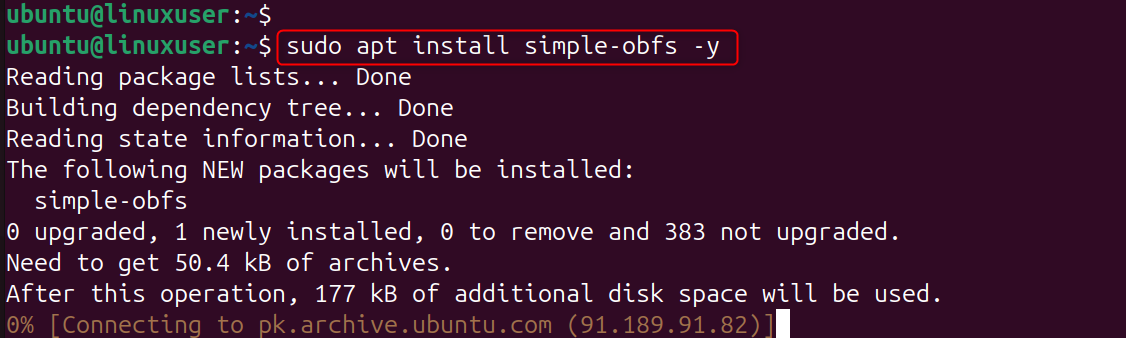
Step 6: Add Obfuscation Plugin (Optional but Recommended)
Simple-obfs disguises Shadowsocks to appear as normal HTTPS traffic. This helps to protect against restrictive networks' deep packet inspections (DPI) and also avoids speed throttling or connection blocking.
Install Plugin:
Update config:
Restart:

Step 7: Connect to Shadowsocks from Your Device
To use the proxy, configure a Shadowsocks-compatible client on your phone or PC. Enter your server's IP, port, encryption, and password. This information creates a secure tunnel between your VPS and your device.
You’ll need:
- Server IP
- Port (8388)
- Password
- Encryption (aes-256-gcm)
- Plugin settings (if enabled)
Popular clients:
- Windows/macOS: Shadowsocks-NG
- Android: Shadowsocks app
- iOS: Shadowrocket
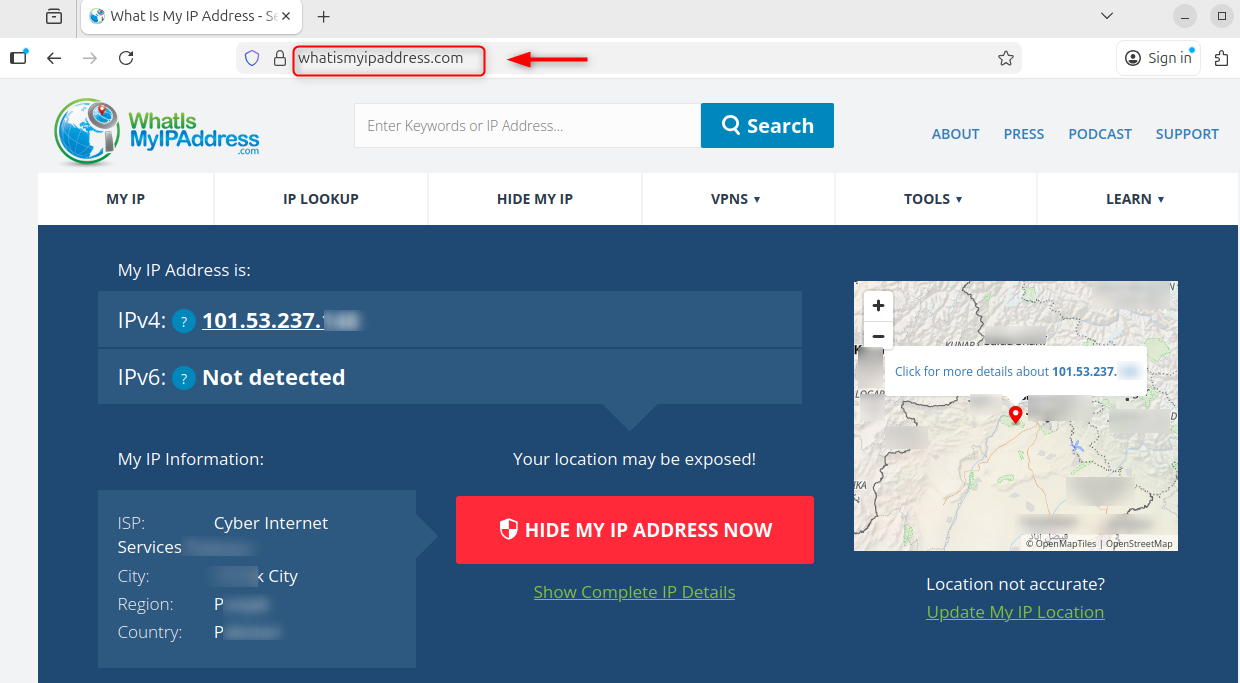
Step 8: Test Your Shadowsocks Proxy
The test ensures that your connection is routed through the VPS and confirms that the proxy and encryption work correctly. If you see a different public IP, your traffic has been successfully tunneled by Shadowsocks.
Visit:
How to Completely Uninstall Shadowsocks from Linux VPS
Deleting configuration directories ensures no residual settings remain on your VPS.
Step 1: Stop the Shadowsocks Service
Shadowsocks will no longer be running if the service is stopped. This prevents errors.

Step 2: Disable the Service
Shadowsocks will not start again when you boot up if the feature is disabled.

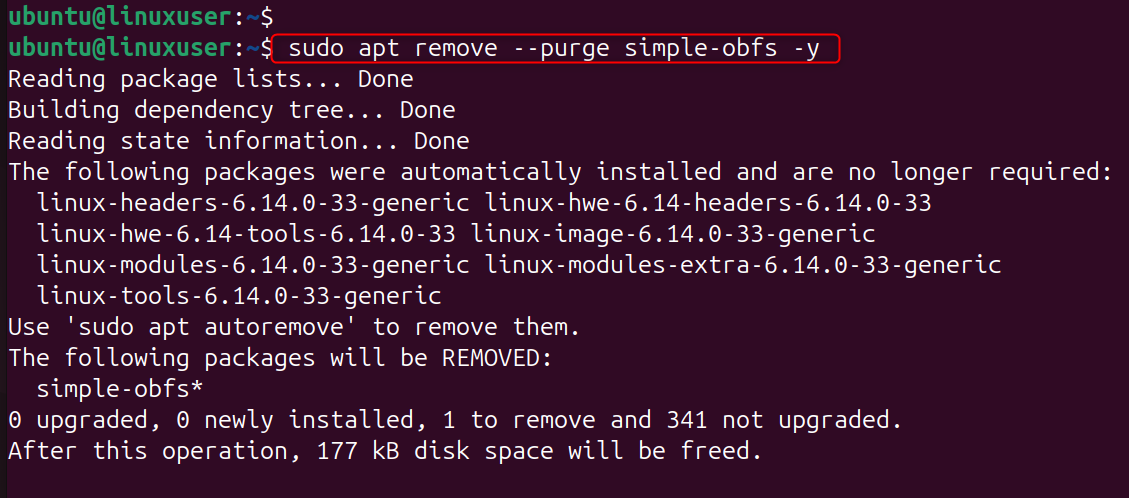
Step 3: Remove the Shadowsocks Package
The Shadowsocks executable and all its binaries are removed from the system.
Step 4: Remove Configuration Files
Deleting configuration directories ensures no residual settings remain on your VPS.

If you installed obfuscation:
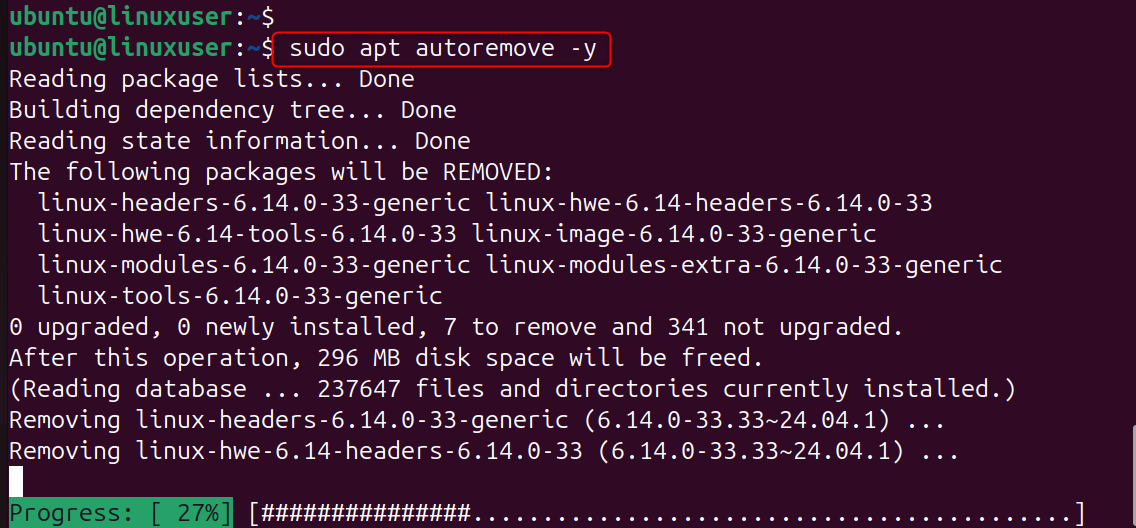
Step 5: Clean Unused Dependencies
This will remove any leftover libraries from your computer and release disk space.
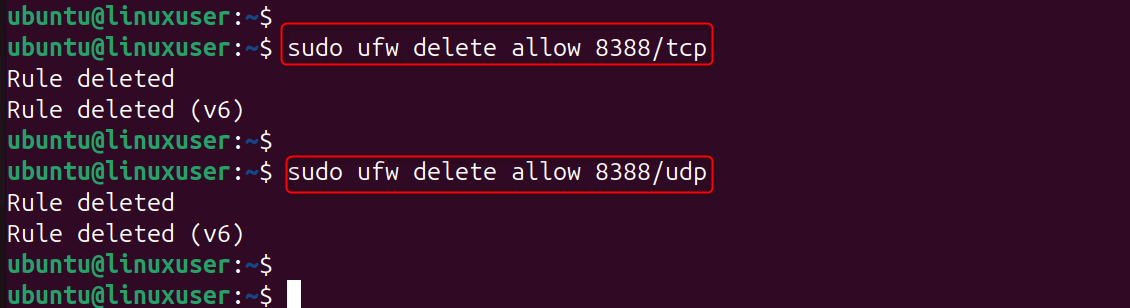
Step 6: Remove Any Firewall Rules Added Earlier
Cleaning up the ports that were added during installation.
Shadowsocks packages and firewall rules have been removed from your system.
Conclusion
Installing Shadowsocks onto a Linux Virtual Private Server (VPS) provides an internet experience that is fast, private, and free of censorship. It's the perfect solution to bypass restrictions and browse securely. With its strong encryption and optional obfuscation, and minimal resource usage. Following the above steps, including configuration, firewall setup, and testing, you can deploy a Shadowsocks Proxy in a matter of minutes.
Whether you’re launching a new idea or scaling an existing project, our Cheap VPS gives you the perfect balance of quality and affordability.
