When managing a Linux VPS, secure and efficient file transfers are essential, especially for backups, migrations, and syncing large directories. Rsync is one of the safest and fastest ways to transfer files from server to server. It uses SSH encryption, while only synchronizing the changed portions of files.
This guide will walk you through all the information you need: how rsync works, how you can transfer files, automate backups, and optimize performance.
What Is Rsync Over SSH?
Rsync, a powerful tool for copying files and directories, synchronizes them between your local computer and a remote Linux VPS. When combined with SSH, rsync is fully encrypted. This means that your data will be secure during the transfer. It is ideal for:
- Backups of VPS data are secure
- Server-to-server migration
- File sync is automated every day
- Website or app deployments
- Remote directory duplication
Rsync over SSH: Secure Linux VPS File Transfers and Backups
It is the most secure and efficient way to perform daily backups and synchronize directories on a Linux VPS. rsync is the fastest, safest, and most reliable way to operate servers. It only transfers modified blocks and encrypts all data using SSH. Rsync is a flexible and powerful solution for any environment, whether you are deploying code, backing up critical data, or migrating servers.
Check rsync installation:
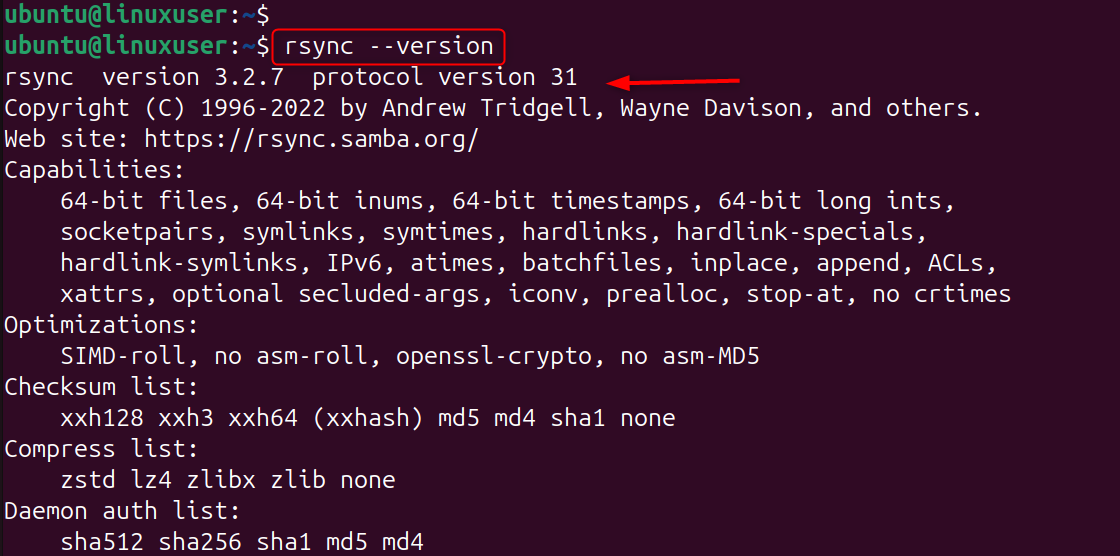
If not installed on Ubuntu/Debian:
Step 1: Basic Rsync Over SSH Command
The easiest rsync command over SSH:
Explanation of each option:
- -a – Archive mode
- -v-- Verbose output for progress indication
- -z -- Compress data during transfer
- -e SSH - Forces Rsync data to be sent through SSH
- /source/path: The folder or files you wish to transfer
- Remote VPS login: username@server-ip
- /destination/path: Where should data be saved on VPS
This is perfect for initial backups or one-time transfers.
Step 2: Rsync from Local to Remote VPS
Uploading website files to the server is an example.

What’s happening:
- Your local directory "/mywebsite/" is synced
- SSH authenticates securely
- The files are copied into /var/www/html/ of the server
- Only the changed files will be transferred
This tool is ideal for updating website content by developers.
Step 3: Rsync from VPS to Local Machine (Download Backup)
You pull your Nginx configuration from the server and store it locally at ~/server-backups/nginx/.

Step 4: Rsync Between Two Remote VPS Servers
You can migrate data between two servers directly:

Explanation:
- SSH login to server1 by Rsync
- Data transfer and reading
- Write directly to the server
- No need for local download
It is possible to move websites and apps quickly between VPS servers.
Step 5: Enable Passwordless Rsync with SSH Keys (Recommended)
SSH keys can be used to automate Rsync, making it even more efficient.
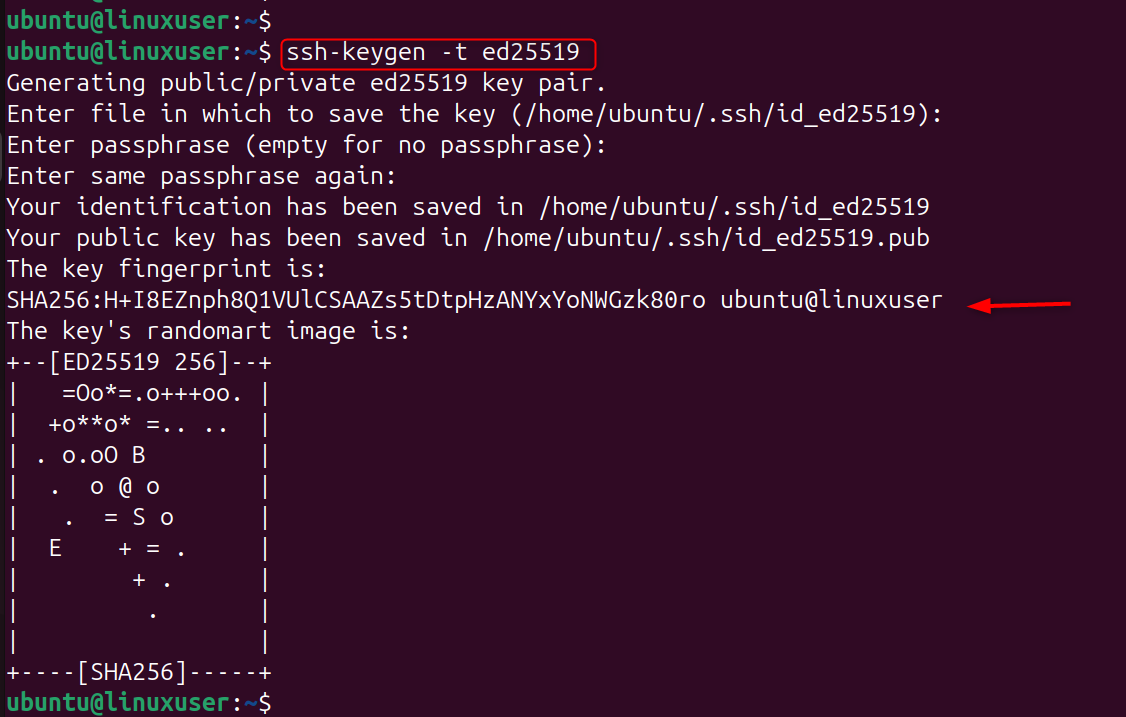
Generate SSH key pair:
Copy key to VPS:

This makes rsync ideal for cron tasks and automated backups.
Step 6: Automate Rsync Backups with Cron
Create a backup every day at midnight. Open cron:
Add:

Explanation:
- **0 0 * * *** → Runs every day at midnight
- The local /data/ directory is synced by Rsync
- VPS backups are stored in /backup/data/
It is easy to set up daily backups.
Step 7: Use Rsync with Important Safety Flags
The powerful features of Rsync include:
--delete
Deletes files on the destination that no longer exist on the source.
Example:

Use with caution: This makes the destination an exact mirror.
--progress
Shows live file-transfer progress:

--exclude
Skip unwanted files:

This keeps your backup clean.
Step 8: Optimize Rsync Speed
Increase SSH transfer speed

Explanation:
- Aes128 is an SSH cipher that's fast
- Compression=no reduces CPU usage
- -T disables TTY allocation
Great for large server migrations.
Step 9: Verify Data Integrity After Rsync
You can verify the integrity of your files using:

-c Compare file checksums, ensuring data integrity.
Used for:
- Production server migrations
- Large data transfers
- Database backups
Conclusion
Rsync over SSH allows you to securely transfer and synchronize files between your local machine and a Linux VPS by combining rsync's fast, differential file-copying capability with encrypted SSH connections; you simply install rsync on both systems, then run a command like rsync -avz -e ssh /source/path user@server:/destination/path to sync data, where -a preserves file attributes, -v shows details, and -z compresses transfers, and you can also sync remote-to-local, server-to-server, automate backups with cron, and enable passwordless authentication using SSH keys, making rsync over SSH a powerful and secure solution for VPS backups, migrations, and routine file updates.
If you're planning to launch an online project and need a Storage VPS, feel free to contact us. Our experts will help you choose a solution tailored to your needs and goals.
