CrowdSec is an open-source security tool that functions as an Intrusion Detection System (IDS) and Intrusion Prevention System (IPS). It detects and prevents malicious activities on servers and applications by analyzing incoming traffic and behaviors. CrowdSec uses predefined collections and scenarios to identify patterns of attacks, such as brute force attacks or malicious IPs, and takes action to block or mitigate these threats. It provides real-time monitoring, incident logging, and can be customized with additional scenarios. CrowdSec enhances server security by actively identifying and countering potential cyber threats.
Installing Crowdsec
Crowdsec is available for many operating systems. In this guide, we are going to focus on Linux installation and configuration.
First, we need to add the Crowdsec repo.
For Debian/Ubuntu:
curl -s https://packagecloud.io/install/repositories/crowdsec/crowdsec/script.deb.sh | sudo bashFor other Linux distros:
curl -s https://packagecloud.io/install/repositories/crowdsec/crowdsec/script.rpm.sh | sudo bash
Then we need to install it with our package manager, in our case apt:
apt install crowdsecCrowdSec's only job is to detect intrusions and attacks but it doesn't actually do anything about it. That's why we need to install the so-called 'Bouncers' Firewalls which actually block the malicious activity.
We will be installing the iptables bouncer.
sudo apt install crowdsec-firewall-bouncer-iptables
Configuration of Crowdsec
Now that we have installed the required software we need to configure it.
Crowdsec works with collections which are a bundle of parsers, scenarios, and postoverflows that form a coherent package. Think of it as rules and what happens when those rules are broken.
By default, Crowdsec detects collections that are compatible during installation. You can check which ones are enabled by running the following command:
sudo cscli collections list
Output:
COLLECTIONS
──────────────────────────────────────────────────────────────────────────────────
 Name                  📦 Status   Version   Local Path
──────────────────────────────────────────────────────────────────────────────────
 crowdsecurity/linux   ✔️ enabled   0.2       /etc/crowdsec/collections/linux.yaml
 crowdsecurity/sshd    ✔️ enabled   0.2       /etc/crowdsec/collections/sshd.yaml
──────────────────────────────────────────────────────────────────────────────────
If for some reason the installation script didn't detect the required collections or you installed software that you want to protect after the fact you can run the following command:
/usr/share/crowdsec/wizard.sh -cYou will get a screen like this where you can select the collections you want to enable.
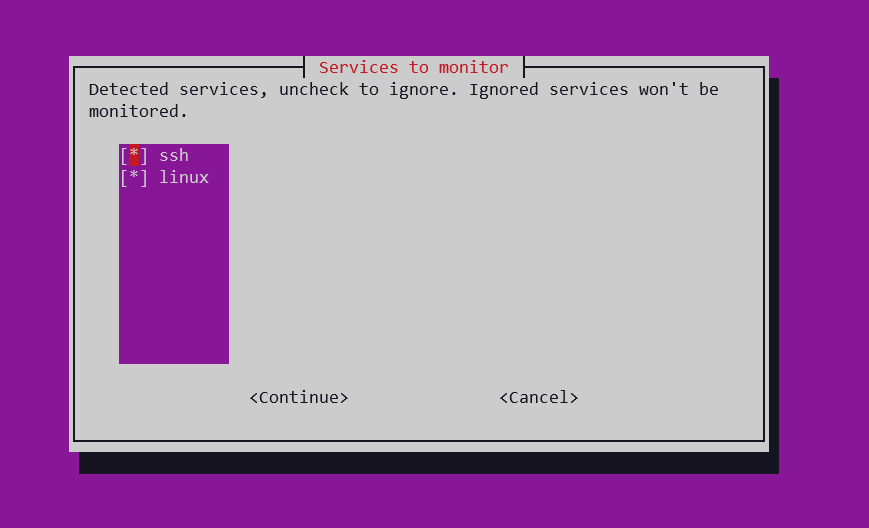
You are also able to view the scenarios against which you are protected.
sudo cscli scenarios listOutput:
SCENARIOS
────────────────────────────────────────────────────────────────────────────────────────────
 Name                        📦 Status   Version   Local Path
────────────────────────────────────────────────────────────────────────────────────────────
 crowdsecurity/ssh-bf        ✔️ enabled   0.1       /etc/crowdsec/scenarios/ssh-bf.yaml
 crowdsecurity/ssh-slow-bf   ✔️ enabled   0.2       /etc/crowdsec/scenarios/ssh-slow-bf.yaml
────────────────────────────────────────────────────────────────────────────────────────────
After configurations are made you should restart CrowdSec with the following command:
sudo systemctl reload crowdsecSetting up Crowdsec dashboard.
You are able to install a dashboard to monitor the decisions, activity, alerts as well as other information collected by Crowdsec and you are able to view it in your browser. The dashboard uses Metabase and runs in a docker container.
You will need to install the following package:
sudo apt install docker.ioAfter that run this command:
sudo cscli dashboard setupOptional arguments:
--listen: ip address to listen on for docker (default is 127.0.0.1)
--port: port to listen on for docker (default is 8080)
--password: password for metabase user (default is generated randomly)
--force: override existing setup
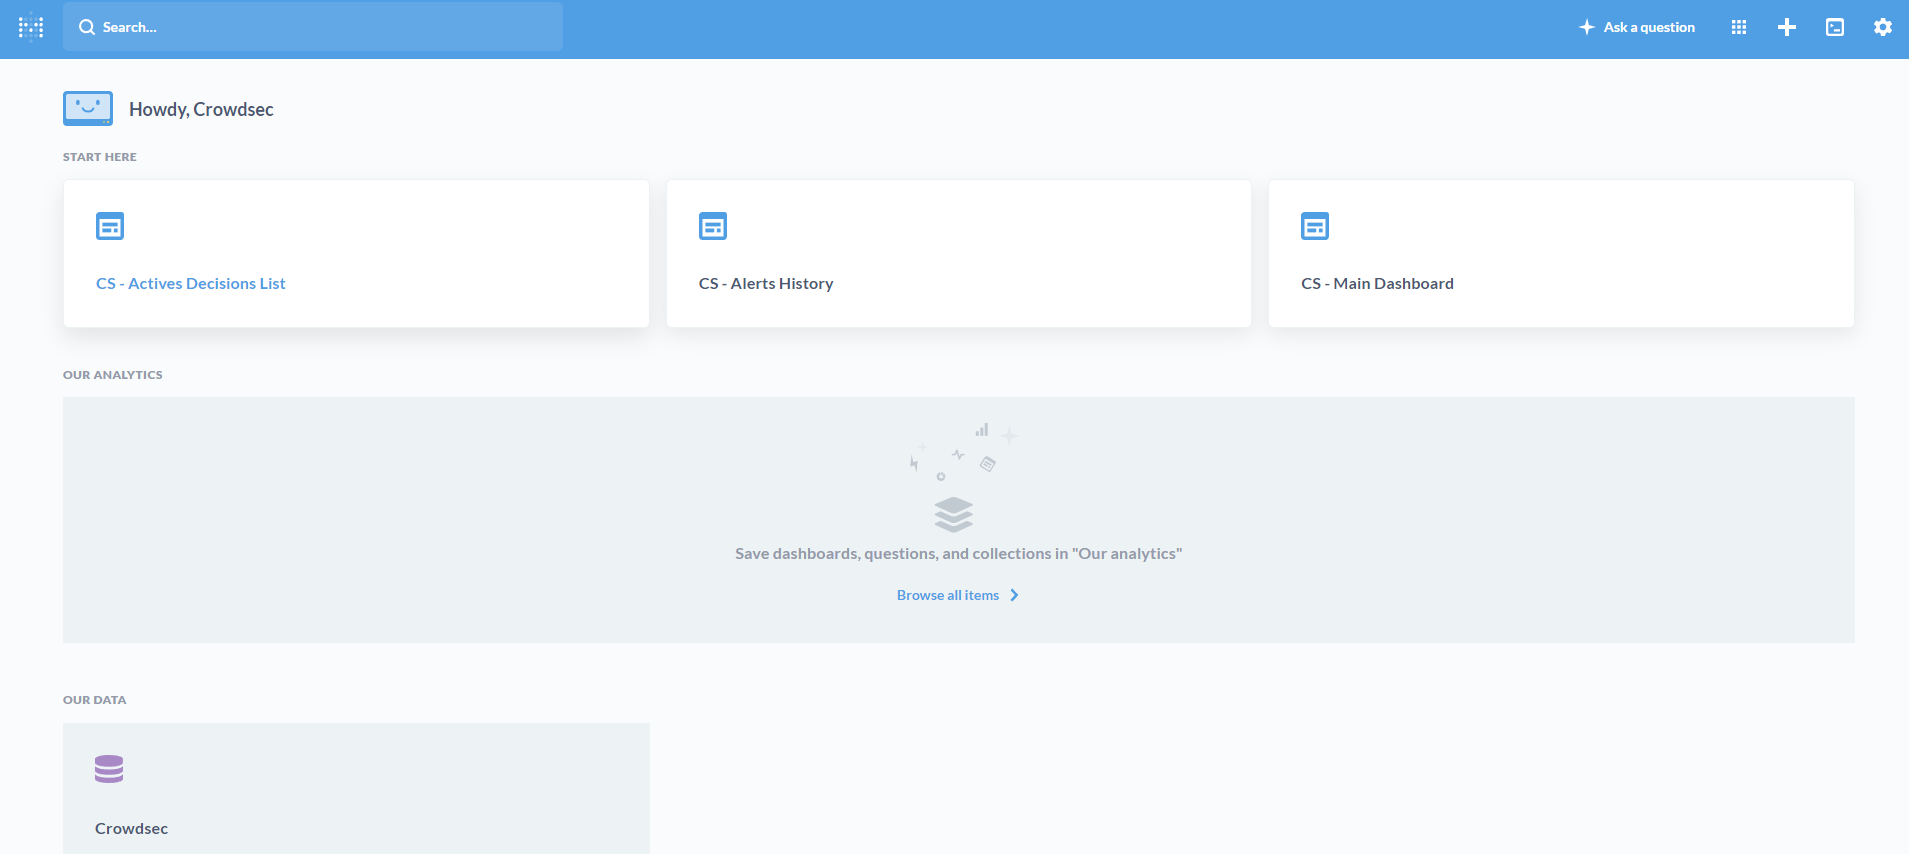
When the process is complete you will get an output with your credentials similar to this:
INFO[24-08-2023 13:09:20] Metabase is ready

        URL       : 'http://127.0.0.1:8080'
        username  : 'crowdsec@crowdsec.net'
        password  : '<RANDOM_PASSWORD>'
Now you can go to the address and use the credentials to log in. You will get a display similar to this:
If you wish to remove the dashboard use the following command:
sudo cscli dashboard remove -fTest Configuration
You are able to turn on simulation mode which acts as if the program works normally but without the decisions taking effect. In this case, we will turn on the simulation only for the SSH Brute Force attack scenario because it is the easiest test.
cscli simulation enable crowdsecurity/ssh-bfIf you want to run a global simulation remove the specific scenario and add -g.
Now I have tried to SSH into our CrowdSec-protected machine and purposefully entered the wrong password.
We can check if the decision is what we expected by running the following command:
cscli decisions listOutput:
+----+----------+--------------+-----------------------------------+------------+---------+----+--------+------------------+
| ID |  SOURCE  | SCOPE:VALUE  |              REASON               |   ACTION   | COUNTRY | AS | EVENTS |    EXPIRATION    |
+----+----------+--------------+-----------------------------------+------------+---------+----+--------+------------------+
|  4 | crowdsec | Ip:82.118.245.234	   | crowdsecurity/ssh-bf              | (simul)ban | BG      |    |      6 | 58m38.255638641s |
+----+----------+--------------+-----------------------------------+------------+---------+----+--------+------------------+
Now we can turn off the simulation by running:
cscli simulation enable crowdsecurity/ssh-bf