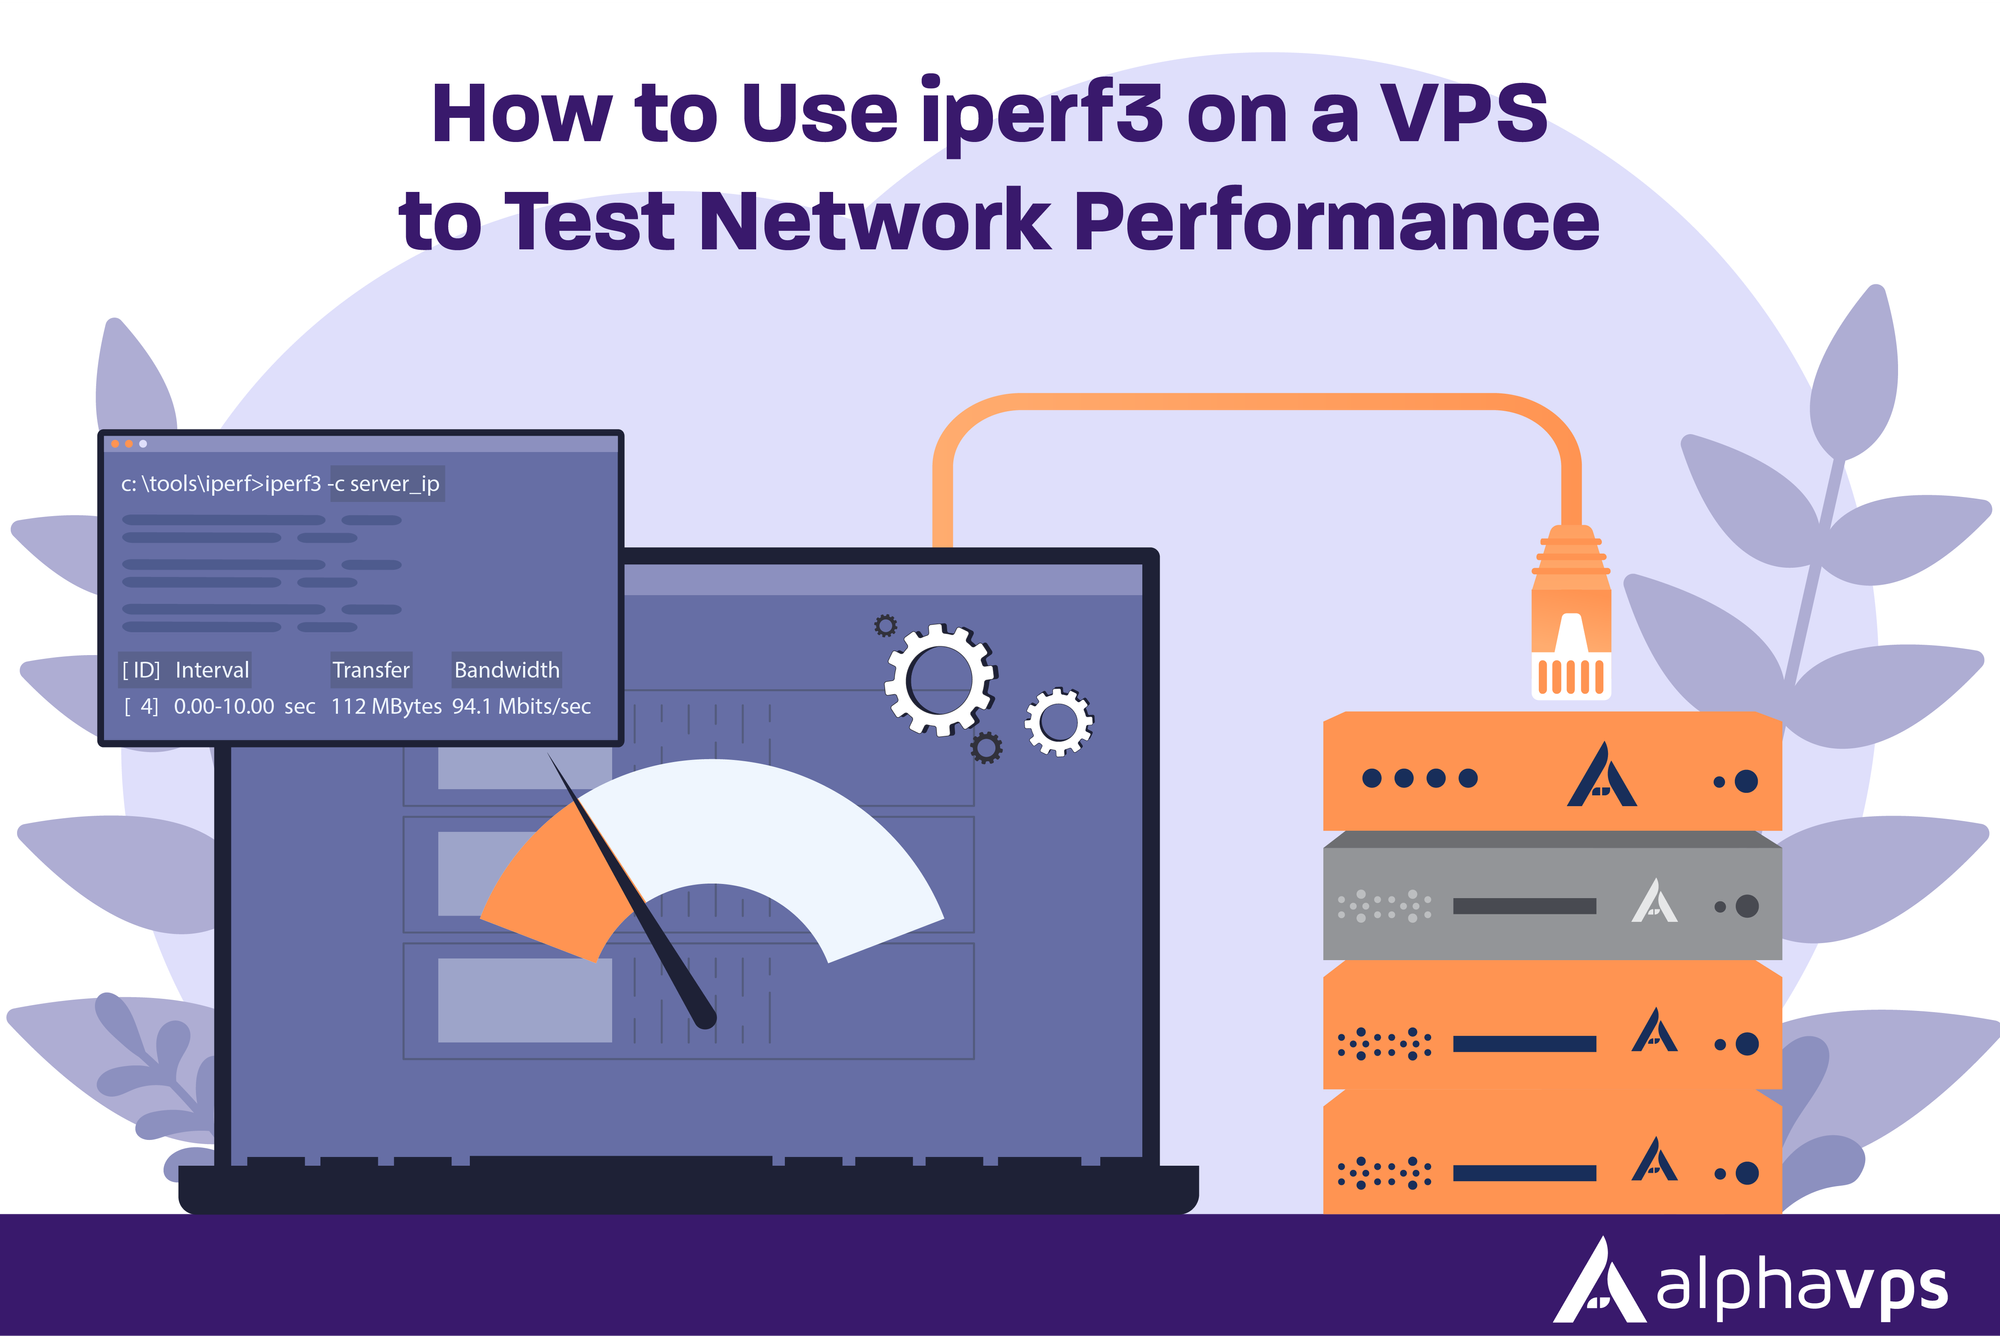
iperf3 is a command-line tool for assessing network performance. It allows you to measure bandwidth, latency, jitter, and packet loss between two endpoints. These measurements are useful for different scenarios like testing, checking the amount of available bandwidth, understanding the latency at peak hours, or planning a capacity for an application that requires a stable throughput.
VPSs are a nice testing endpoint since they can provide a stable test tool (i.e., always up), a public IP address without NAT, and they can be consistently available for running repeated circuit tests. The iperf3 client running against a VPS provides a route that reflects real-world conditions through your internet connection or UL data center.
This guide will show you how to install iperf3, run basic and advanced tests, and gather context to interpret your test results to understand your network performance.
Prerequisites: What you need before starting
You will need a Ubuntu LTS system with root or sudo access privileges to conduct your tests. This system can either be your VPS or used as a local test environment. In order to act as a real VPS environment, you will run iperf3 in server mode and client mode on the same system or separated by two systems.
Check to see if iperf3 is already installed. If it is not installed, you will use the next section to install it. When testing in a VPS, ensure that your firewall settings are open on port 5201 for TCP and UDP traffic. On Ubuntu, you can open port 5201 with:
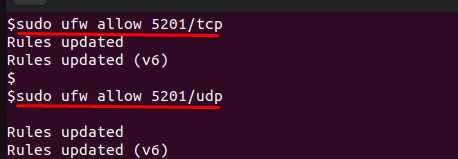
When you are testing locally, there is no firewall because the network traffic does not go outside your system to the network. However, always conduct tests only on networks that you are authorized to use. This is because iperf3 creates continuous data streams, which consume bandwidth.
Installing iperf3 on Ubuntu VPS
Start by refreshing the package lists so the system can fetch the latest versions of available software:

Once the update completes, install iperf3 with:
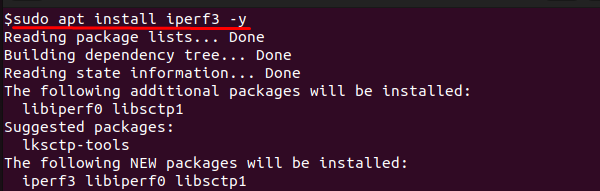
The package manager will download the required files and set them up automatically.
To verify the installation, run:

This command shows the version installed and confirms that iperf3 has been installed properly. Seeing the version number also indicates that you installed the tool from Ubuntu's maintained repositories, as opposed to installing from an old or custom-built version.
For our purposes, iperf3 is installed and requires no further configuration. You can run it straight away in server or client mode, to start testing network performance.
Basic iperf3 Workflow — Server and Client Commands
iperf3 acts in a two-part process: a server that listens for connections and a client that performs the test. Typically, on Ubuntu, we can simulate both on the same machine, using the loopback address 127.0.0.1, and only need a single command. On a VPS, you would run the server on the VPS and connect to it from another machine, with a client using the VPS's public IP address.
Start the server:

This launches iperf3 in server mode, listening on port 5201. Use -p to set a custom port and -D to run it as a daemon in the background.
Run the client against the server:
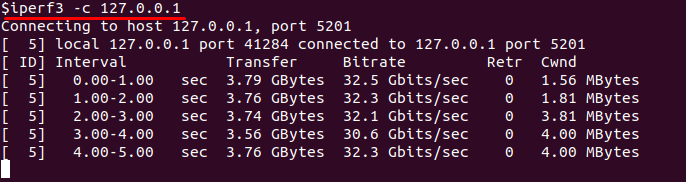
This is a TCP test against the loopback address. If you test this on a VPS, replace 127.0.0.1 with the server's public IP and run it from another machine. The output will display bandwidth, number of retransmits, and the maximum segment size (MSS).
To test in the opposite direction, use the reverse flag:
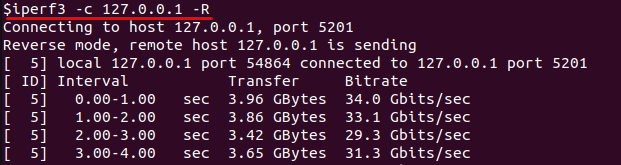
This reverses the flow so the server sends data to the client. It is useful when testing download performance. On a VPS, use the server’s public IP to run this test from your workstation.
TCP vs UDP Tests — When and How to Choose
iperf3 uses TCP by default, which is characteristic of most internet traffic. TCP testing will typically show throughput and retransmits, so it is a good choice to check bandwidth under normal application conditions:

This runs a local TCP test. If I were testing on a VPS, the same command would work with the server's IP in place of 127.0.0.1. The output will indicate total throughput and the number of retransmits. If we see a high number of retransmits, it likely indicates packet loss or congestion.
For streaming and other real-time applications, testing using UDP can provide additional insights. Since UDP does not retransmit lost packets, it can calculate packet loss and jitter.
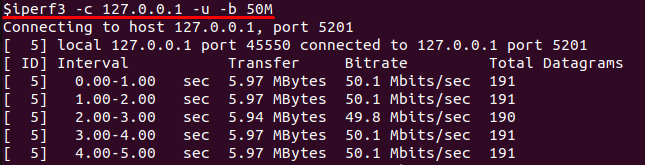
This sends UDP traffic at 50 Mbps. Also provided are packets sent and lost, and jitter in milliseconds. On a VPS, replacing 127.0.0.1 with the server's IP tests your link across the internet.
In general, we recommend using TCP when you want realistic throughput measurements, and using UDP when you want to analyze quality for streaming media or voice over IP.
In the end, testing both versions provides the most complete profile of the performance possible to achieve on a link.
Advanced Options and Realistic Testing Scenarios
Once you are familiar with the normal workflow, iperf3 has numerous options that will allow for more realistic testing conditions. Using options allows you to simulate different types of network usage and get good measurements:
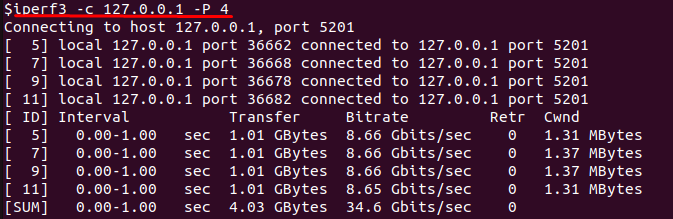
The -P option will run multiple parallel streams. In this example, four streams will be opened simultaneously. This simulates concurrent connections or usage, as multiple applications or users are connected over the same link. On a VPS, simply replace the loopback with the VPS IP to evaluate it in a real environment:
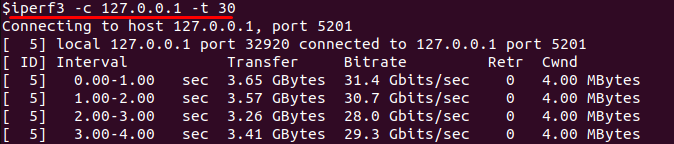
The -t flag extends the test time. A 30-second test will give a more stable measurement than the default 10 seconds, particularly if your link has variable throughput:

When running in UDP mode, the -b flag will set the target bandwidth. In this example, the client will keep sending at a rate of 100 Mbps, and help you measure how much traffic the network can carry before you start to see packet loss:

The -w command-line argument specifies the size of the TCP window. Windows can get pretty big - 256KB is a common size, which is useful when using a high-latency link, because small windows can be a throughput limiter.
To obtain useful results, you should conduct the tests many times over varying times during the day and then average the outputs to get rid of short-term spikes or drops and provide a clearer representation of how your VPS network performs under normal conditions and peak demands.
For accurate and repeatable network performance testing, you need a reliable VPS with low latency and consistent bandwidth.
At AlphaVPS, our High-Performance VPS and Ryzen VPS plans are ideal for benchmarking tools like iperf3—delivering stable throughput for both TCP and UDP tests.
If you’re analyzing network capacity or testing sustained data flows, our Dedicated Servers and Storage VPS lines offer enterprise-grade connectivity, making them perfect for production-level performance measurements.
Conclusion
In this guide, we covered the use of iperf3 on a VPS link to verify the network performance. We started with the prerequisites and installation on an Ubuntu server before setting up iperf3 in server and client modes to test effectiveness. You learned about TCP tests to see what kind of throughput you might expect, and UDP tests to check packet loss and jitter, which reveal other aspects of network quality.
We also looked at additional testing options such as parallel streams, test duration, bandwidth limit, and TCP window size option that could all relate to using real appliances/services. It will not matter if you are testing locally on an Ubuntu instance so that you can learn iperf, or running similar commands against a VPS instance that you expect to record a measurement on, you will use the same commands with the only difference being that you are using 127.0.0.1 locally and the public IP of the VPS in production.
