Securing SSH for your Linux VPS server is the best way to protect it from brute force attacks and unauthorized access. Password-based logins can be extremely vulnerable. Automated bots will constantly try to guess passwords. Switching to SSH key-based authentication and adding two-factor authentication (2FA) creates a multi-layer, strong security system. Attackers cannot easily breach it.
This guide will show you how to secure SSH with keys and use Google Authenticator for 2FA. Each step is explained in detail.
How to Secure SSH on Your Linux VPS with Keys and Two-Factor Authentication
Securing SSH with keys on your Linux VPS and two-factor verification adds two layers of security to prevent unauthorized entry. SSH keys are used to replace passwords and cryptographic authentication. This makes brute-force attacks almost impossible. Enabling 2FA with Google Authenticator then adds a one-time, time-based code that is required for every login. This ensures that even if your SSH key was stolen, someone would still be unable to access your server. SSH keys combined with 2FA provide a strong security setup for your VPS that will protect it from common cyberattacks.
Method 1: Secure SSH with Key-Based Authentication
SSH keys are cryptographic pairs used for authentication. They are much more secure than traditional passwords, and they eliminate the need for them.
Step 1: Generate SSH Keys on Your Local Machine
On your computer, you create a pair of public and private keys. The public key is uploaded to the server, but the private key remains with you.
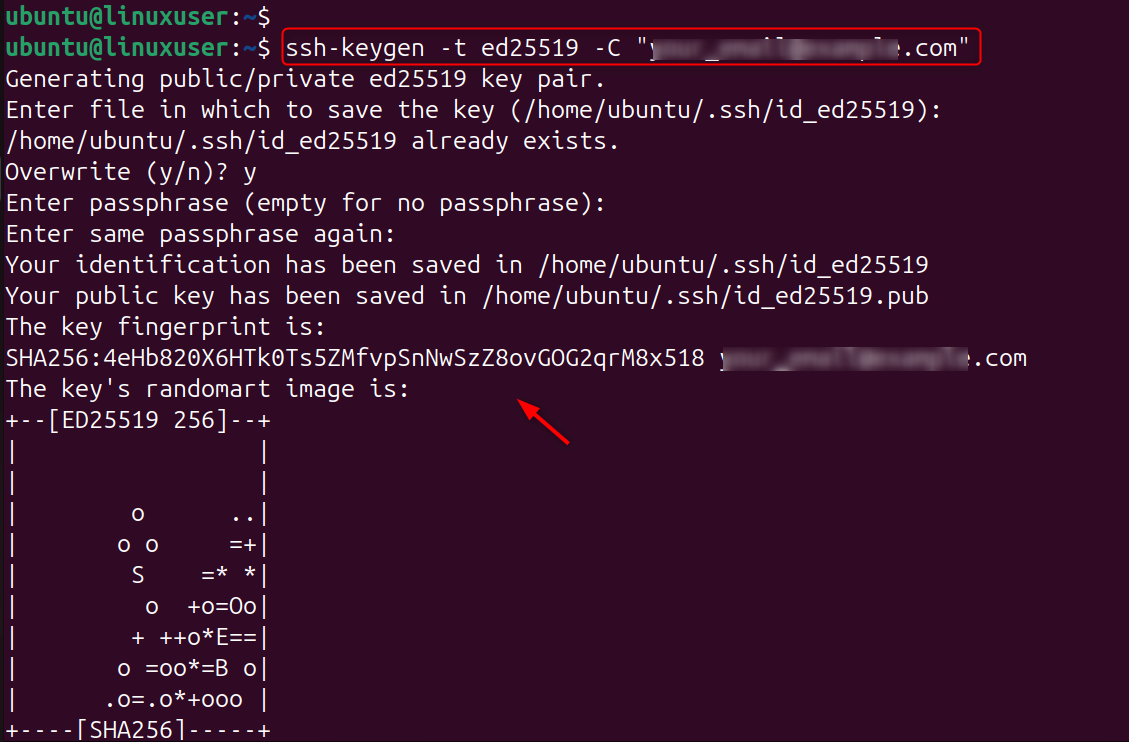
This will create strong encryption keys that attackers can't brute force.
Step 2: Copy Your Public Key to the VPS
This step will install your public key on the server. Your local machine can then authenticate by using your private key.
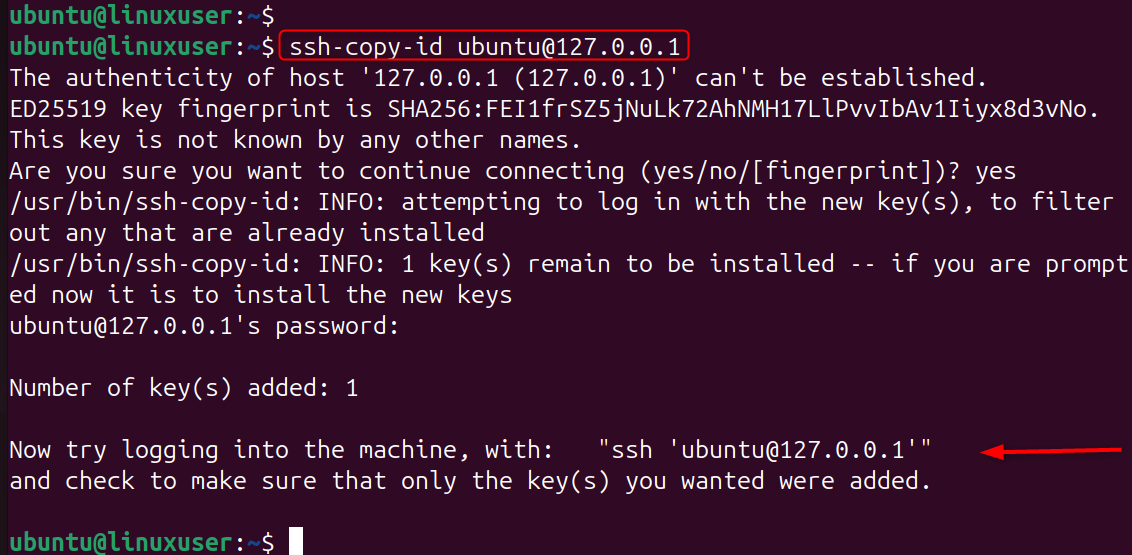
Upload the key manually if this command is not available.
Once you have done this, the server will accept authentication attempts made by your computer.
Step 3: Test SSH Key Authentication
Test the login before you disable passwords.
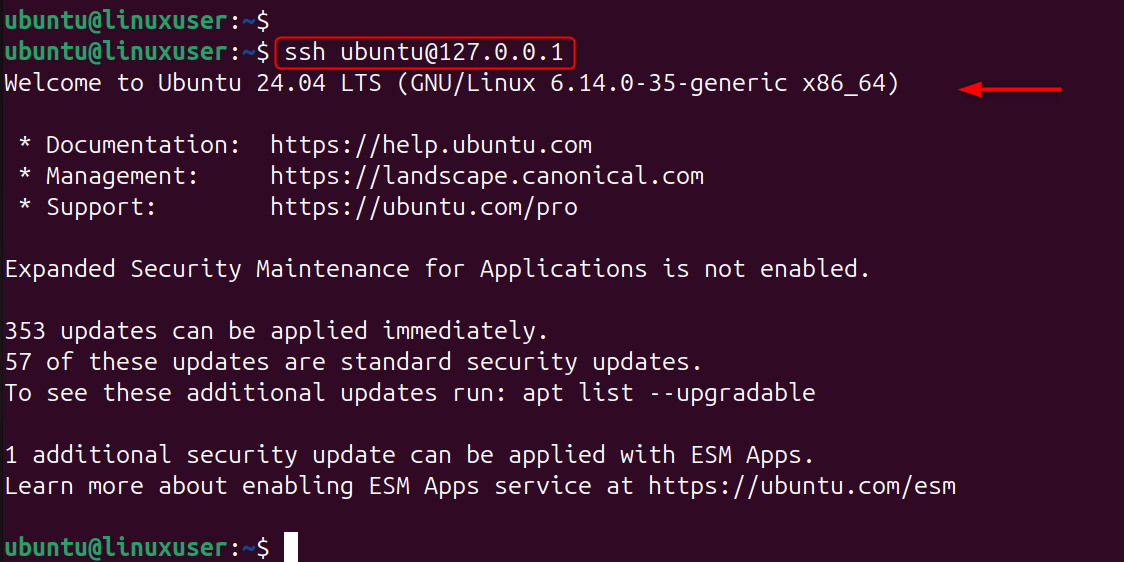
If you can log in without entering a password, then key authentication is functioning correctly.
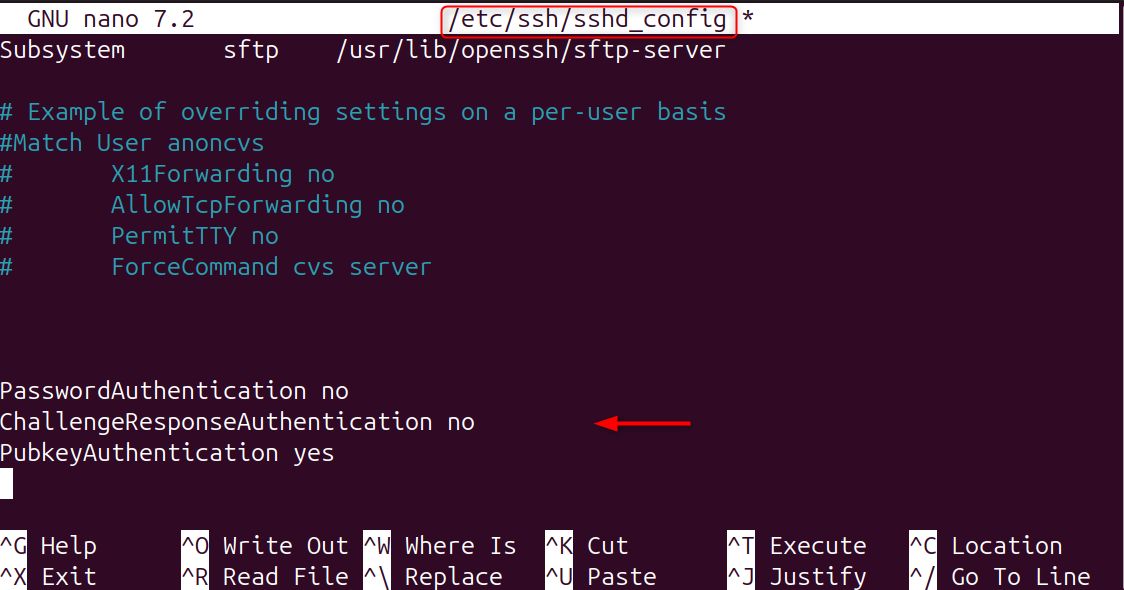
Step 4: Disable Password Authentication in SSH
By disabling passwords, attackers are prevented from launching a brute-force attack. Let’s open SSH config:
Set the following:
Restart SSH in order to apply the changes.

Only trusted SSH keys will be able to log in.
Method 2: Add Two-Factor Authentication (2FA)
2FA uses a TOTP (time-based one-time password) that is changed every 30 seconds. This code is required to log in, even if your SSH key has been stolen.
Step 1: Install Google Authenticator PAM Module
This package allows SSH to request a code of verification from Google Authenticator. Let’s install it:
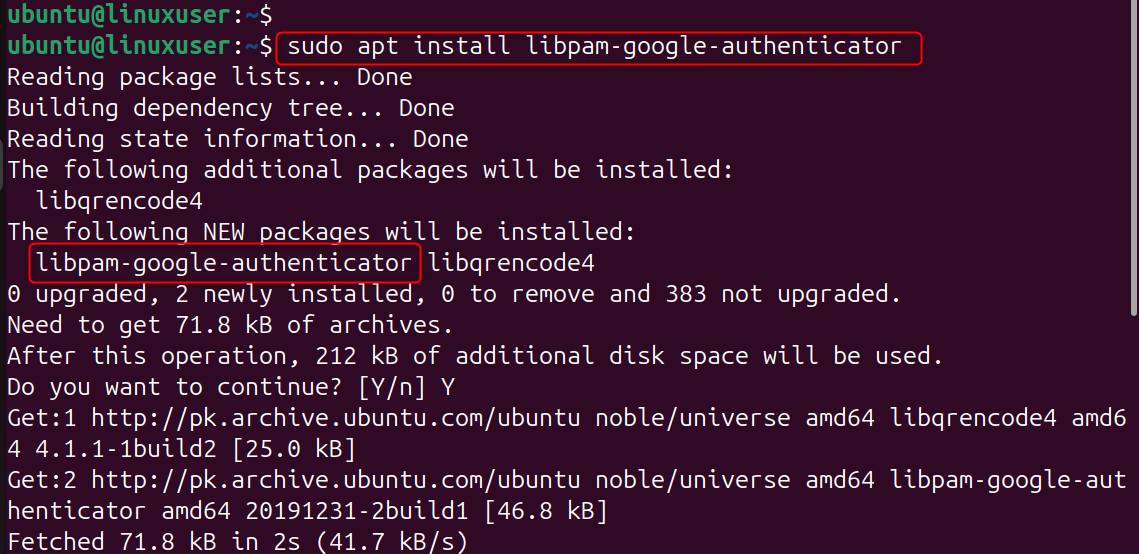
This module adds 2FA to the authentication framework of the system.
Step 2: Generate Your 2FA Secret Key
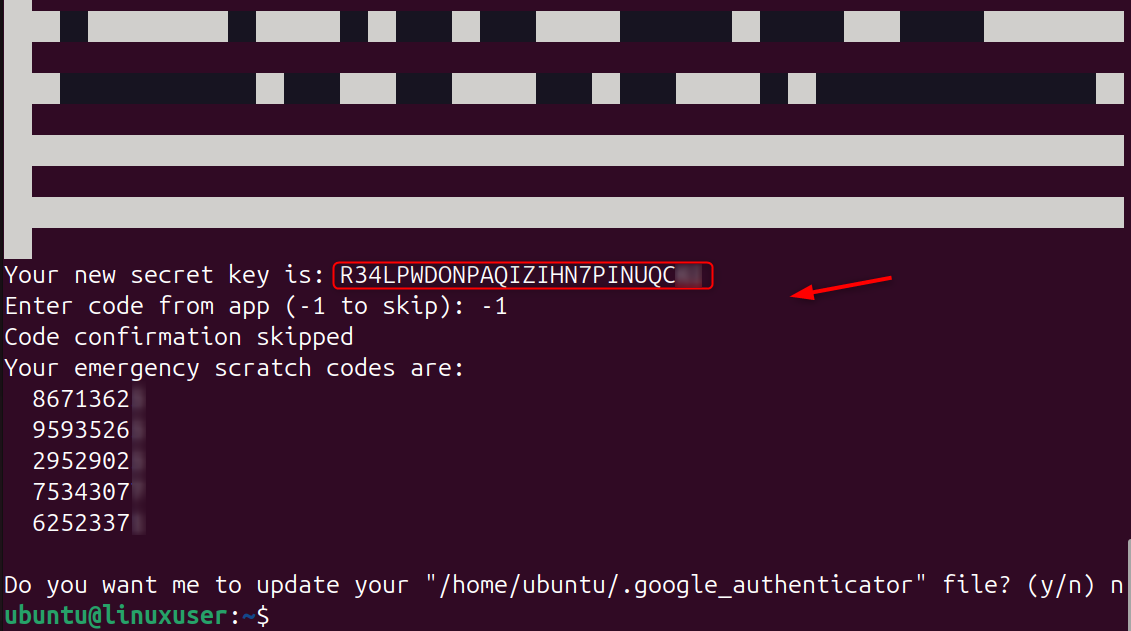
This command will generate your secret one-time password key and QR code.
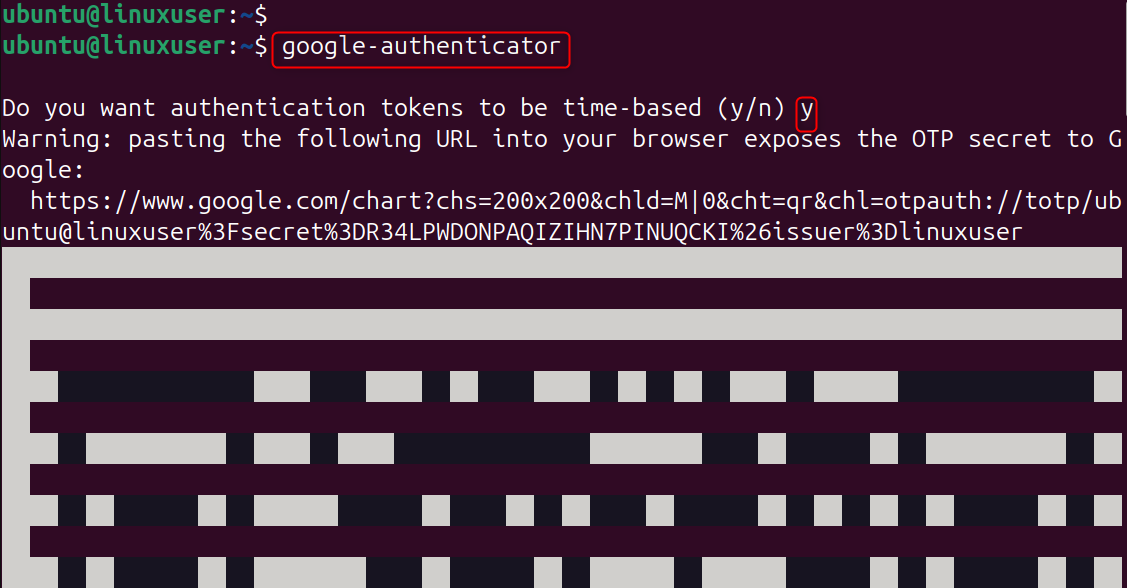
Use your mobile app to scan the QR code.
It will also ask you for security questions and backup codes.
Step 3: Configure PAM to Require 2FA
This tells SSH that it will check the Google Authenticator code when you log in.
Add the following line to the top:
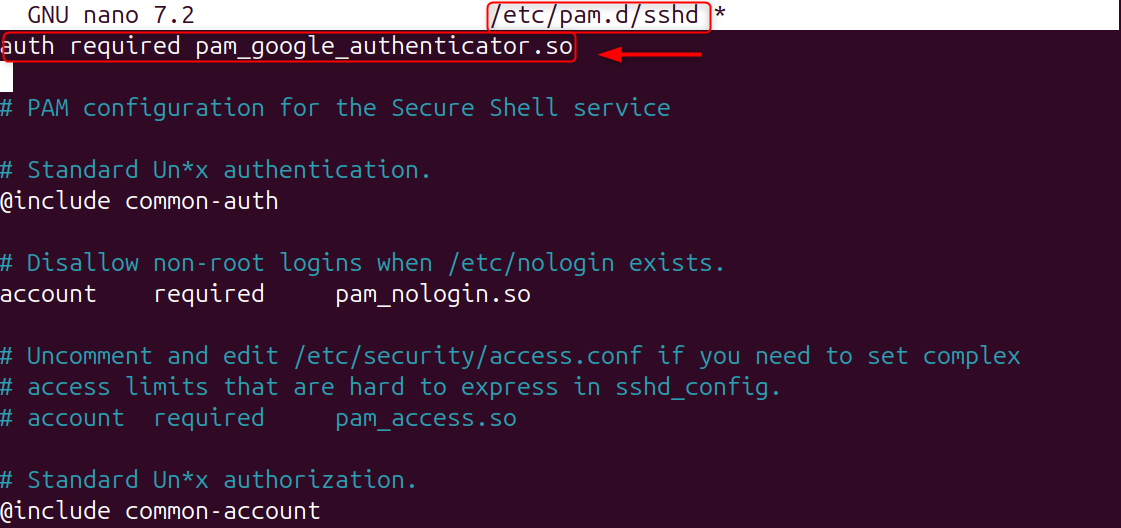
The 2FA authentication is enabled for each SSH login.
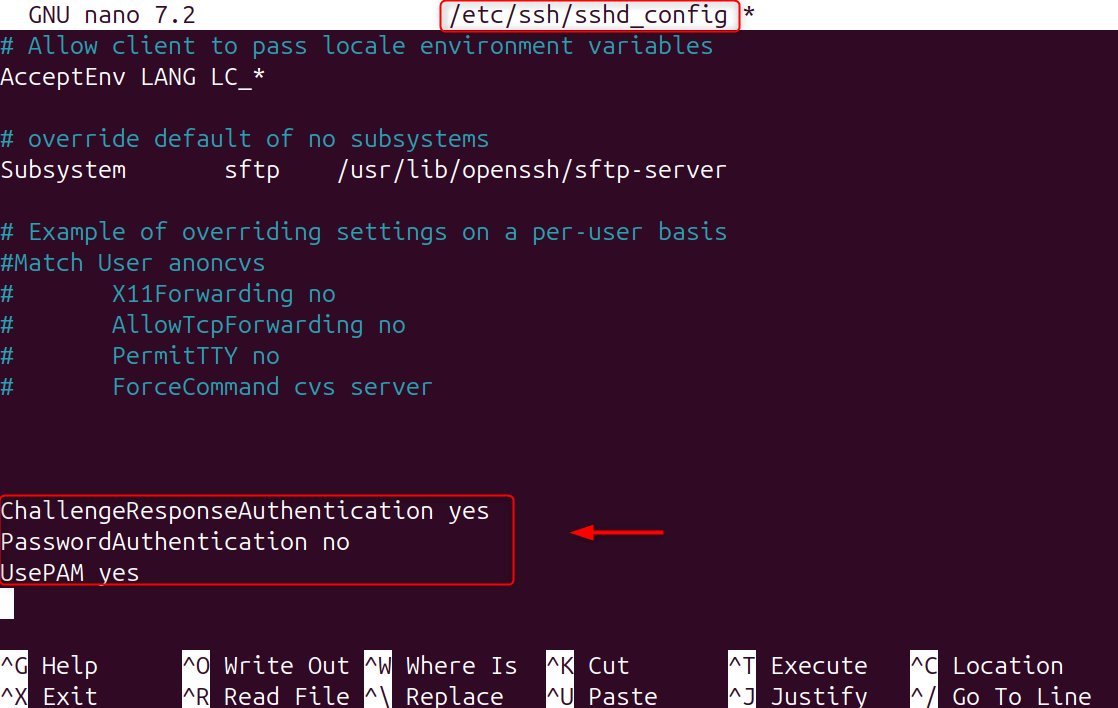
Step 4: Enable 2FA in the SSH Configuration
This will activate challenge-response Authentication, which allows SSH to request the TOTP code.
Make sure these settings are active:
Restart SSH in order to apply the changes.

Your SSH key as well as your time-based code will be required.
Step 5: Test SSH Login with 2FA
Reconnect the two authentication layers to ensure they are working properly.
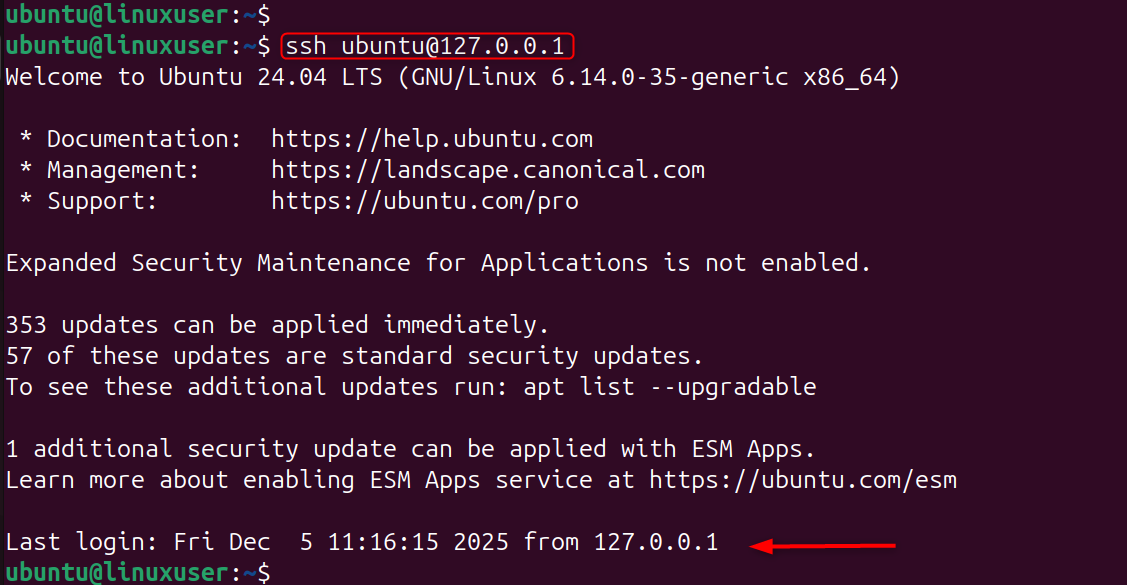
This confirms your server is now fully protected.
Extra Security Tips on Your Linux VPS
1. Change the Default SSH Port
Attackers frequently scan port 22. By changing it, you can reduce unwanted traffic.
Let’s change the port 2222:

Restart SSH:

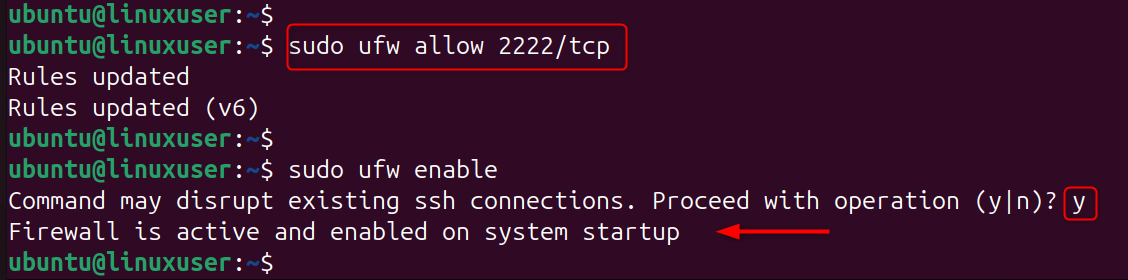
2. Enable Firewall Rules
Only allow your selected SSH port to pass through the firewall. UFW example:
3. Install Fail2Ban
Fail2Ban automatically blocks failed SSH login attempts.
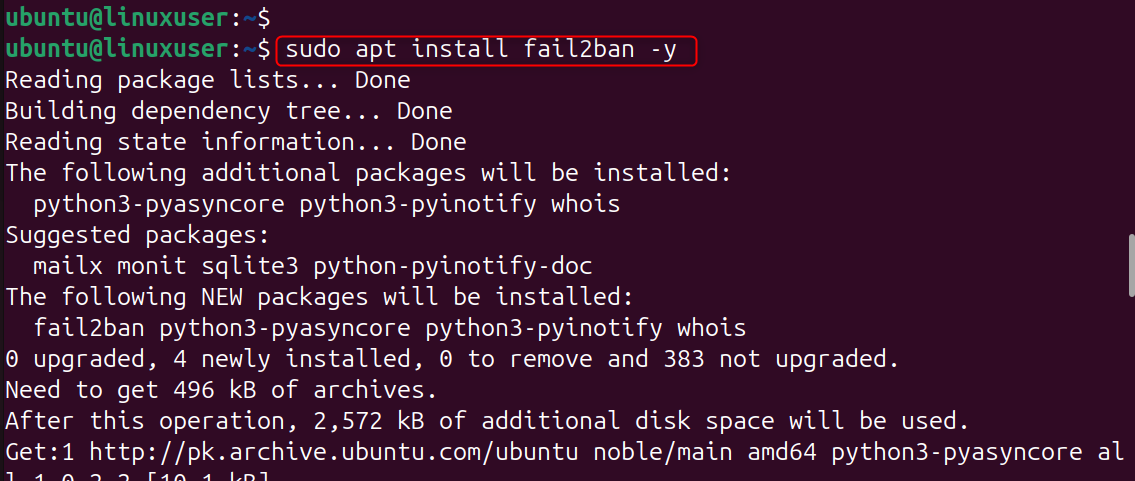
Let’s enable the services of Fail2Ban:

This is the complete guide to Secure SSH on your Linux VPS using keys and two-factor authentication.
Conclusion
Securing SSH using keys and two-factor verification is the best way to protect your Linux Virtual Private Server. SSH keys reduce the risk of brute force attacks. 2FA provides an additional layer of security that prevents unauthorized entry even if your key is compromised. Following the above steps generating keys, disabling passwords, and enabling Google Authenticator, you can significantly improve the security of your server and reduce the risks of attacks.
With our Cheap VPS solution, you get the power, speed, and control of premium hosting—at a fraction of the cost. Start deploying faster, scale effortlessly, and keep your project performing at its best.
