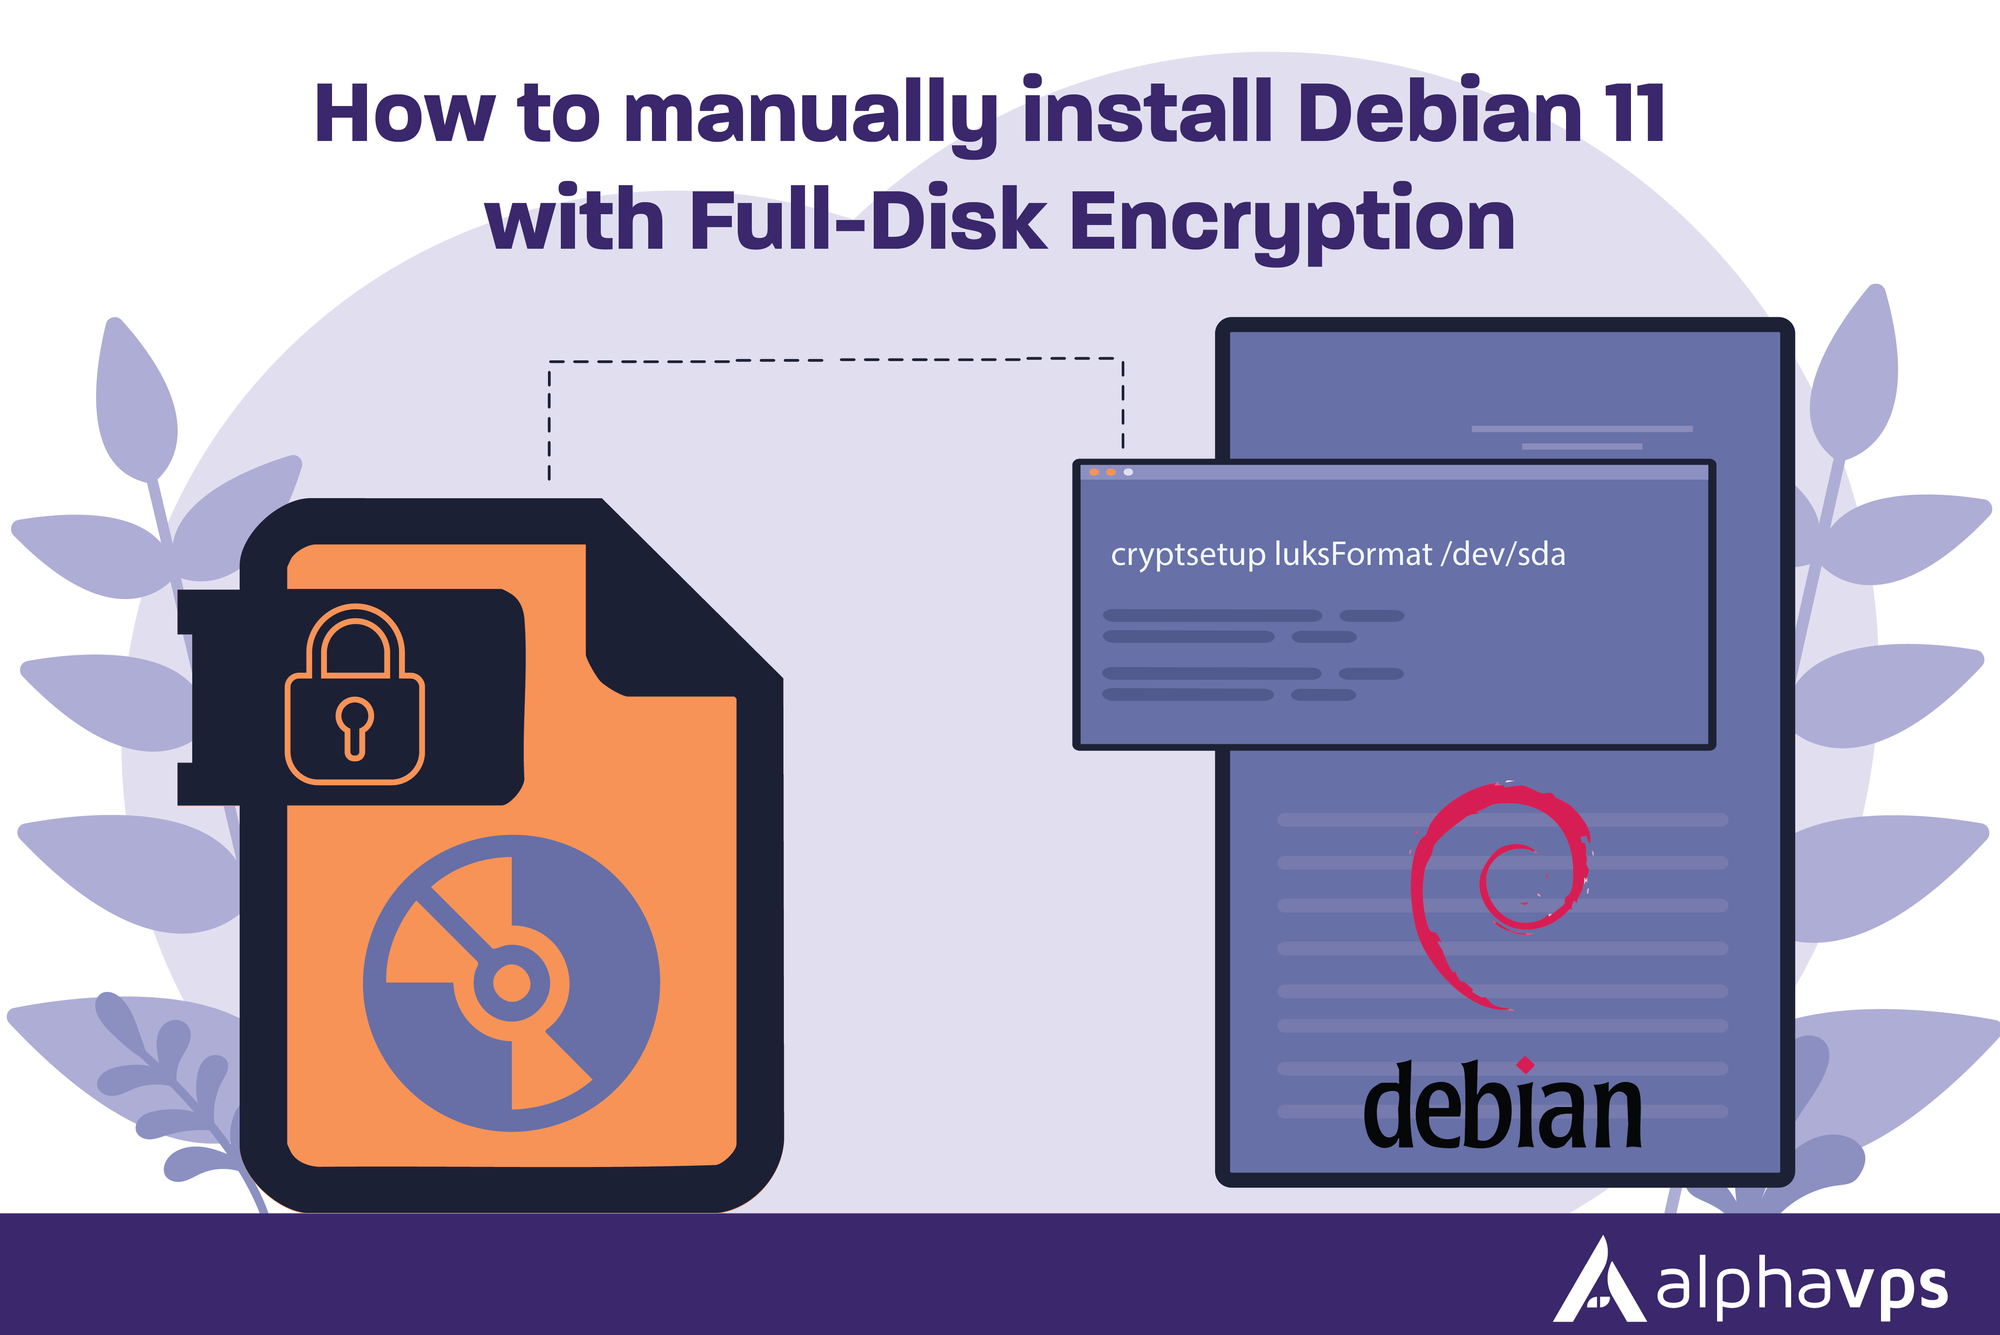
In this blog post, we'll walk you through the steps of manually installing Debian 11 via an ISO file. Debian is a free and open-source operating system that is known for its stability and security, making it a popular choice for servers and other resource-intensive applications.
By the end of this guide, you'll have a working Debian 11 VPS from AlphaVPS with
FDE (optional).
To process a manual installation of Debian 11, you will need to mount the ISO from your clients' area panel. Do not forget to change the boot order to "CD-ROM 1st" as well. If you're installing on a dedicated server, you'd need to have IPMI access to perform this task. Reboot and open the OOB console to start the installation.
We will guide you through each step with the graphical installer.

Initial Settings
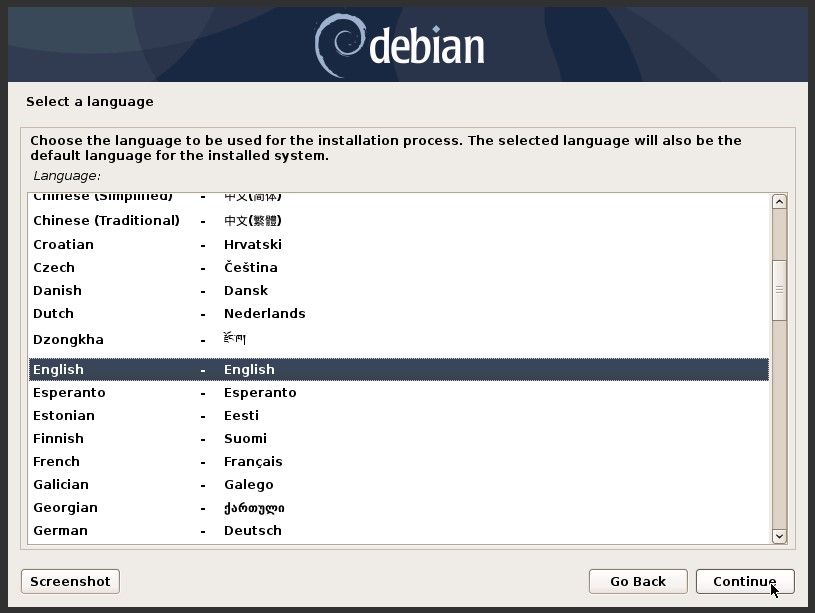
1. Select the required language
2. Set the location and time zone
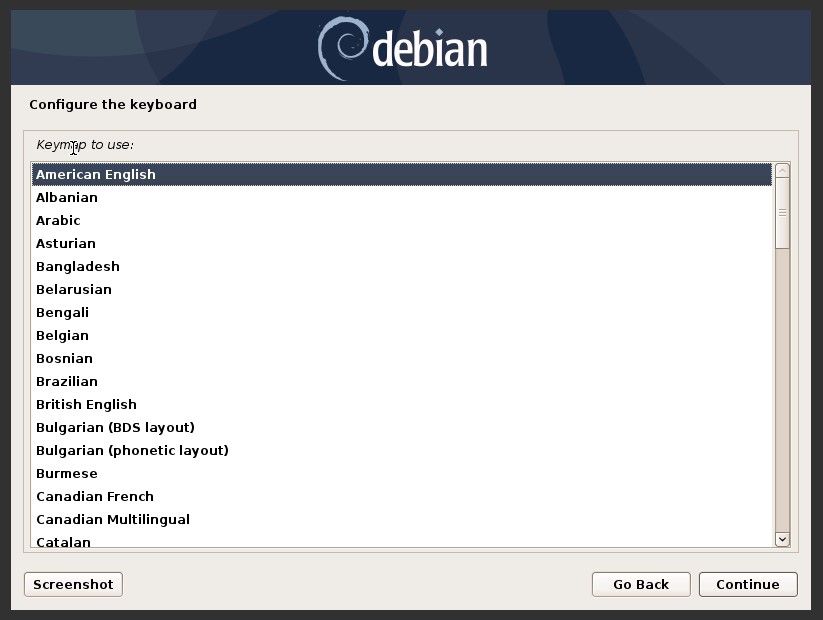
3. Configure locales and keyboard layout
User settings
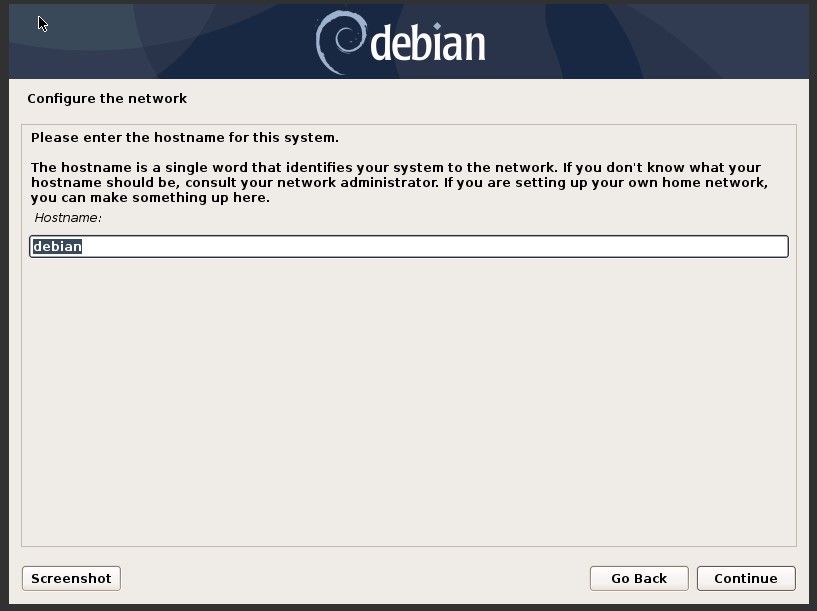
1. Enter the hostname for your system
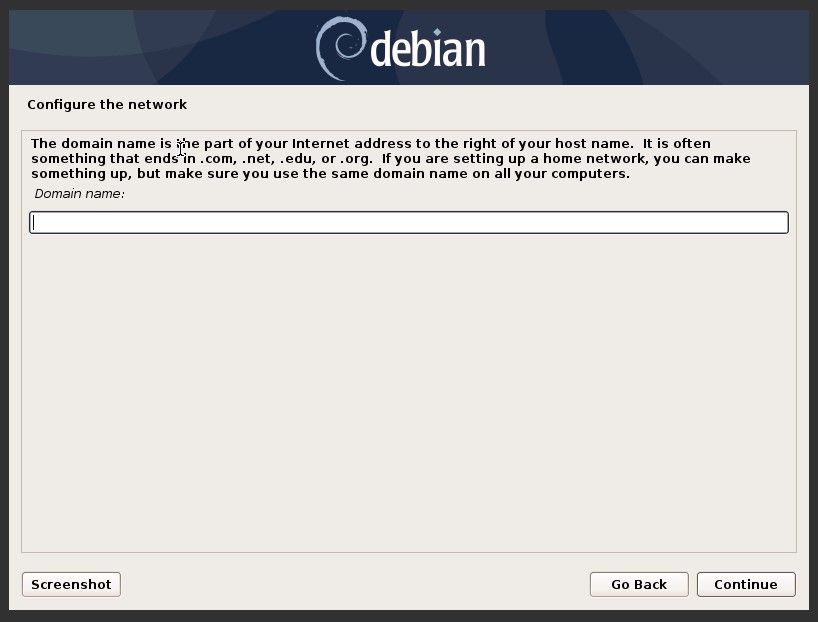
2. If you have a domain, enter it here. Alternatively, you can just skip this step.
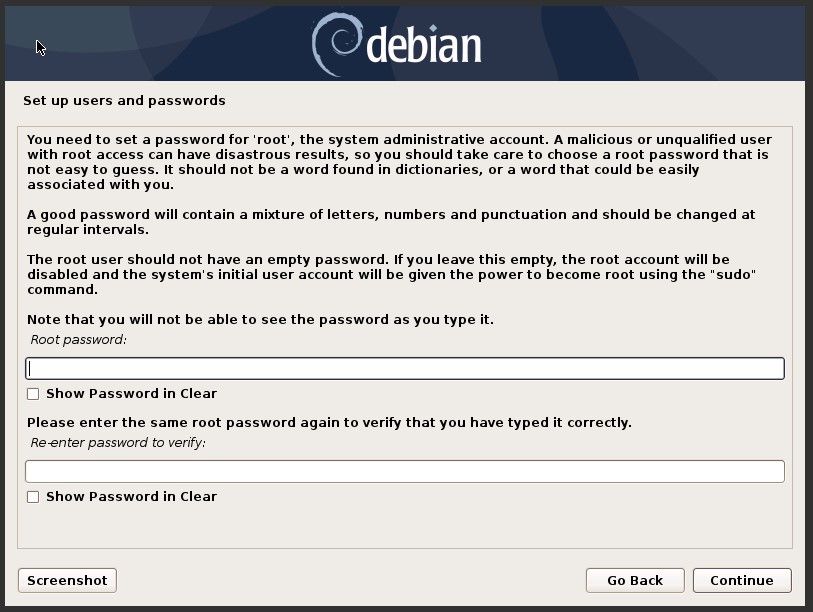
3. Set your root password. To narrow down any eventual security issues, we highly recommend setting a strong secure password.
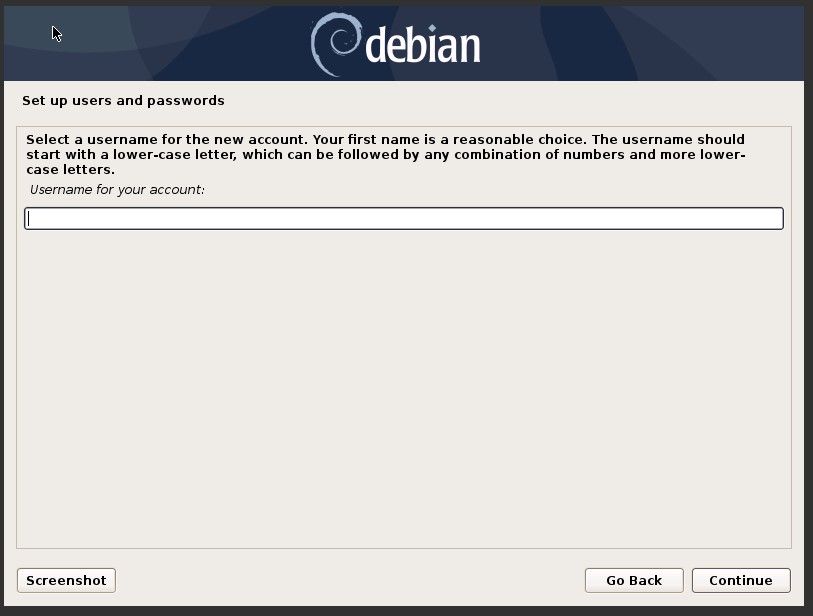
4. Create a sudo user account by providing a name, username, and password.
Remote root logins will be disabled initially.
Note down the created user's credentials.
You will need them to log in via ssh.
Partition settings
You can configure partitioning manually or you can leave it as "Guided".
If you require custom partitioning, switch to "Manual" and continue.
You can split your storage space into multiple partitions, name them, and adjust their mount points.

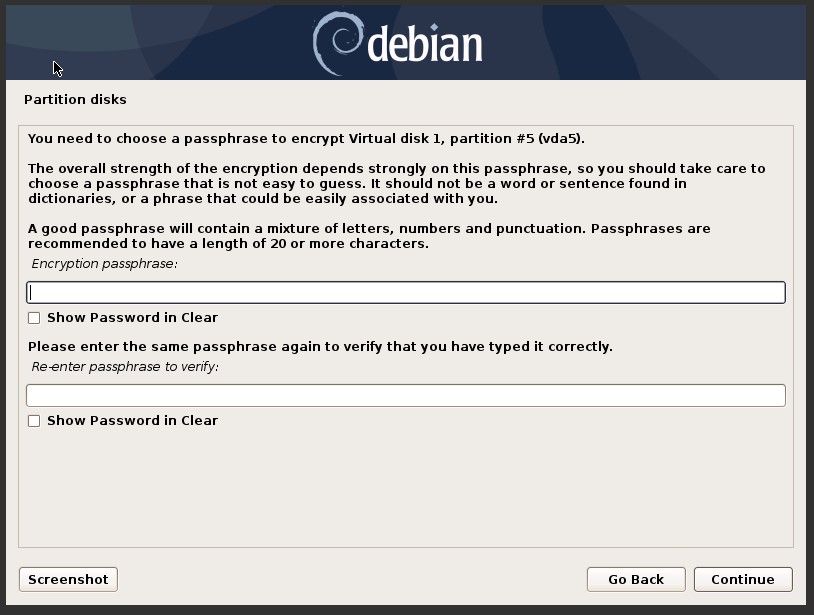
If you require full-disk encryption on your VPS, you will need to go with option #4.
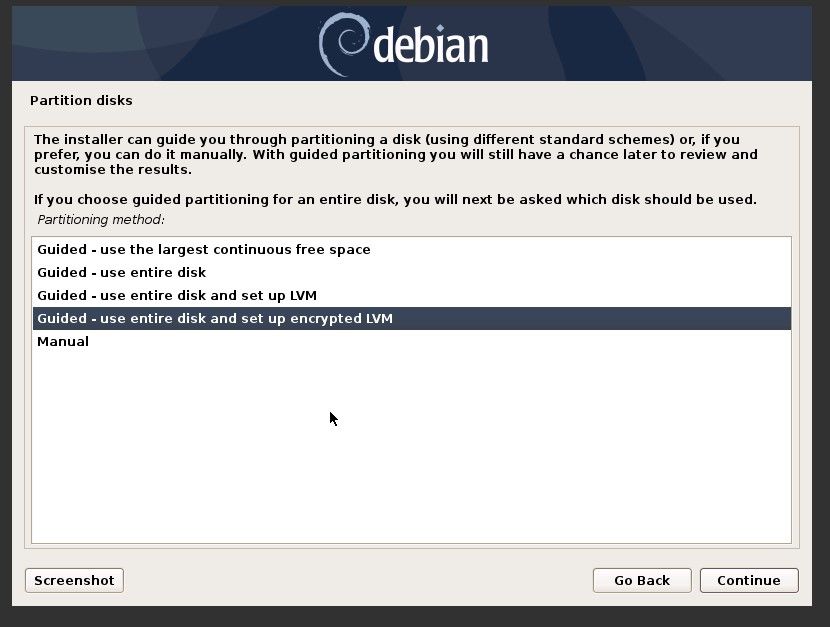
Full-disk encryption is a security method for protecting sensitive data at the hardware level by encrypting all data on a disk drive.
You will need to provide a passphrase, which you will unlock your disk with.
If you have not selected manual partitioning, the installer will guide you through the next steps. Confirm them and continue.
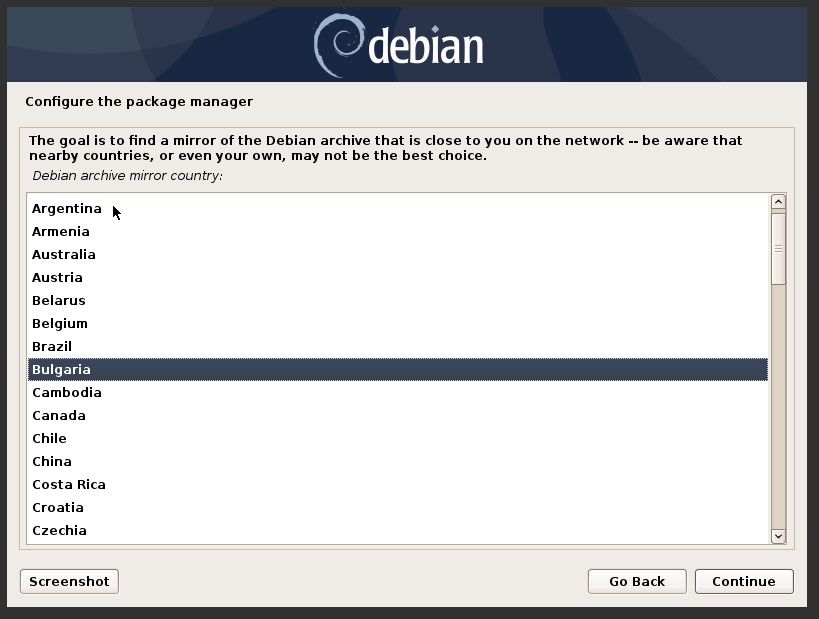
Select installation source and finishing touches
Select the preferred mirror - the closer to your server's physical location.
Most countries provide a whole list of mirrors on their network, which you will be able to choose from.
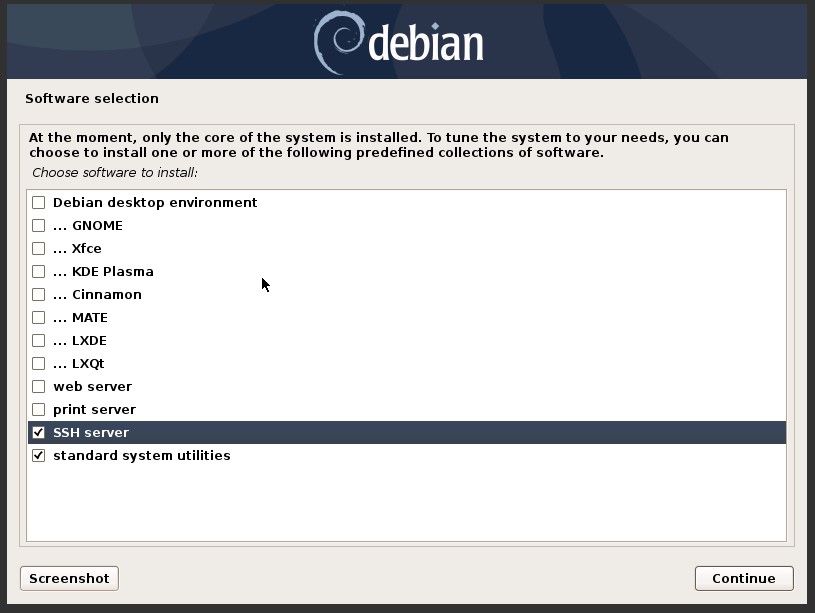
To remotely access your VPS via ssh, you will need to select the "SSH server" option. Alternatively, you can install it manually by accessing the server from the console in your clients' area panel or your IPMI.
We recommend installing the standard system utilities.
For those who prefer a GUI over a CLI, multiple options are provided as well.
It is mandatory to install the GRUB bootloader. Otherwise, your system will not boot. Select the drive where you want to install it.
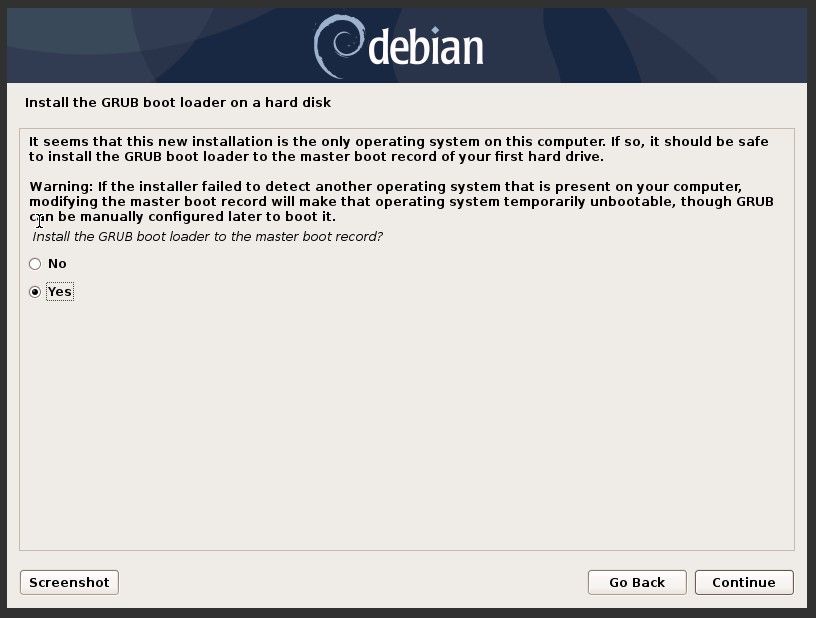
You can either enter the hard drive label manually or for your convenience you can simply select it from the list.
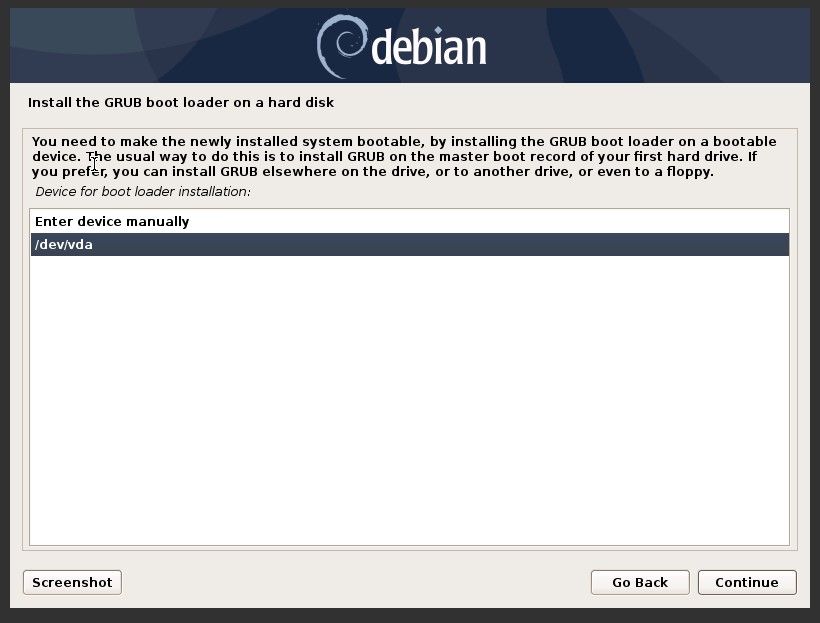
Confirm, continue, and finish the installation.
Enabling remote root logins
Remote ssh logins with the root user are not allowed by default.
It is recommended to log in via a sudo user.
If required, you can switch to root via the su command.
However, if you still want to enable remote root logins, here are the steps to do so:
- Log in remotely to your VPS with the created
sudouser or directly log in as therootuser from the console in your clients' area panel.
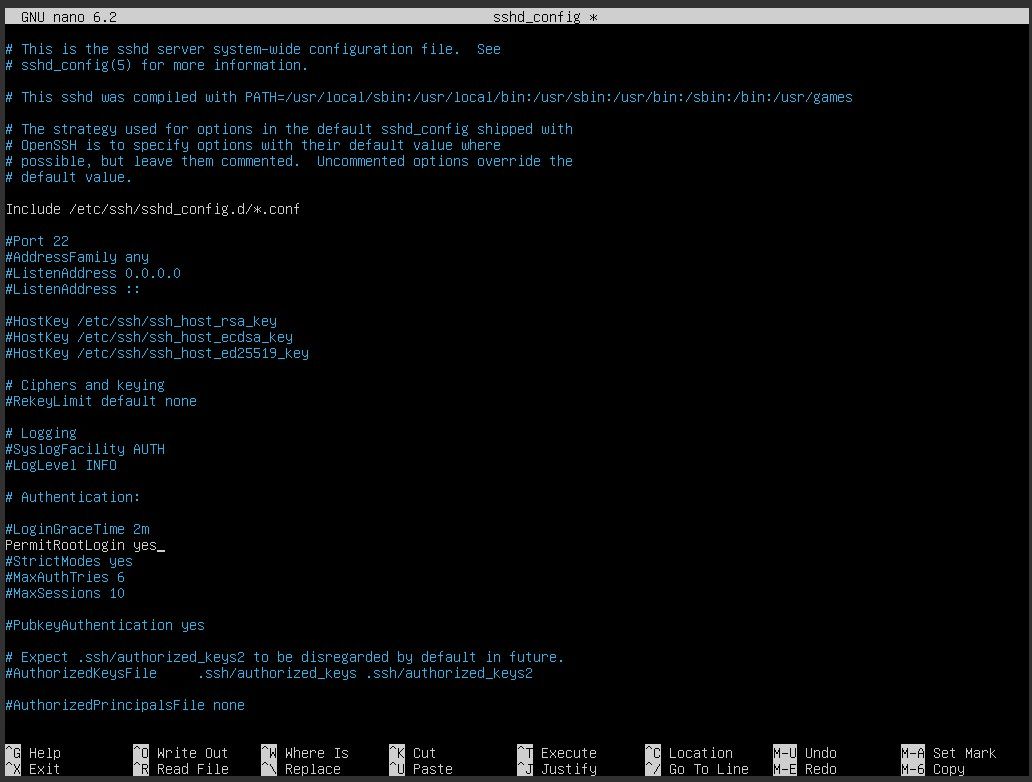
The console provides OOB access and you will be able to log in as root. - Open the SSH configuration file by running the command
sudo nano /etc/ssh/sshd_config - Search for the line that says
PermitRootLoginand set it toyesafter removing the comment #.
You can also refer to the image below.
4. Save the changes to the file by pressing CTRL+X, then Y, then ENTER
Restart the SSH service by running the command sudo systemctl restart ssh
You are now able to log in remotely as the root user.