Installing Windows on a virtual private server (VPS) can be a useful way to test new software, run older applications, or host websites and services. In this tutorial, we'll show you how to install Windows Server on a KVM VPS from AlphaVPS using an ISO file with embedded virtio drivers.
The ISO can be attached to any service plan from either our Intel-based KVM services (https://alphavps.com/kvm-vps.html), our high-performance EPYC-based KVM services (https://alphavps.com/high-performance-vps.html), or our high-performance RYZEN-based KVM services (https://alphavps.com/ryzen-vps.html).
By the end of this tutorial, you'll have a fully functioning Windows installation on your KVM VPS from AlphaVPS.
I promise it won't take very long.
Let's get started!
Mount the ISO
First, you will need to attach the ISO file for the version of Windows you wish to install. This can be done through the control panel.
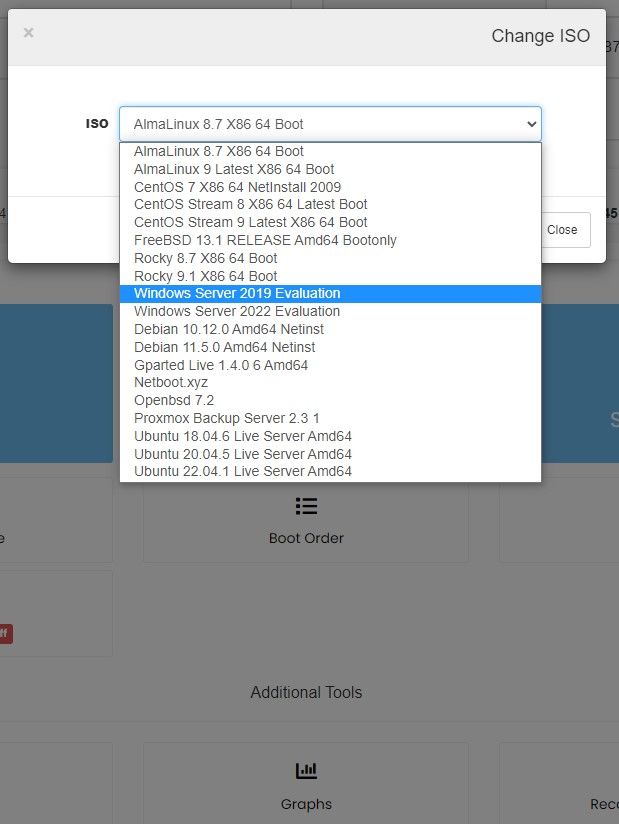
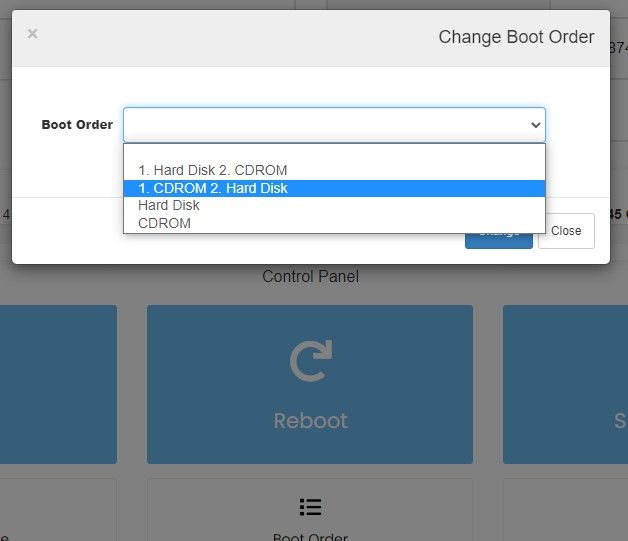
After this is done, you will need to change the boot order of your VPS to CDROM 1st/HDD 2nd or simply CDROM only.
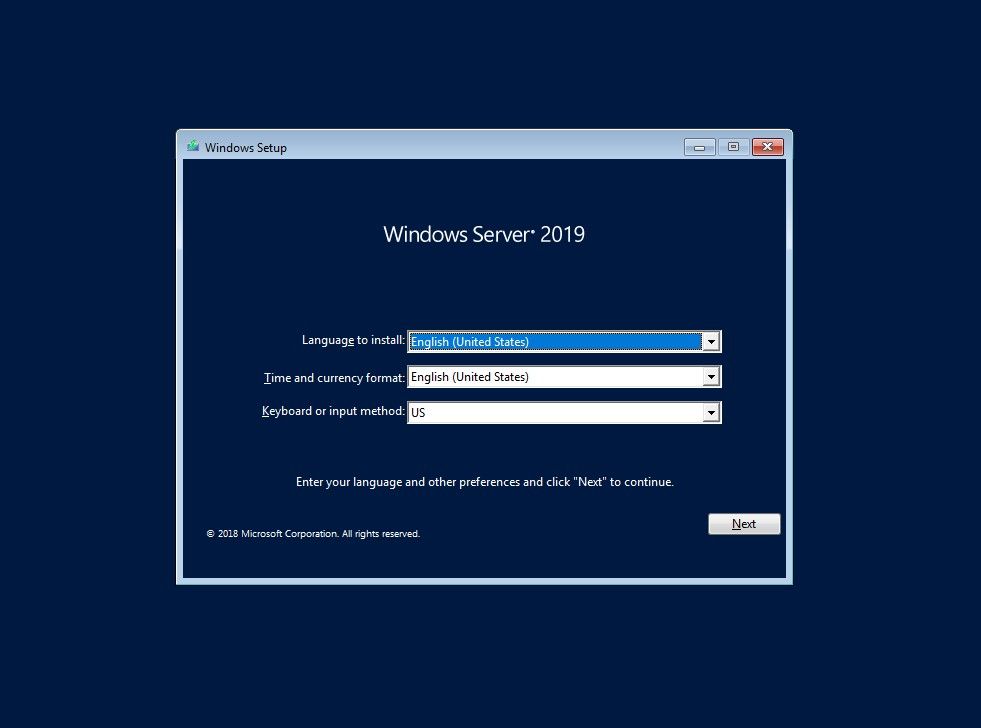
Start the installation
Follow the prompts to install Windows on the virtual machine. This process will be similar to installing Windows on a physical machine.
If you require a GUI to be installed as well, make sure that the "Desktop Experience" version is selected and click on "Next".

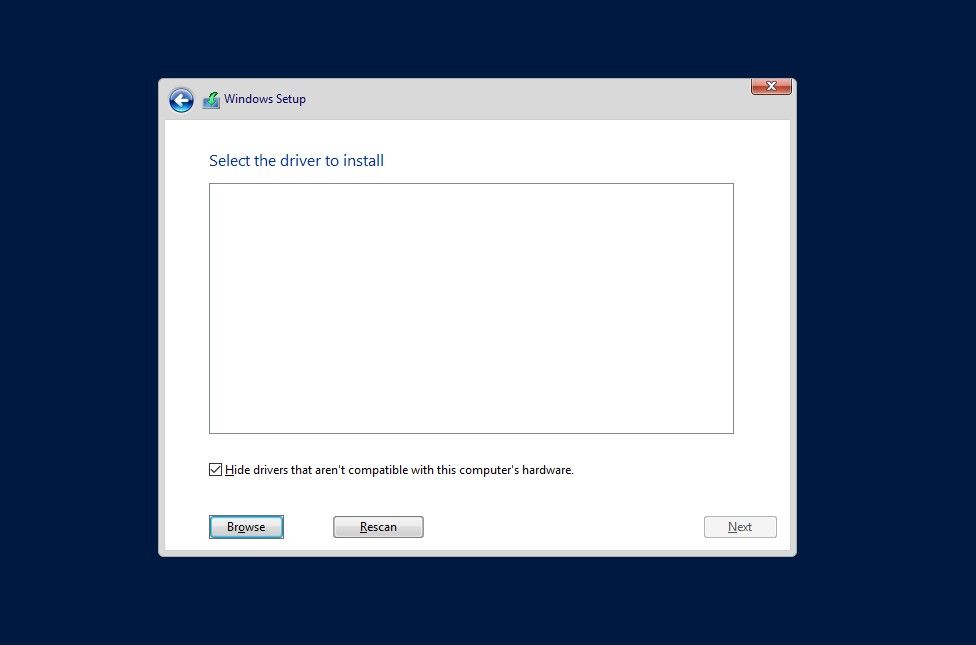
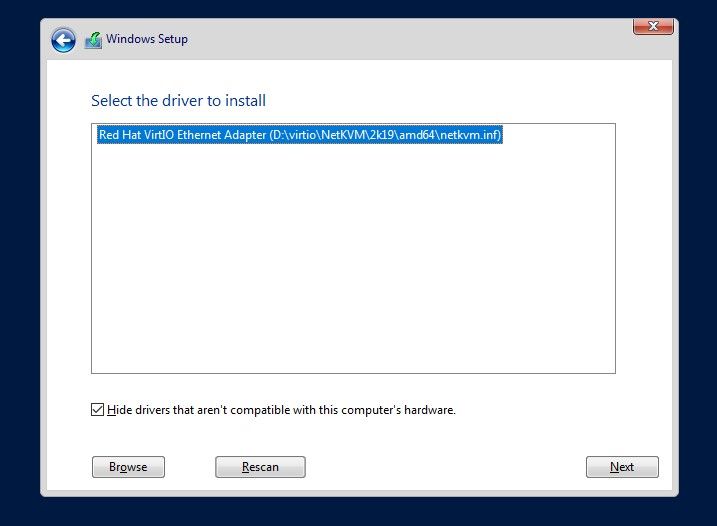
Install Drivers
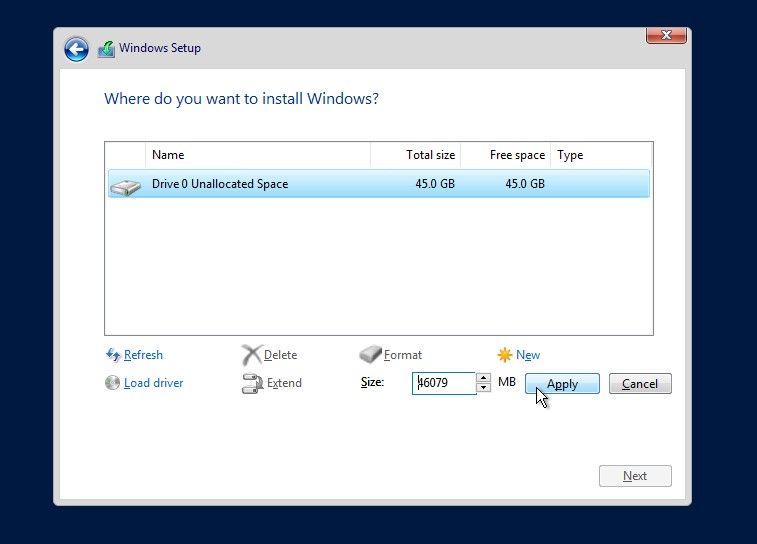
Once the installation is started, you will need to install virtual drivers in order to fully utilize all of the virtual machine's resources and create a partition on which the OS will be installed. The drivers are embedded in the ISO and you will need to load them.
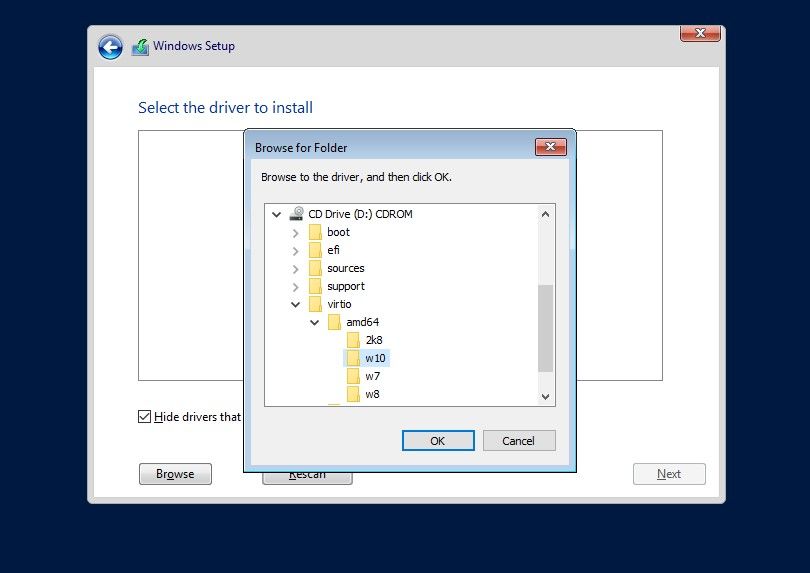
Click on "Browse"
Navigate to your CD-ROM and select the storage drivers. The pathname can be viewed in the image below. The storage drivers can be found in the "amd64" folder.
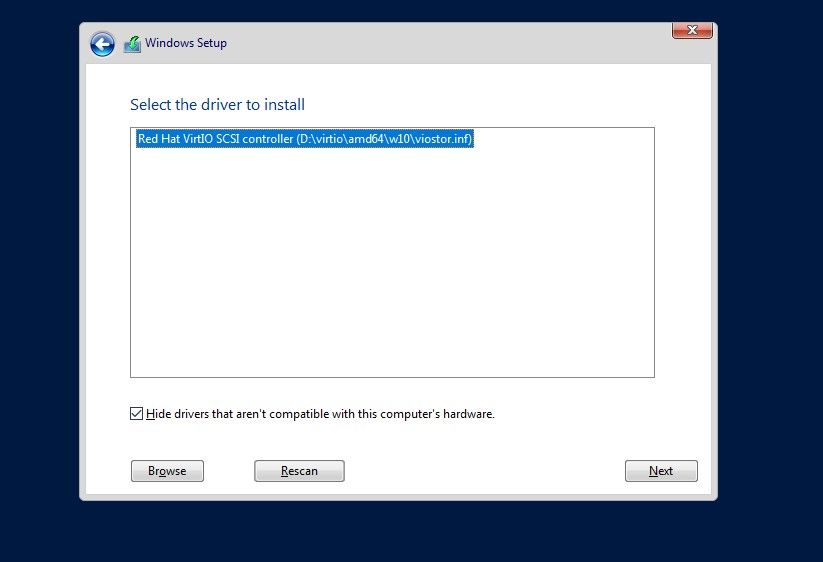
Click "Next" once the drivers are found.
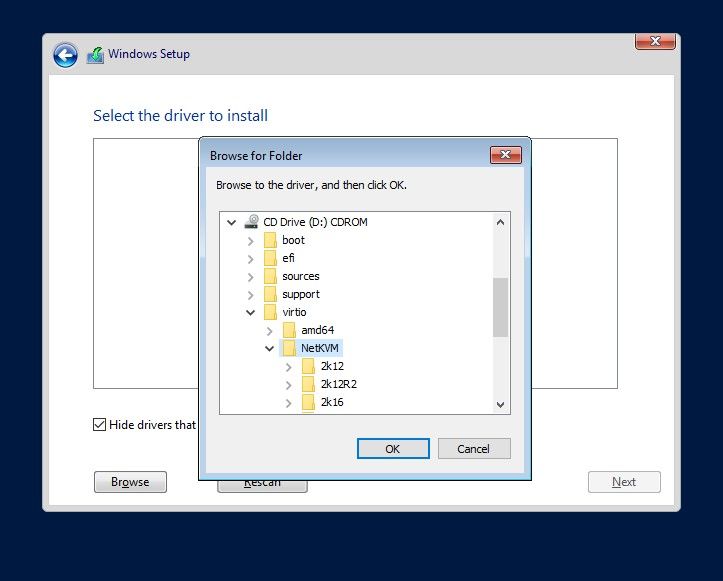
Do the same steps for the network drivers. They can be found in the "NetKVM" folder. The 2k19 drivers will work for both Windows Server 2019 & 2022.
Once the drivers are installed, you will be able to create your partition as per your requirements and continue with the installation.
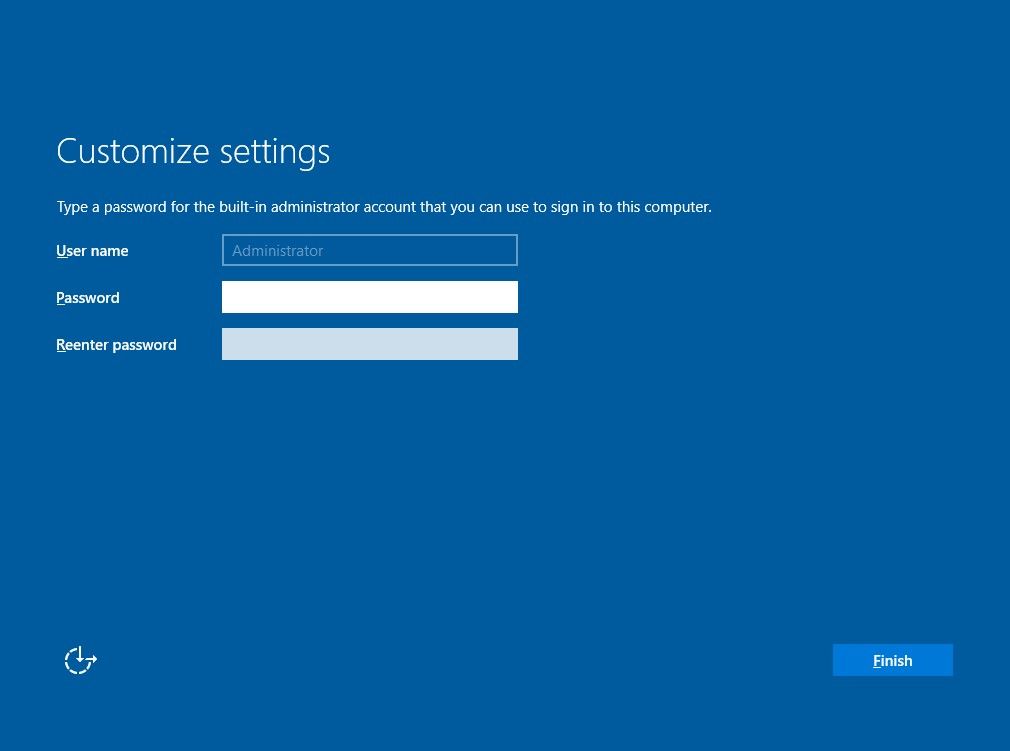
Set Credentials
Set the password and let it finish on its own.
Enable Remote Desktop Connections
Voila! The installation is completed.
All that is left to be done is to enable Remote Desktop Connections.
This can be done by clicking on the "Remote Desktop" button in the Server Manager dashboard. Enable it by selecting the proper radio button and apply the changes.
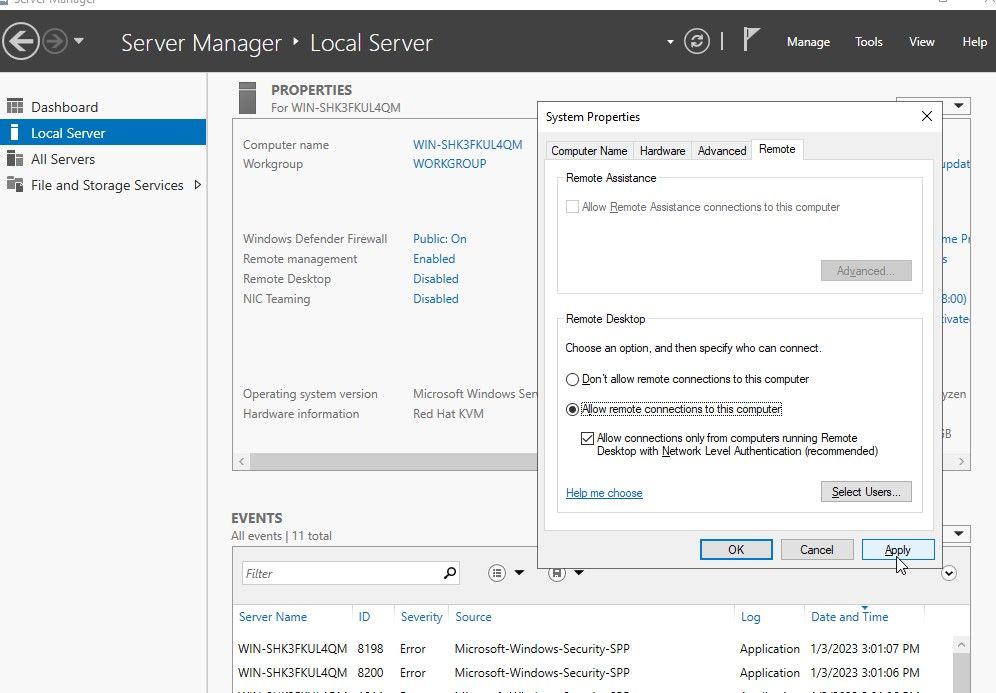
You can now connect to the server via your RDP Client or the OOB console in your clients' area panel.