Kubernetes is the platform of choice for managing, scaling, and deploying containerized applications. The standard Kubernetes set-up (often referred to as "k8s") is complex and resource-intensive for smaller environments. Rancher Labs has developed k3s, a lightweight Kubernetes-compliant distribution.
This guide will walk you through the steps to install K3s on your Linux VPS, whether it's Ubuntu or Debian. We'll explain each step in detail so that you know why you are doing and what you are doing.
Prerequisites
Before you begin, make sure your VPS meets the following requirements:
- Operating System: Ubuntu 24.04 / 22.04 or Debian 12 / 11
- CPU: Minimum 1 vCPU
- Memory: At least 512 MB RAM (1 GB recommended)
- Disk Space: Minimum 5 GB of free space
- Access: Root or sudo privileges
- Network: Stable Internet connection for downloading packages
These specifications are sufficient for running a single-node k3s Kubernetes cluster for testing or lightweight workloads.
How to Install Kubernetes (k3s) on a Linux VPS
K3s were designed to be simple and efficient, so they are perfect for small teams or developers running Kubernetes on virtual private servers.
Step 1: Update Your Server
Make sure that your VPS has the latest security patches and packages installed before installing anything.
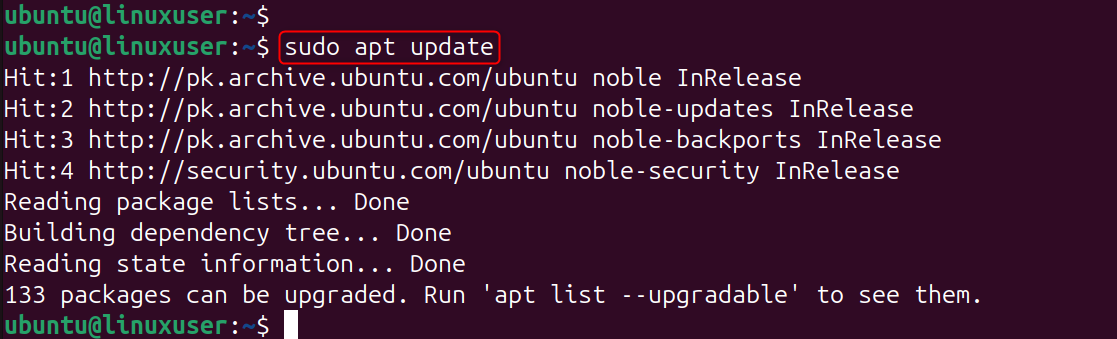
Explanation: Updates ensure you are working with the most recent stable packages and security upgrades. This helps to avoid conflicts and issues during installation.
Step 2: Verify System Requirements
Check that your VPS meets the minimum requirements for K3s.
- Operating System: Ubuntu 22.04 / 20.04 or Debian-based Linux
- CPU: Minimum 1 vCPU
- Memory: Minimum of 512 MB RAM (1GB recommended).
- Disk: Minimum 5 GB free space
- Access: root or sudo privileges
Check your OS and kernel version:

Explanation: fewerK3s is dependent on a modern Linux Kernel and systemd to manage services. These commands are used to confirm compatibility.
Step 3: Disable Swap
For Kubernetes to perform at its best, swap must be disabled.

Explanation:
- Swap memory is immediately disabled by swapoff.
- The second command will comment out any entries for swap in /etc/fstab, ensuring that swap is off after a reboot.
This ensures Kubernetes doesn’t encounter memory management issues, as it expects full control over system memory.
Step 4: Install Curl (if not installed)
We'll use curl to download the remote script that k3s uses.

Explanation: Curl is an application that allows you to send data via URLs. We'll use it to download the k3s script from Rancher servers.
Step 5: Install k3s
Rancher's official install script is the easiest way to install K3s.

Explanation: This command downloads the official installation script of k3s. This is what it does:
- Download the latest stable binary of k3s.
- Sets k3s up as a service in systemd, which means it will start automatically at boot.
- Installs Kubernetes components (API server, controller manager, kubelet, etc.) In a lightweight package.
After it is finished, you will have a Kubernetes cluster with a single node running on your VPS.
Step 6: Verify the Installation
Check the status of k3s:

If it is working properly, you should see Active: active (running). Then, confirm your Kubernetes nodes:

Explanation:
- The systemctl k3s status confirms the service's uptime.
- kubectl check nodes searches the Kubernetes interface for active nodes.
Your VPS should be listed as "Ready" on one node.
Step 7: Access the Kubernetes Configuration
K3s automatically installs Kubectl, the Kubernetes command line tool, and stores its configuration in:

Copy this file to your local machine and replace the server's IP with your VPS public IP.
Explanation: The YAML file contains the credentials and information about your Kubernetes cluster. You can use kubectl, Lens, or the VS Code Kubernetes Extension to manage your cluster remotely by copying the file locally.
Step 8: Deploy a Test Application
Let's install a simple NGINX server to test everything.
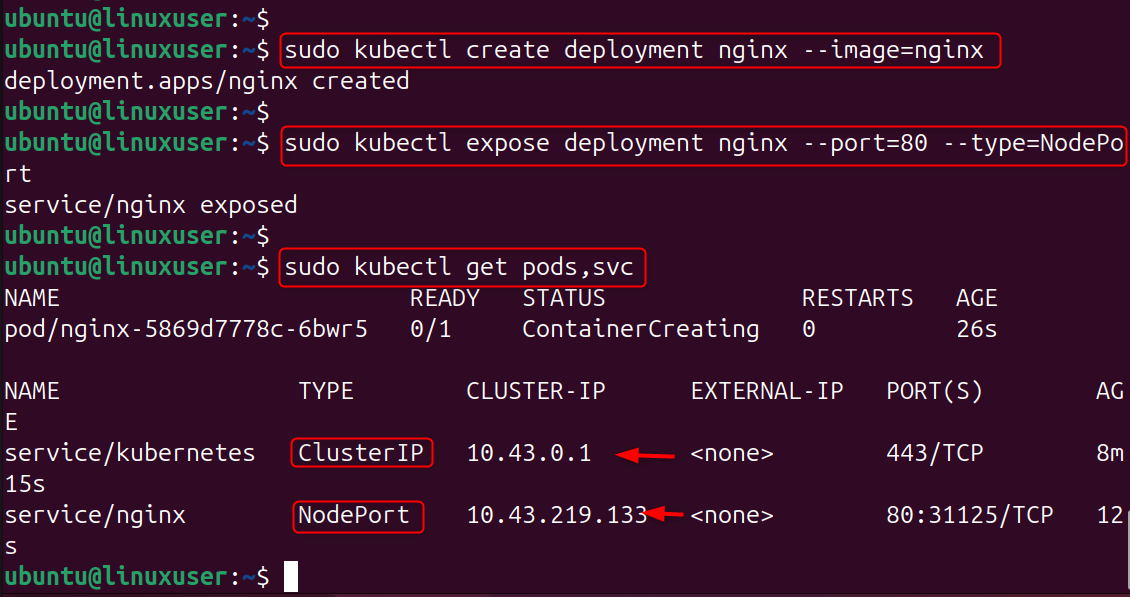
Explanation:
- The first command creates an NGINX deployment using the Docker Hub image.
- The second exposes the service as a NodePort on port 80 – which means it can be accessed via your VPS' IP address and assigned port.
- You can check that everything is running by using the third command.
Find your NGINX via URL:

Open your browser and then:
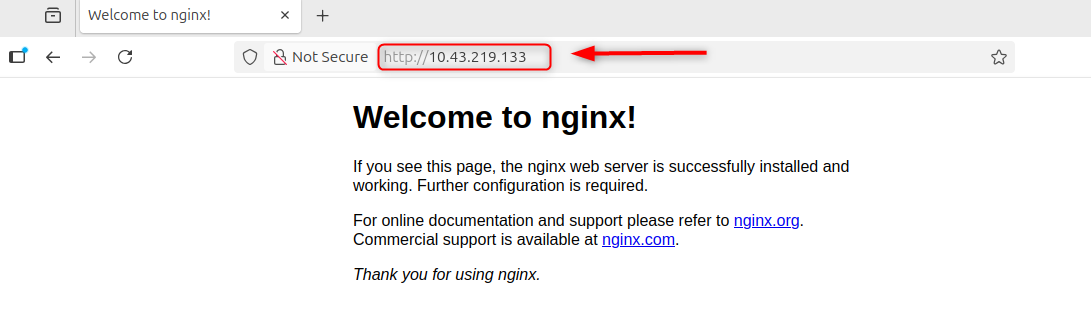
The NGINX Welcome Page should appear – this is a confirmation that your cluster works!
Step 9: (Optional) Set Up a Multi-Node Cluster
Node Join Token is required if you wish to add workers to your cluster:

Explanation: This allows you to connect additional VPS instances, as worker nodes, to your master node. The token is used to ensure secure communication between master and worker nodes.
Step 10: Check Cluster Health
Last but not least, ensure that your cluster is healthy.
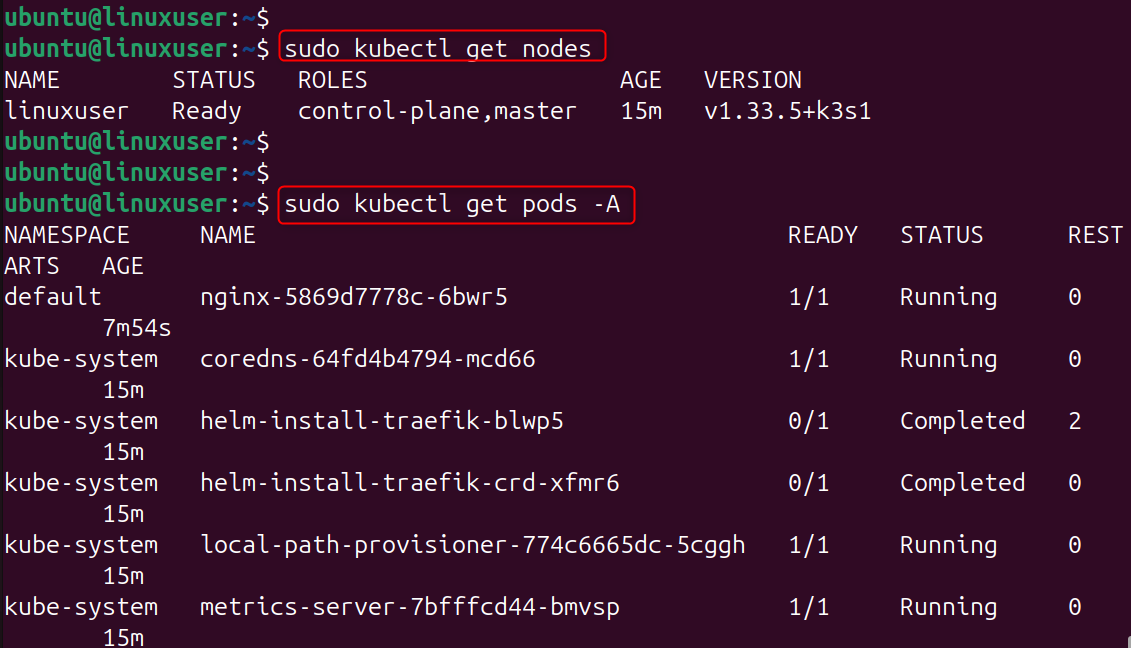
Explanation:
- kubectl list nodes displays all the nodes and their status in your cluster.
- Get pods with kubectl -A shows all pods running across all namespaces.
These commands allow you to monitor the health of your clusters and identify any problems.
Conclusion
Installing k3s on a Linux VPS is one of the fastest and most efficient ways to run a lightweight Kubernetes cluster.
It provides the same core functionality as standard Kubernetes while using far fewer resources — ideal for testing microservices, CI/CD environments, or small-scale production workloads.
By following these steps, you’ve deployed a working Kubernetes environment on your VPS. From here, you can explore more advanced topics such as Helm charts, persistent volumes, or multi-node configurations.
If you’re looking for reliable infrastructure to run Kubernetes, our High-Performance VPS and Dedicated Servers provide the power, isolation, and full-root control you need — with NVMe storage and fast networking that’s perfect for container orchestration.
