Drupal is an open-source content management system (CMS). It allows its users to create, manage, and publish digital content, such as websites, blogs, and online applications. Drupal enables its users to build websites for many different use cases.
Key features of Drupal include:
- Modular architecture, which allows users to create and install various modules to add specific functionalities to their websites.
- Various content types, including articles, images, videos, and more.
- Customizable themes, which can match design requirements.
- Capable of handling high-traffic websites.
- Regular updates and security patches.
- Multilingual capabilities, making it suitable for building websites in multiple languages.
In this tutorial, we are going to show you how to install Drupal on your Ubuntu 22.04 server from AlphaVPS with an active sudo user.
Prerequisite installation and setup
Creating a sudo user
All commands in the tutorial will be executed by a sudo user.
If you do not have an active sudo user, you are able to create a new user and grant sudo privileges by running the following commands:
adduser 'username'
//provide password and confirm it
usermod -aG sudo 'username'
Switch to the user by running:
su 'username'Update packages
We will need to update our installed packages and apt repositories. This can be done by running:
sudo apt update
sudo apt upgrade
Install Apache
The Apache web server can be installed by running:
sudo apt install apache2Start and enable the Apache service by running:
sudo systemctl enable apache2
sudo systemctl start apache2
If your ufw firewall is active, we will need to allow HTTP and HTTPS connections. Do this with the following command:
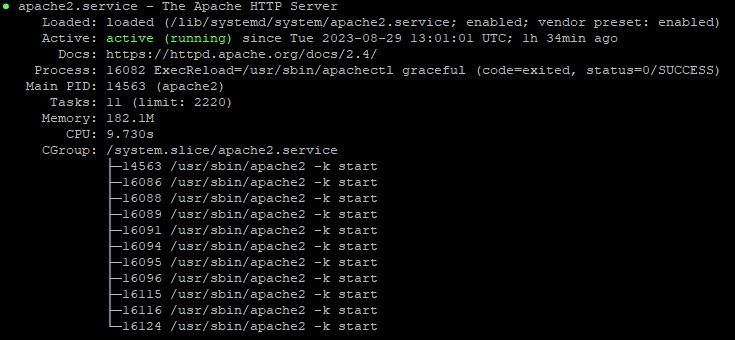
sudo ufw allow 'Apache Full'We are able to confirm our Apache installation with the sudo systemctl status apache2 command. If everything is fine, you will receive similar output:
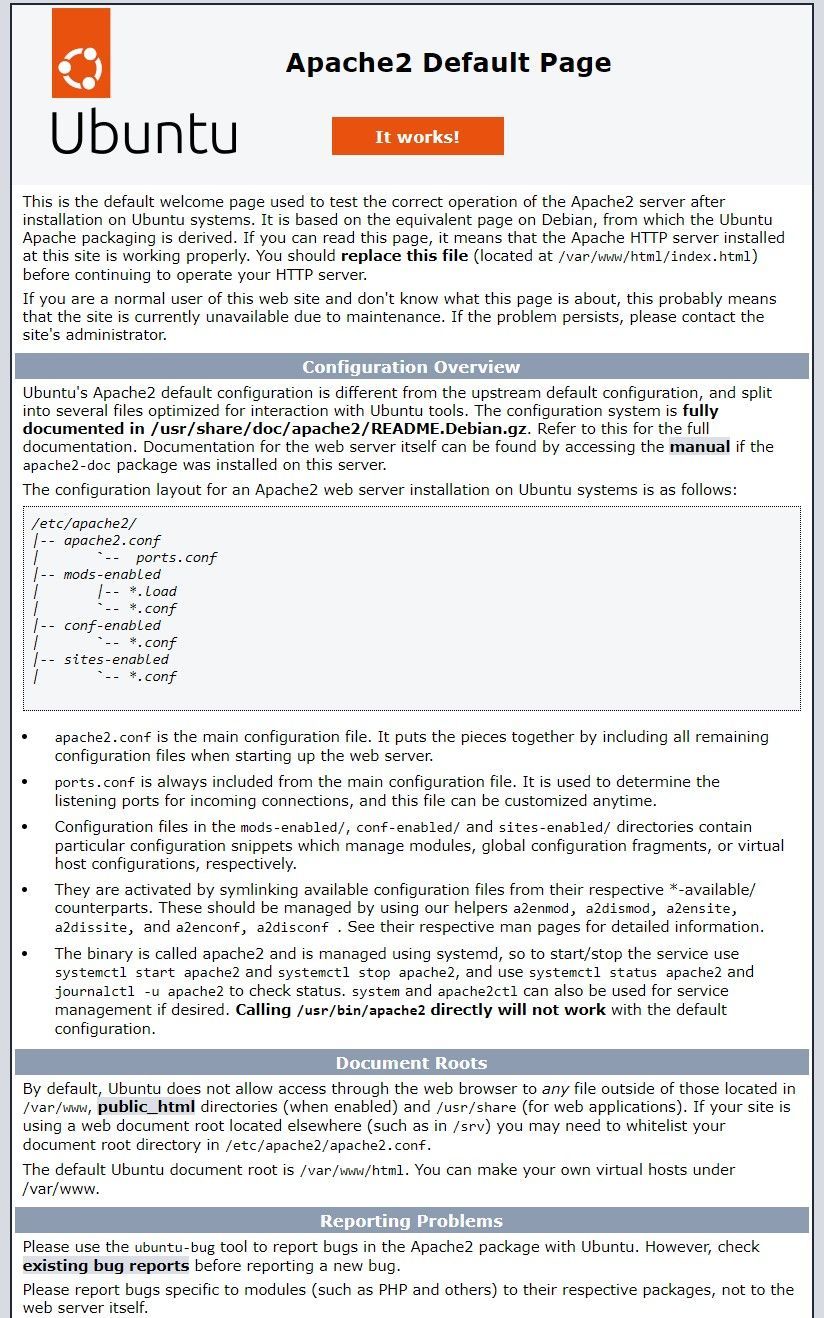
When we access our server via HTTP, we will be presented with Apache's default page.
Installing MySQL
Install, start, and enable MySQL by running:
sudo apt-get install mysql-server
sudo systemctl start mysql
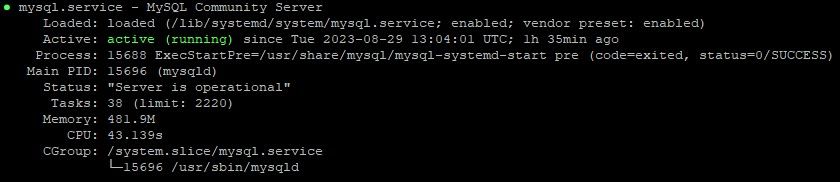
sudo systemctl enable mysqlThe installation can be confirmed with the sudo systemctl status mysql command.
Now we will need to secure the MySQL installation by running the mysql_secure_installation shell script.
mysql_secure_installation script without additional configuration, an error will occur, which will loop the script. We will prevent this by doing the following:sudo mysql
mysql> ALTER USER 'root'@'localhost' IDENTIFIED WITH mysql_native_password BY 'your-password-here';
mysql> exitNow, run the script:
sudo mysql_secure_installationIt is advisable to confirm all of the suggested settings with a y|Y and set your password validation policy to STRONG.
Installing PHP
We can install PHP and the required PHP modules by running:
sudo apt install php libapache2-mod-php php-dev php-bcmath php-intl php-soap php-zip php-curl php-mbstring php-mysql php-gd php-xmlWe can confirm our installation by running php -v

Installing Drupal
Download Drupal
Use the following command to download the latest version of Drupal:
sudo wget https://ftp.drupal.org/files/projects/drupal-9.3.13.zipunzip tool. If not already installed on your system, you can do this by running sudo apt install unzip.Extract the files and specify the directory by running:
sudo unzip drupal-9.3.13.zip -d /var/www/html/The extracted folder's name will probably be drupal-9.3..... For simplification and to avoid any confusion, we will rename it:
sudo mv /var/www/html/drupal-9.3.13/ /var/www/html/drupal/Now, we will need to update the ownership of our directory.
 sudo chown -R www-data:www-data /var/www/html/
 sudo chmod -R 755 /var/www/html/
Create MySQL Database
Prior to finalizing our Drupal installation, we will certainly need to create a database for Drupal. Log in to MySQL by running:
sudo mysql -u root -pOnce logged in, create a new user, database, and grant all the necessary privileges.
mysql> CREATE DATABASE drupal;
mysql> CREATE USER 'your-username-here'@'localhost' IDENTIFIED BY 'your-password-here';
mysql> GRANT ALL ON drupal.* TO 'your-username-here'@'localhost';
mysql> FLUSH PRIVILEGES;
mysql> EXITCreate Apache Virtual Host
We will now need to create a configuration file for our website - a virtual host in our Apache webserver directory. Do this by running:
sudo nano /etc/apache2/sites-available/drupal.confPaste the following configuration in the file and provide your own domain, instead of the placeholders in the example below.
<VirtualHost *:80>

ServerAdmin webmaster@your-domain-here.com

ServerName your-domain.com
ServerAlias www.your-domain-here.com
DocumentRoot /var/www/html/drupal

<Directory /var/www/html/drupal/>
        Options Indexes FollowSymLinks
        AllowOverride All
        Require all granted
</Directory>

ErrorLog ${APACHE_LOG_DIR}/your-domain-here.com_error.log
CustomLog ${APACHE_LOG_DIR}/your-domain-here.com_access.log combined

</VirtualHost>
Save the file and exit.
DocumentRoot line. If your website folder in the /var/www/html directory is named different, modify the line as well.Enable the configuration file by running:
sudo a2ensite drupal.confDisable the default Apache configuration by running:
sudo a2dissite 000-default.confAfter this is completed, restart your Apache web server with:
sudo systemctl restart apache2Web Setup
Once we have finished our Apache configuration, we are able to access our Drupal installation by browser. Navigate to your domain name or IP address - http://your-domain-here.com
We will need to finalize the installation by going through a few additional steps.
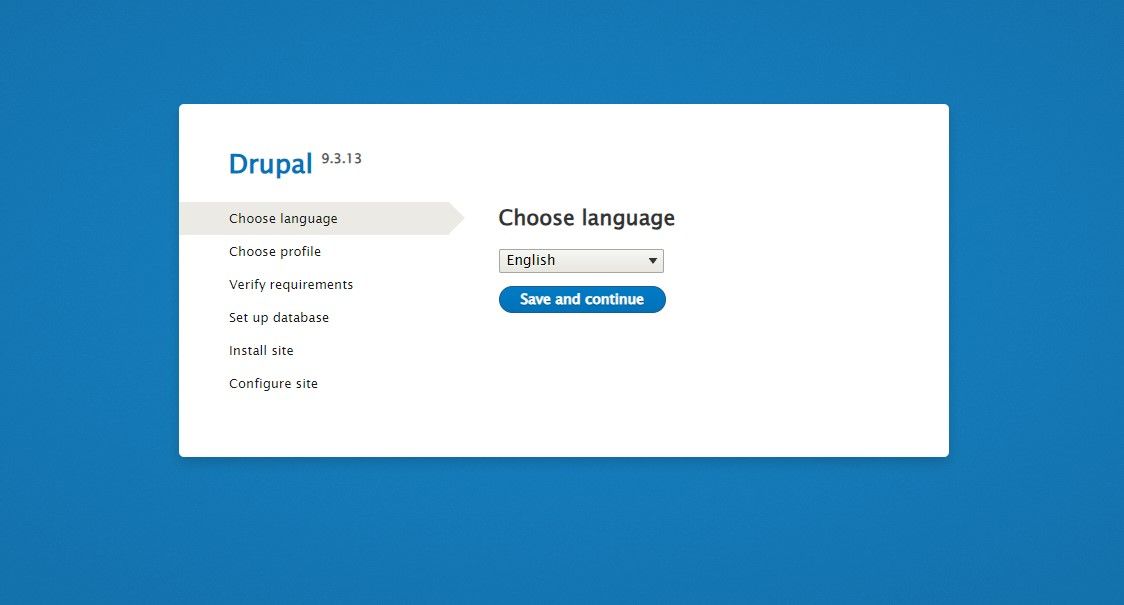
- Choose a language
2. Choose installation type
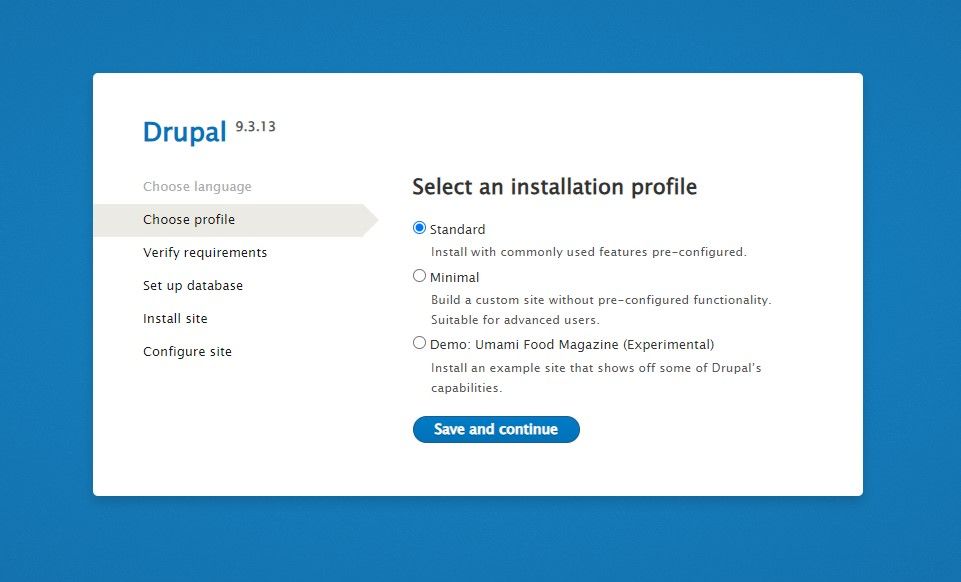
Proceed with standard.
3. Verify requirements
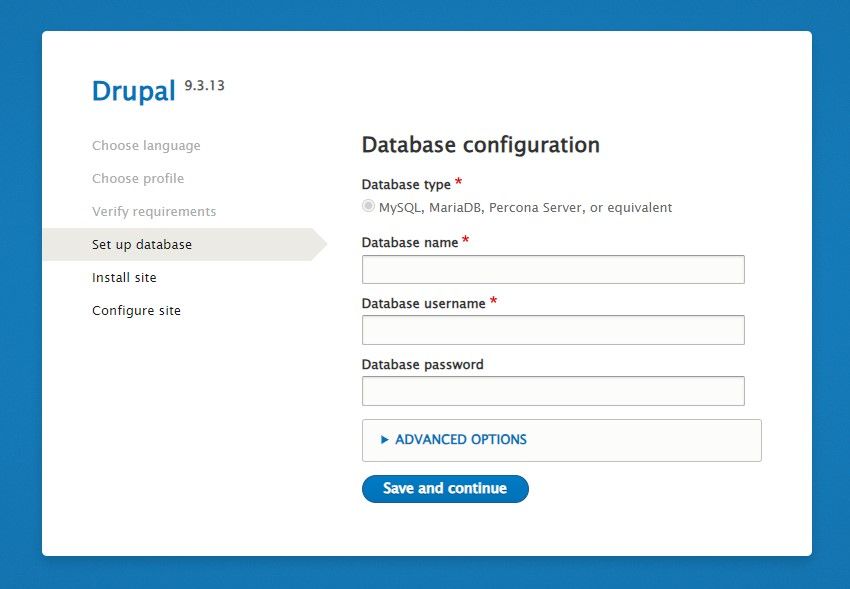
4. Provide database credentials
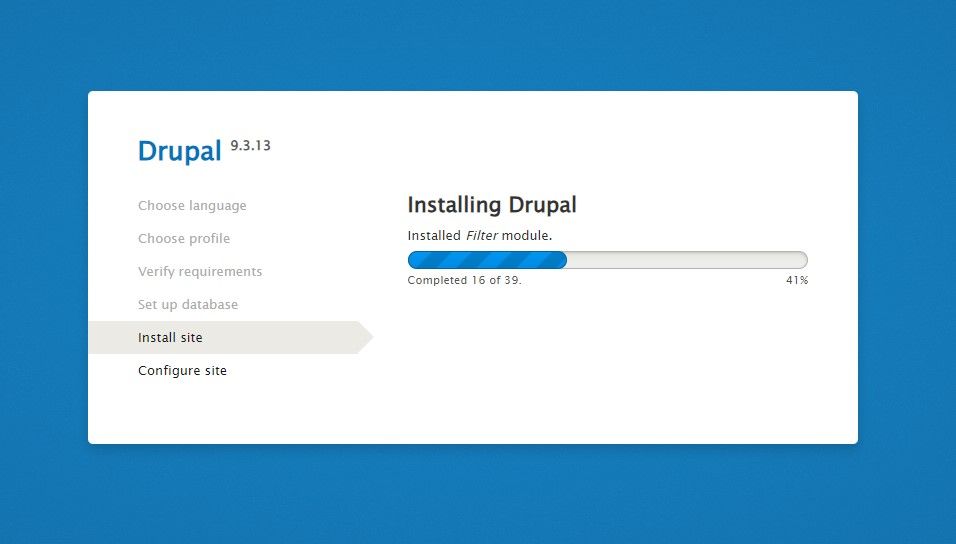
5.Wait for installation process
6.Configure website and set credentials
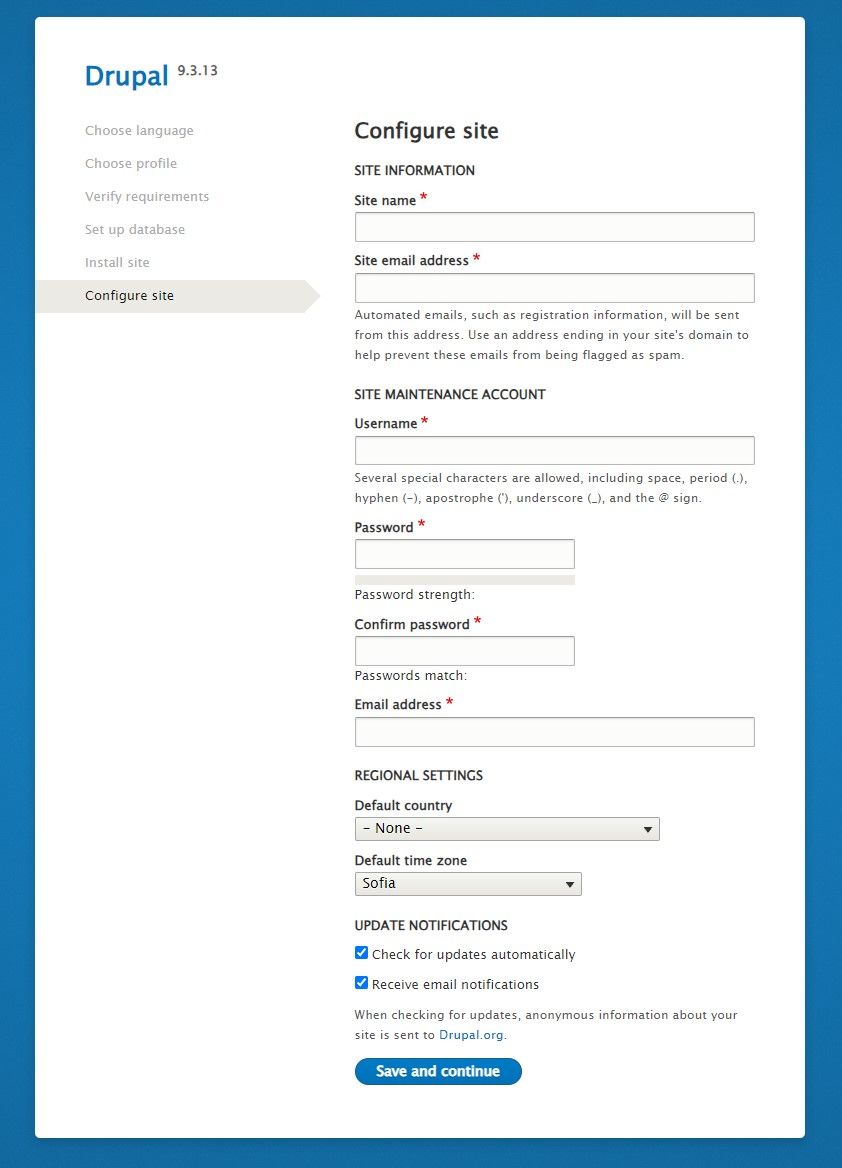
Once all these are set, you are ready and you can proceed with your website setup.
You will be redirected to your management panel.
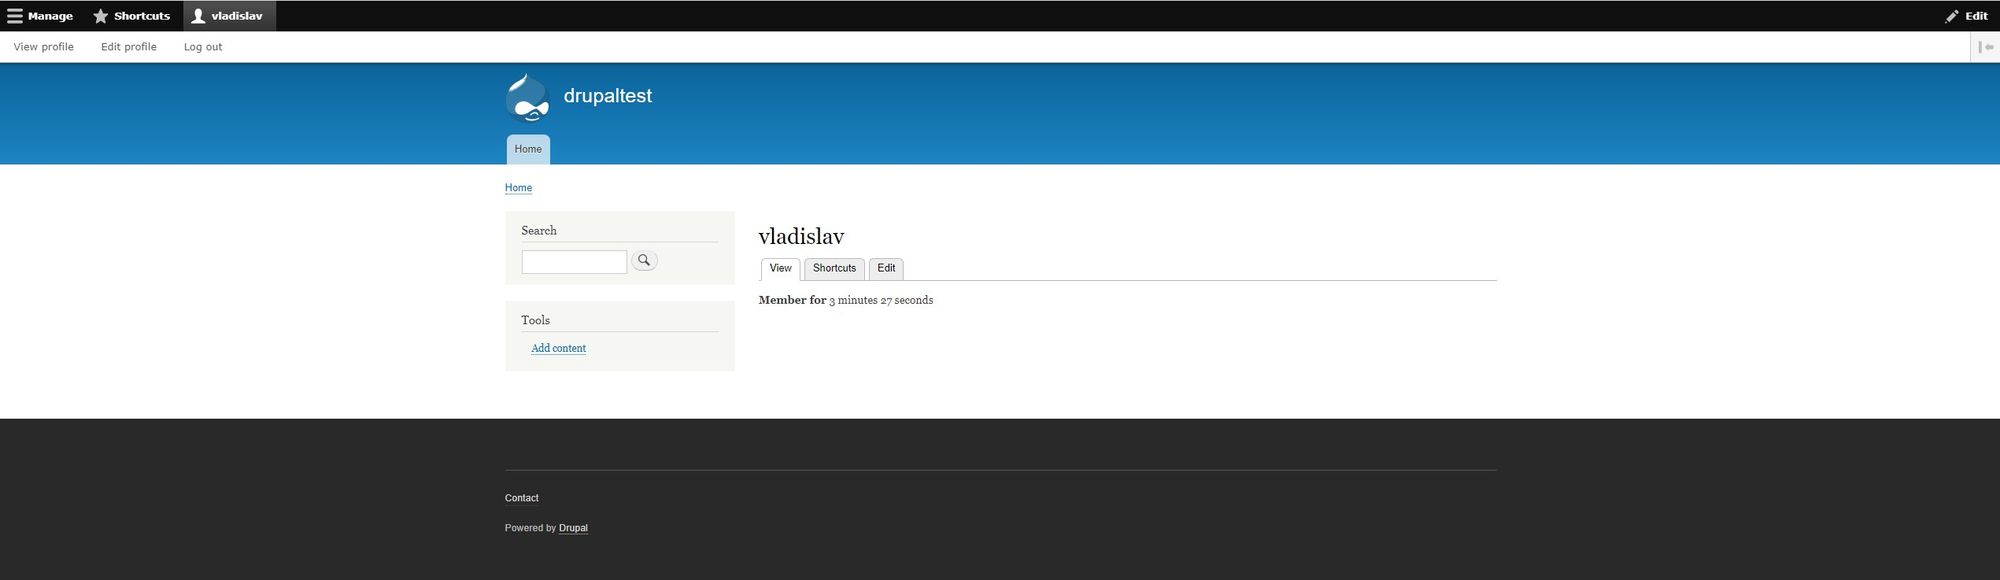
Voila!