> ## Content Index
> Fetch the complete content index at: https://blog.alphavps.com/llms.txt
> Use this file to discover other available public pages before exploring further.
# How to install Caddy web server on Ubuntu 22.04
- URL: https://blog.alphavps.com/how-to-install-caddy-web-server-on-ubuntu-22-04/
- Published: 2024-01-30T09:55:00.000Z
- Updated: 2026-05-22T09:33:39.000Z
- Author: David Filipov
- Tags: Tutorials, Ubuntu, Web Servers
Caddy is a modern, open-source web server that stands out for its automatic HTTPS configuration using Let's Encrypt, simplifying the process of securing websites. It's designed with user-friendliness in mind making it accessible to both beginners and experienced users. Caddy's modular architecture allows easy integration of plugins for extended functionality.
---
## Installing Caddy
Caddy is available on multiple platforms including Windows. For this guide, we are going to install the binaries, but you are also able to compile it from source.
We need to add the required repos and install Caddy :
```
sudo apt install -y debian-keyring debian-archive-keyring apt-transport-https
curl -1sLf 'https://dl.cloudsmith.io/public/caddy/stable/gpg.key' | sudo gpg --dearmor -o /usr/share/keyrings/caddy-stable-archive-keyring.gpg
curl -1sLf 'https://dl.cloudsmith.io/public/caddy/stable/debian.deb.txt' | sudo tee /etc/apt/sources.list.d/caddy-stable.list
sudo apt update
sudo apt install caddy
```
installing this package automatically starts and runs Caddy as a systemd service named **caddy**. It also comes with an optional caddy-api service which is used if you primarily configure Caddy via its API instead of config files.
Then we will enable and start Caddy.
```
systemctl enable caddy && systemctl start caddy
```
We can check if everything with the status flag of systemctl:
```
systemctl status caddy
```
Output:
```
caddy.service - Caddy
Loaded: loaded (/lib/systemd/system/caddy.service; enabled; vendor preset: enabled)
Active: active (running) since Mon 2023-08-28 10:44:07 UTC; 1min 19s ago
Docs: https://caddyserver.com/docs/
Main PID: 154914 (caddy)
Tasks: 6 (limit: 2274)
Memory: 10.3M
CGroup: /system.slice/caddy.service
└─154914 /usr/bin/caddy run --environ --config /etc/caddy/Caddyfile
```
---
## Adding modules
One of the most popular features of Caddy is the ease of installing different modules to suit your needs. The process is very streamlined. The only caveat is, if you have already installed Caddy you will need to download the program anew, selecting the modules you want installed, or recompile it with the appropriate flags. We will touch only on the standard download. Go to this page [https://caddyserver.com/download](https://caddyserver.com/download?ref=blog.alphavps.com). Select your platform, in our case Linux amd64, click on the modules you wish to be included with your installation, and click on download.
After the installation is done you can check the modules installed by running the following command:
```
caddy list-modules
```
To add a module you will need to visit their GitHub page because their configuration varies. As an example let's say that you want to add the Cloudflare module. By visiting their GitHub repo we can see that we need to add the following to our Caddyfile with the appropriate token:
```
tls {
dns cloudflare {env.CF_API_TOKEN}
}
```
---
## Configure Caddy
You are able to configure Caddy both with standard config files and through the API using Json files. We will go over both methods starting with the standard file configuration.
### Caddyfile and .html configuration
Create the /var/www/html directory if it doesn't already exist with the following command:
```
mkdir -p /var/www/html
```
Here we will place the .html files of our site. You can use the example file provided here for testing purposes.
```
Hello from Caddy!
Hello World
```
Then we will need to edit the /etc/caddy/Caddyfile with the text editor of your choice:
```
nano /etc/caddy/Caddyfile
```
```
root * /var/www/html
file_server
```
There might be a lot more text when you open the Caddyfile, but these settings are all that's needed for setting up a basic website.
Now reload Caddy with the following command:
```
systemctl reload caddy
```
Now in our web browser type the domain that we put in the config file and we will get the following page:
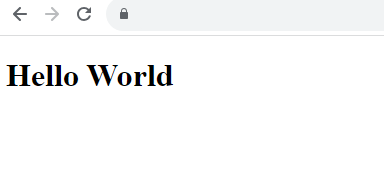
As you can see by the lock at the top right, the site is automatically HTTPS certified, which is one of the main features of Caddy
💡
For the automatic https to work would will need a domain name with a set A record pointing to a valid IP.
### JSON and API configuration
The endpoint by default is **localhost:2019\.** This can be changedby setting the **CADDY\_ADMIN** environment variable. We will be using the default endpoint.
We will need to create a .json file for our configuration.
```
nano config.json
```
```
{
"apps": {
"http": {
"servers": {
"my_server": {
"listen": [":443"],
"routes": [
{
"handle": [
{
"handler": "static_response",
"body": "Hello world"
}
],
"match": [
{
"host": [Your_Domain_here]
}
]
}
]
}
}
}
}
}
```
Now to run the .json file with the API type the following command:
```
curl localhost:2019/load \
-H "Content-Type: application/json" \
-d @config.json
```
You can either go to your domain in your browser or use curl to verify that everything works:
```
curl
Hello world
```
You are also able to use the API with Caddyfile configuration with the following synaxis:
```
curl "http://localhost:2019/load" \
-H "Content-Type: text/caddyfile" \
--data-binary @Caddyfile
```
Here are some useful API calls that might come in handy.
## Caddy API Calls
| API Call | Description |
| --------- | ----------------------------------------------------------- |
| /config | Retrieve the current Caddy configuration. |
| /load | Load a new configuration into Caddy (does not activate it). |
| /validate | Validate the configuration for errors without loading it. |
| /reload | Reload the active configuration, applying any changes. |
| /stop | Stop the Caddy server gracefully. |
| /status | Check the status of the Caddy server. |