Apache Tomcat is the most widely used open-source Java application server developed by the Apache Software Foundation and built for deploying Java Servlets and JSPs. Tomcat is now a lightweight but highly extensible and detailed server for developing into a cross-cutting set of development applications, making it probably the best known and most used free or open source servlet container. Setting up Apache Tomcat on a VPS You can host your web application that is capable of serving dynamic web pages using Tomcat.
In this tutorial, we will show you how to install Apache Tomcat 8 on an Ubuntu 24.04 VPS and have it run under the default Tomcat user account, making your installation more secure from potential attacks.
If you’re deploying Java apps that benefit from strong CPU and fast NVMe, our High-Performance VPS line is a great match: balanced compute, fast storage, and full root access for Java/Tomcat stacks.
👉 https://alphavps.com/high-performance-vps.html
If you’re just testing Tomcat or running small dev demos, start lean with our Cheap VPS and scale later:
👉 https://alphavps.com/cheap-vps.html
I’ll walk through each step with commands and explanations.
How to Install Apache Tomcat on an Ubuntu 24.04 VPS
For developers and system administrators who need a reliable, scalable Java application server built using the professional-quality open source package from the Apache Software Foundation, Tomcat will be a backbone for anyone navigating their Ubuntu 24.04 VPS looking for performance, stability, and dependability.
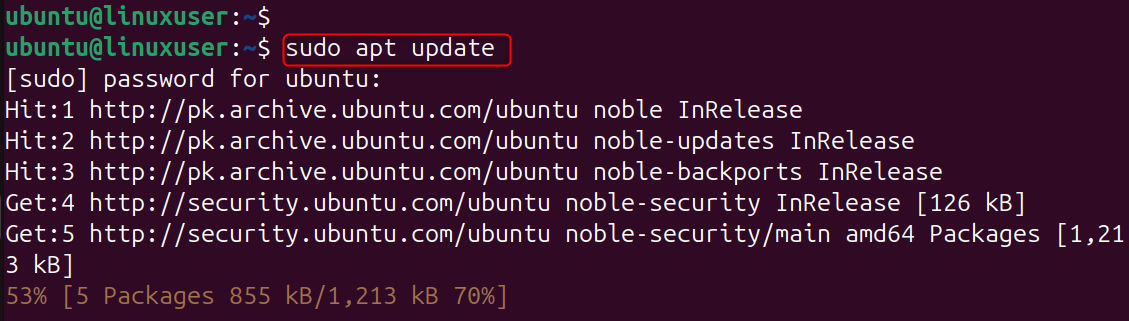
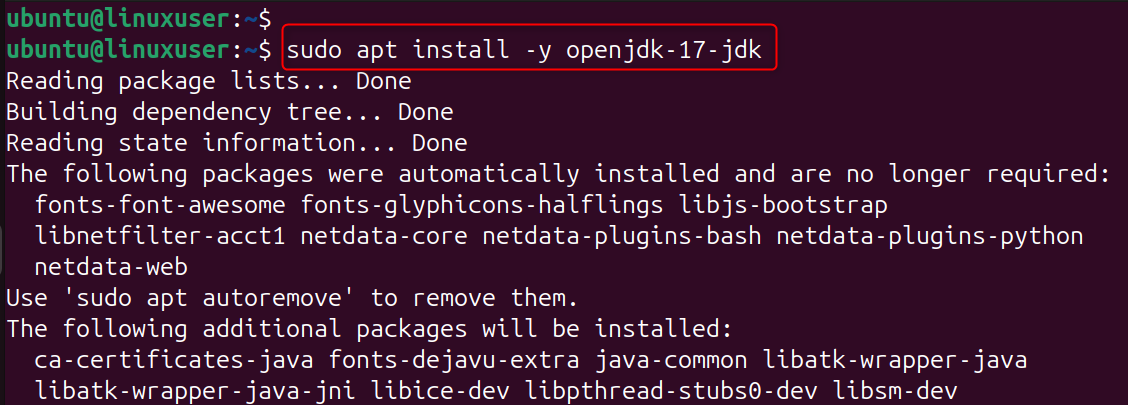
Step 1: Update packages & install Java
Tomcat runs on Java. Install an up-to-date OpenJDK (Tomcat 10.1 is built with OpenJDK 18) x needs Java 11+). Check on their site for what Java version your version of Tomcat needs.
Install OpenJDK 17 (safe and modern default). If you prefer, you can also use openjdk-11-jdk. Tomcat is a Java servlet container; it needs JRE/JDK.
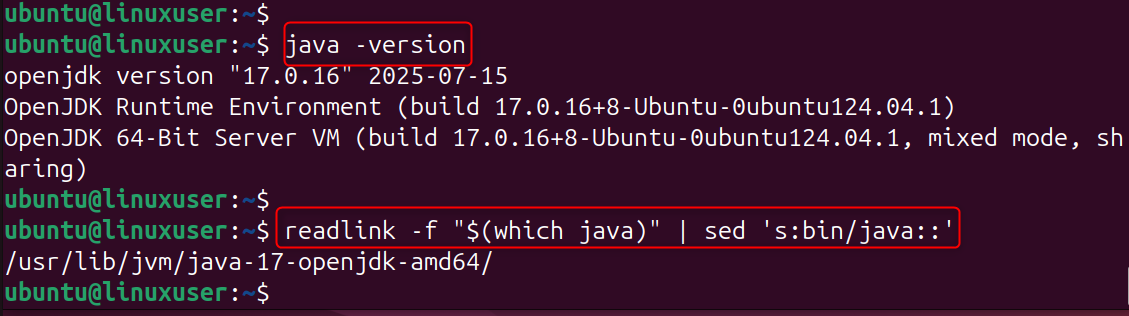
Verify Java:
From the above command, Java is installed. First, the readlink | sed command prints the JAVA_HOME path (to then be able to populate correctly with Help in editing here) systemd file.
Step 2: Create a dedicated Tomcat user
Running Tomcat as a stand-alone user lowers the attack vector: if an attacker compromises Tomcat, there is only limited access to the system. Use a non-privileged user to start Tomcat for security.

Step 3: Download Tomcat
Choose the latest stable Tomcat release (below is an example with 10.1.47 – go to the Tomcat download page and mirrors for the current). Always choose the Official Releases download and check their checksums/signatures.
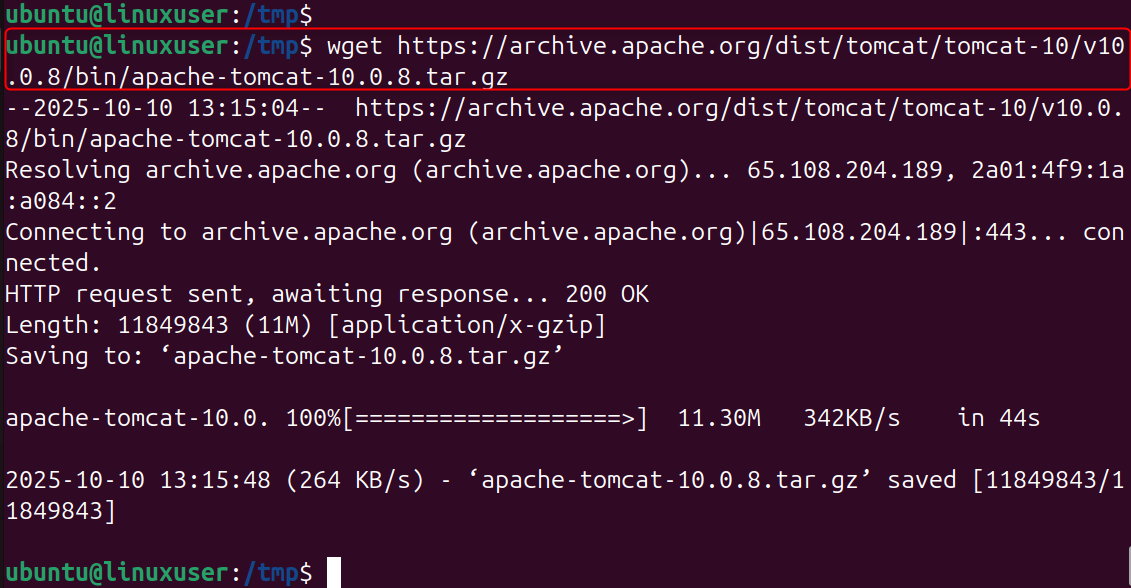
Extract to /opt/tomcat:
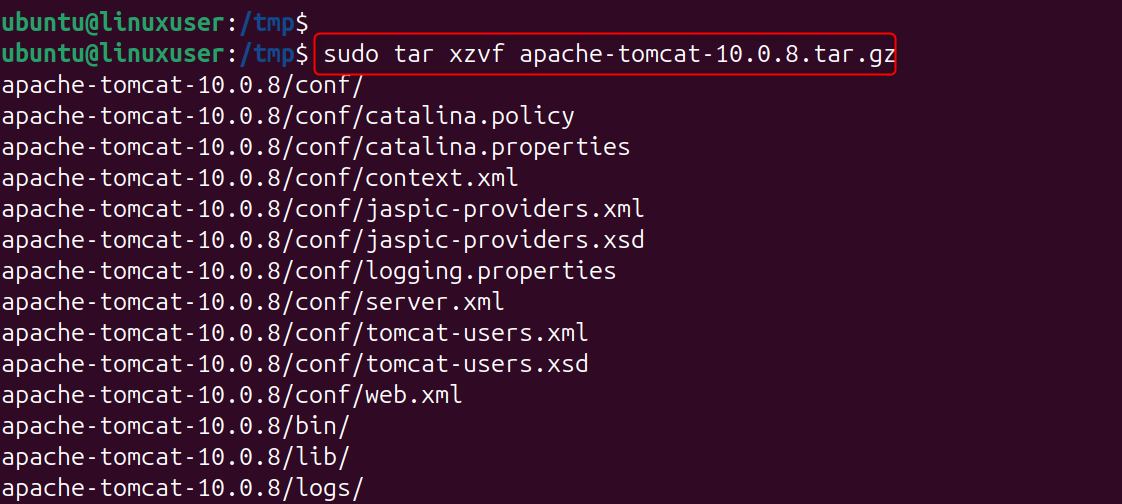
/opt is the usual place for optional or third-party software. When you go this route, your Tomcat will be kept separately from system-wide packages, and upgrades will be simpler in the future.

Note - check your downloads: Tomcat new SHA512 checksums and OpenPGP signatures; it is recommended to check before posting the production. It is suggested by the Tomcat download page.
Step 4: Set ownership and adjust permissions
Tomcat needs to read its conf files, write logs/work/temp, and execute scripts. Assigning ownership to a loyal end-user also makes the system secure and predictable.
Enter the user and group that should own the installation, tomcat in this example.

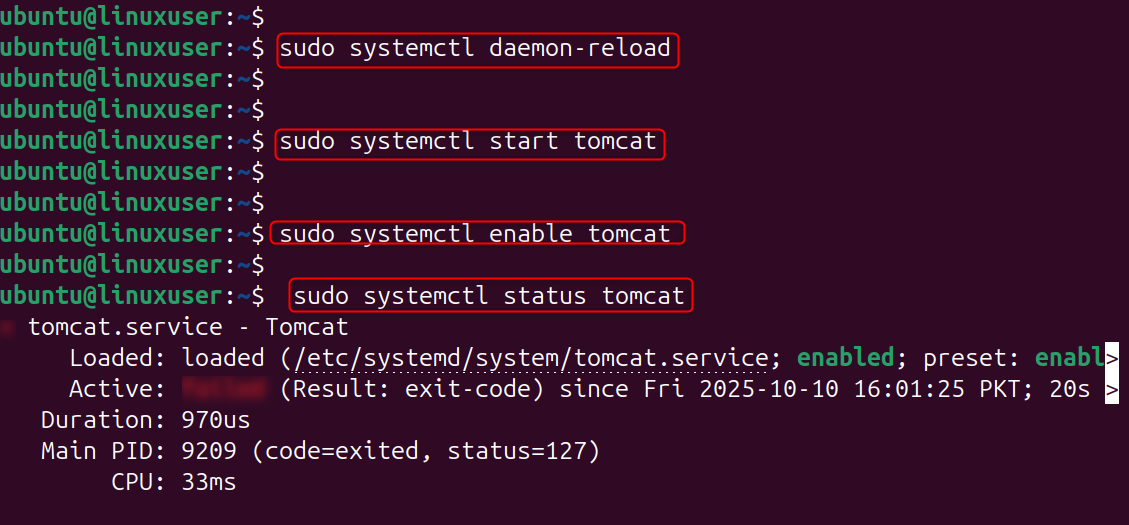
Step 5: Create a systemd unit
Then create a systemd service to control Tomcat just like any other service.
Step 6: Manage systemd services
systemd takes care of the process lifecycle, resets it when it crashes, and will autostart Tomcat on boot.
Then enable and start:
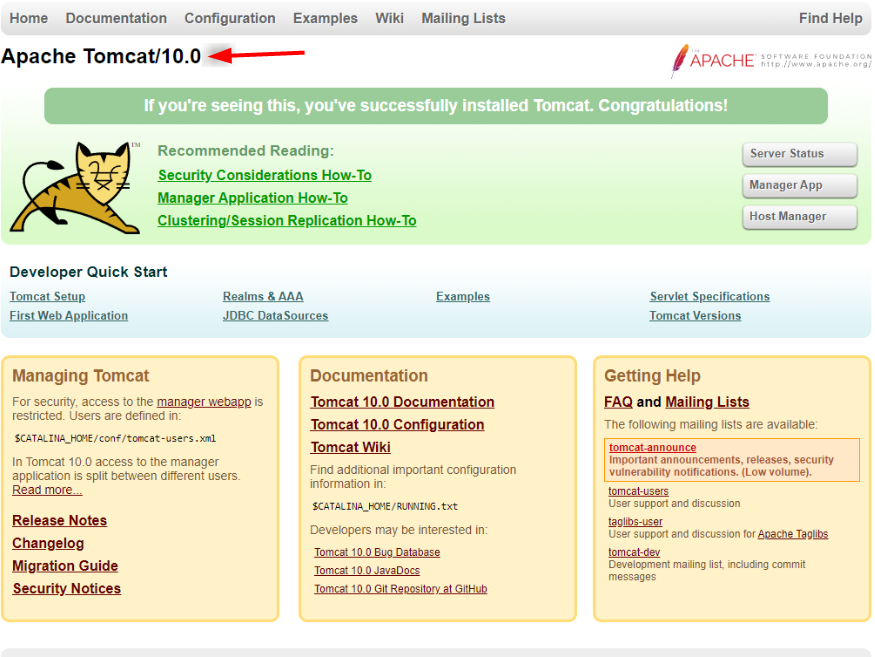
Step 7: Test that Tomcat is running
It will be great to check the status of the process and HTTP response to see if Tomcat is up, listening to the port, or not. Now go to http://YOUR_SERVER_IP:8080/ from your desktop — you should see the Tomcat welcome page:
That is all from the guide.
Conclusion
Few additions are as important and simple on a Ubuntu 24.04 VPS as installing Apache Tomcat. By completing the steps to install Java, creating a new Tomcat user, downloading and configuring your server for Tomcat, and then configuring a systemd service file, you are securing your system to ensure that it runs not only efficiently but securely.
If you’re looking for a High-Performance VPS, get in touch with us — we’ll help you find the perfect solution for your business needs.
