
GIT is a widely used distributed version control system that allows a team of developers to work on the same project simultaneously. This allows them to collaborate on a project efficiently.
In this tutorial, we will familiarize you with the basics of GIT, install it, configure it, and provide you with common commands about it.
What is GIT?
Git is a version control system - a 'time machine' for your project, which allows multiple developers to work on it and keep track of all changes and development stages. If required, developers are able to revert to previous versions/development stages of the project.
Each developer has the entire project history. This allows all developers to work offline and independently until merging their changes with the main project.
A GIT repository is a central storage location for a project. The repository contains all files, directories, and the complete history of changes made to that project. GIT repositories are often hosted on remote servers such as GitHub, GitLab, or Bitbucket. For example, GitHub is a web-based hosting platform and collaboration tool built around GIT.
GIT allows developers to create separate branches to work independently on the project - either for bringing new features, bug fixing, or simply testing. Branching enables parallel development without affecting the main project. Once the changes in a branch are tested and deemed ready, they can be merged back into the main branch.
Installing GIT
For this tutorial, we are going to use an Ubuntu 22.04 VPS from AlphaVPS, but the installation is relatively straightforward even if you are working with an entirely different Linux distribution.
GIT is included in almost every /if not every/ Linux distribution's default software repository.
You simply need to run:
sudo apt install gitThe installation can be confirmed by running:
git -–versionConfiguring GIT
The git config command allows you to customize your Git environment. These customizations will persist between upgrades.
Setting up user identity
First, we will need to set our user name and email address. A GIT commit uses this information, and it’s immutably added to the commits you process.
You do this only once by passing the --global flag. Git will always use that information for anything you do on that system.
We can do this with the following two commands:
$ git config --global user.name "user-name-here"
$ git config --global user.email email@email.com
Configuring text editor
You are able to set the default text editor that will be used when Git needs you to type in a message.
You are able to do this by running the following command:
git config --global core.editor 'text-editor-name-here'Some example commands are:
git config --global core.editor nano
git config --global core.editor vim
If you want to check your current GIT configuration, you can use the git config --list command to list them all.
Connecting Git with your GitHub account
Using SSH for GIT operations offers secure authentication, convenience, and automation capabilities. It is the recommended method for interacting with Git repositories, including those hosted on GitHub.
SSH provides a secure channel over an unsecured network.
You will need to create a new SSH key pair /or you can simply use the ones, which you already have available/. You are able to do this with the following command:
ssh-keygen -t ed25519 -C "your_email@example.com"
You will be prompted to confirm the file name in which the generated key will be saved, provide a passphrase and re-confirm it. The passphrases are optional but recommended for additional security.
You will receive a similar output:
Your identification has been saved in /root/.ssh/id_ed25519
Your public key has been saved in /root/.ssh/id_ed25519.pub
The key fingerprint is:
SHA256:x35eDDg3jV18nhJdYL2WThy7Vo2LPia35ch7sPKn4RE example@mail.com
The key's randomart image is:
+--[ED25519 256]--+
|              oo.|
|             ..oo|
|             ..oX|
|         . . +oX=|
|        S = Eo*o+|
|         o oo=o+ |
|          ..+o=  |
|          o=*Bo  |
|           *XB.  |
+----[SHA256]-----+
Now we will need to add the generated SSH key to the ssh-agent.
We can confirm that it is running with the following command:
eval "$(ssh-agent -s)"Expect similar output:
Agent pid 121818We can now add our private key to the ssh-agent by running:
ssh-add /root/.ssh/id_ed25519.pub
The next step is to add your public key to your GitHub account.
The command below will provide you with the file contents:
cat /root/.ssh/id_ed25519.pubCopy them, open your browser, and log in to your GitHub account.
Go to your account settings and navigate to the SSH/GPG keys tab in the access section.
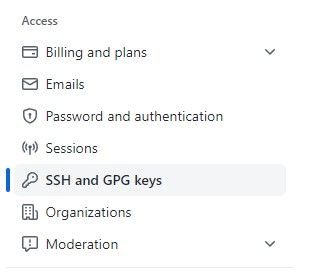
You will be redirected to:

Click on the New SSH key button and add it by pasting the contents in the specified field.
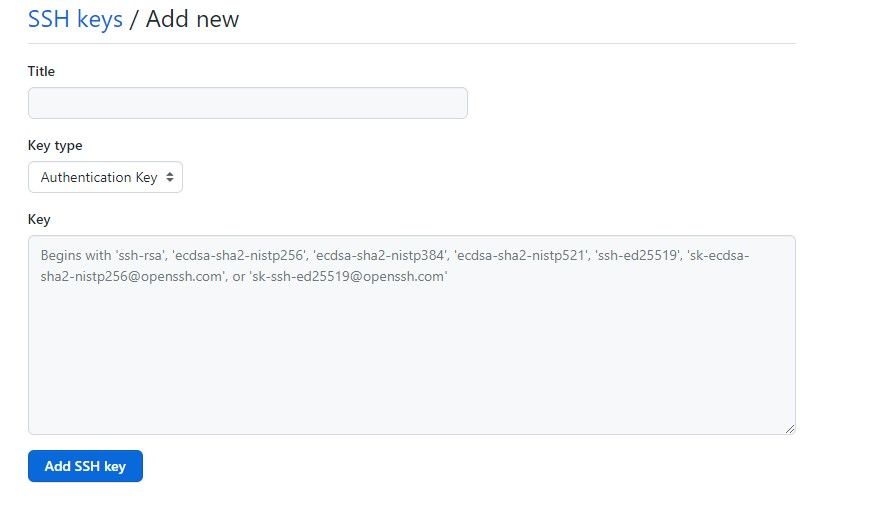
Specify the key type as Authentication key and name it by adding a descriptive label in the title field.
Once done, confirm the provided key by clicking on the Add SSH key button.
For more information on Git and common commands, you can check our guide here.