> ## Content Index
> Fetch the complete content index at: https://blog.alphavps.com/llms.txt
> Use this file to discover other available public pages before exploring further.
# How to install a LEMP stack on Ubuntu 22.04
- URL: https://blog.alphavps.com/how-to-install-a-lemp-stack-on-ubuntu-22-04/
- Published: 2023-05-04T13:31:36.000Z
- Updated: 2023-05-04T13:31:36.000Z
- Author: Vladislav Peev
- Tags: Tutorials, Ubuntu, Web Servers, #series-lamp-lemp
The LEMP stack is a popular web development platform that consists of four main components: **Linux** operating system, **Nginx** web server, **MySQL** database, and **PHP**.
It is a combination of software that isused together to run dynamic websites and web apps on a server - a powerful web development platform that can handle a wide range of web applications and workloads.
It is a popular alternative to the more commonly known LAMP stack.
You can also check our guide on LAMP [here](https://blog.alphavps.com/how-install/).
In this tutorial, we will be walking through the process of installing a LEMP stack on an Ubuntu server. We will go with **Ubuntu 22.04**, but the process is pretty much the same for all Debian-based distributions.
You will need to have an Ubuntu 22.04 server with a non-root sudo-enabled user. You can either proceed with an automatic installation from your clients' area panel or you can manually install the OS via an ISO.
For a manual installation, you can refer to our guide [here](https://blog.alphavps.com/how-to-manually-install-ubuntu-via-an-iso/).
We will entirely work from the terminal.
---
## Installing Nginx
Nginx is a high-performance web server and reverse proxy server that is widely used in the web development industry. It is free and open-source.
A web server is a software and the underlying hardware that accepts requests via the HTTP protocol or its secure variant HTTP.
Basically, it is software that is used to host and serve web pages and web applications over the internet.
You will need to update your apt cache and install Nginx via these two commands:
```
sudo apt update
sudo apt install nginx
```
Confirm the installation by pressing Y/y and ''Enter''.
If the installation was processed without any errors, your Nginx web server is now working. You can check the status of your Nginx web server by running:
```
sudo systemctl status nginx
```
You will receive a similar output.

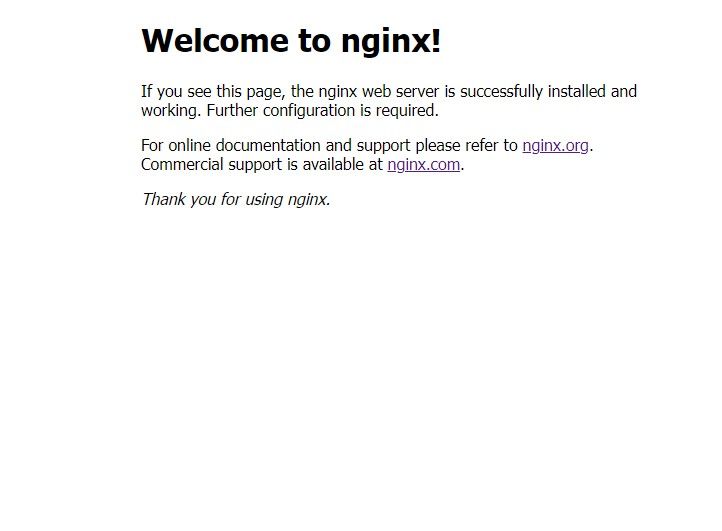
You can also test the installation by opening a web browser and navigating to `http://your-server-ip/` . You should see the default Nginx web page, which confirms that Nginx is running.
Example commands to find out your IP are:
```
ip addr
ifconfig
ip a
```
---
## Installing MySQL
MySQL is an open-source relational database management system (RDBMS) that is widely used for building web-based applications. It is a popular choice for managing and organizing data because of its speed, reliability, and ease of use.
MySQL can be installed by running:
```
sudo apt-get install mysql-server
```
**NOTE!**
MySQL is installed with a default root user without a password. This is a security vulnerability because anyone can connect to the MySQL server as the root user without providing a password. `mysql_secure_installation` is a script that allows you to set a password for the root user and remove anonymous users. The script will help you to secure your MySQL installation.
As of 2022, if you try to run the `mysql_secure_installation` script without additional configuration, an error will occur, which will loop the script.
This needs to be prevented!
Run the following command:
```
sudo mysql
mysql> ALTER USER 'root'@'localhost' IDENTIFIED WITH mysql_native_password BY 'your-password-here';
mysql> exit
```
Note the provided password because it will be required during the script.
`mysql_secure_installation` is a command-line tool provided by MySQL that lets you secure your MySQL installation. It will guide you through the process of securing your database - set a root password, remove anonymous users, disable remote root logins, and remove test databases.
To start it, simply run:
```
mysql_secure_installation
```
Simply answer everything with a yes by clicking 'Y/y'.
You will be prompted to select a level of a password validation policy.
Make sure that your password covers the requirements when you provide it. Otherwise, an error will occur.
```
LOW Length >= 8
MEDIUM Length >= 8, numeric, mixed case, and special characters
STRONG Length >= 8, numeric, mixed case, special characters and dictionary
Please enter 0 = LOW, 1 = MEDIUM and 2 = STRONG:
```
Your MySQL database installation is now completed.
---
## Installing PHP
PHP stands for Hypertext Preprocessor. It is a server-side scripting language that is widely used to create dynamic websites and web applications. It can interact with databases and support various data and protocols.
The difference between Apache and Nginx in terms of PHP processing is that, while Apache embeds the PHP interpreter in each request, Nginx needs an external program to handle PHP processing.
You will need to run the following command:
```
sudo apt install php8.1-fpm php-mysql
```
- `php8.1-fpm` stands for “PHP fastCGI process manager”. It instructs Nginx to pass PHP requests to this software for processing.
- `php-mysql` is a PHP module that enables PHP to communicate with your MySQL database.
Your LEMP stack is now installed.
---
## Configuring Nginx Server Blocks
Nginx server blocks, also known as virtual hosts in Apache, allow you to host multiple websites or applications on a single server with a single IP address.
A server block is a configuration file in Nginx that contains the settings for a specific website or application.
Make sure that you replace `example-domain.com` with your actual domain.
To proceed with our configuration, we will need to create a web directory for our domain. We will need to do so in our web root directory - `/var/www`.
Run the following command:
```
sudo mkdir /var/www/example-domain
```
We will need to assign ownership of the directory with the following command:
```
sudo chown -R $USER:$USER /var/www/example-domain
```
Once again, replace `example-domain` with your actual domain name.
Now we will create a new configuration file in Nginx's directory.
```
sudo nano /etc/nginx/sites-available/example-domain
```
Replace `example-domain` again.
Paste the provided configuration - an example server block looks like this:
```
server {
listen 80;
server_name example-domain.com www.example-domain.com;
root /var/www/example-domain.com;
index index.html index.php;
location / {
try_files $uri $uri/ =404;
}
location ~ \.php$ {
include snippets/fastcgi-php.conf;
fastcgi_pass unix:/run/php/php8.1-fpm.sock;
}
}
```
Make sure that you replace `example-domain.com` with your actual domain.
Let's take a closer look at each of the settings above.
- `listen`: the IP address and port number that Nginx listens on for incoming connections.
- `server_name`: the domain name or IP address that the server block should match.
- `root`: the directory where the website's files are stored.
- `index`: the default file to serve when a directory is requested.
- `location`: a block that specifies how Nginx should handle requests for specific URLs or file types.
Now we will need to activate our configuration by linking to the configuration file from `sites-enabled` directory in Nginx:
```
sudo ln -s /etc/nginx/sites-available/example-domain /etc/nginx/sites-enabled/
```
The default configuration file can be unlinked by running:
```
sudo unlink /etc/nginx/sites-enabled/default
```
Test your configuration for any syntax errors by running:
```
sudo nginx -t
```
If everything is fine, reload Nginx with the following command:
```
sudo systemctl reload nginx
```
Our configuration is now ready and our site is active.
Let's create an `index.html` file in our `var/www/example-domain` directory, so we can test this out.
```
nano /var/www/example-domain/index.html
```
Paste the following HTML markup in the file and save it:
```
Hello World
Hello, World!
```
We can now test if our `index.html` page is being served by opening the browser and navigating to `http://your-server-ip/`. Provide your AlphaVPS service IP in the URL. The provided content is visualized as:

## Testing PHP Processing
In the previous section, we tested how our web server serves HTML pages.
Now we will check if our Nginx configuration also correctly serves PHP pages.
We will create now create a new `.php` file in our `/var/www/example-domain/` directory by running:
```
nano /var/www/example-domain/index.php
```
Provide the following standard content in the file:
```