GParted stands for GNOME Partition Editor. It is a free disk partitioning tool allowing users to manage and modify disk partitions. GParted is commonly used for creating, resizing, moving, and deleting partitions.
This tutorial will show you how to extend your partition or create an entirely new one via a GParted Live CD.
Mounting the ISO
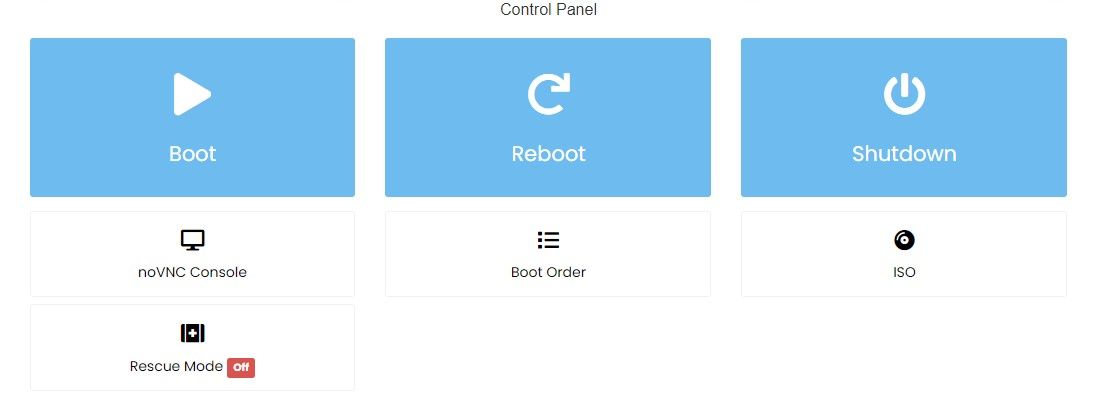
If you have an active KVM service from AlphaVPS, such as our EPYC and RYZEN lines, the dashboard in your clients' area panel will provide you with the options to change the boot order and mount an ISO.
Navigate to your dashboard and scroll down to the actions section.
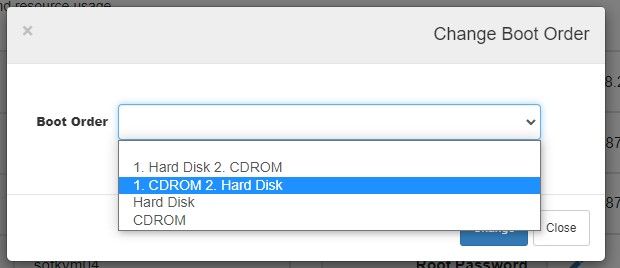
Change the Boot Order to CD-ROM 1st/HDD 2nd or CD-ROM.
Click the ISO button.

Select the Gparted Live CD and mount it.
Once this is done, you will need to shut down your VPS and boot it back again.
Open the console from the noVNC Console button and proceed with the ISO itself.
Application startup
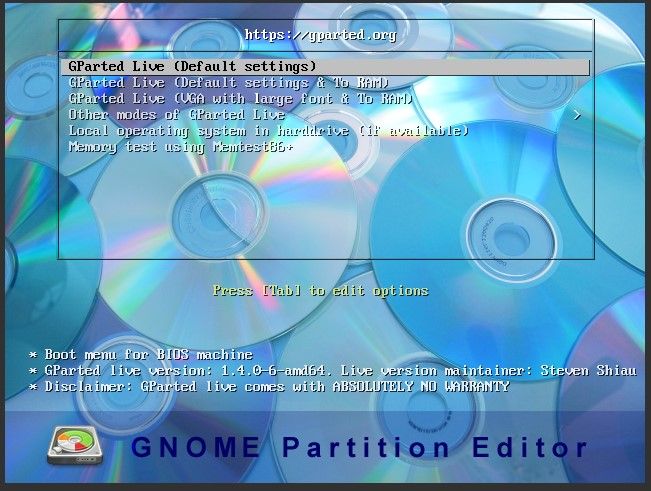
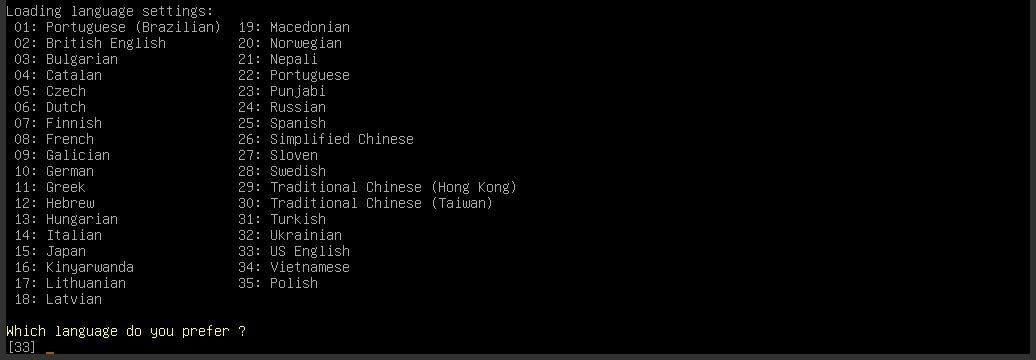
After the ISO is mounted and booted, you can proceed through Gparted's multiple prompts. If you do not have any specific requirements, simply press Enter to continue.

Partition modification
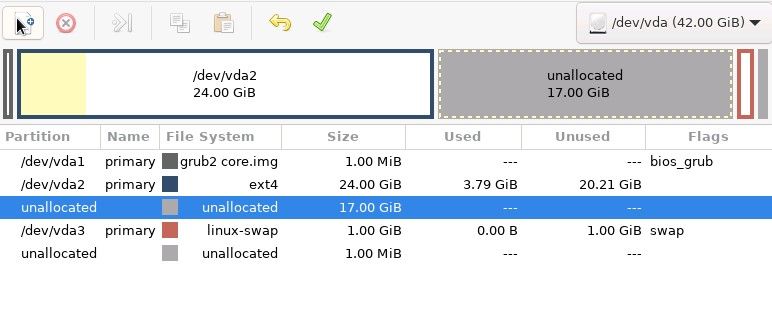
Once GParted is all up and running, you will be presented with a summary of your partitions. The presented table should look similar to the image below.
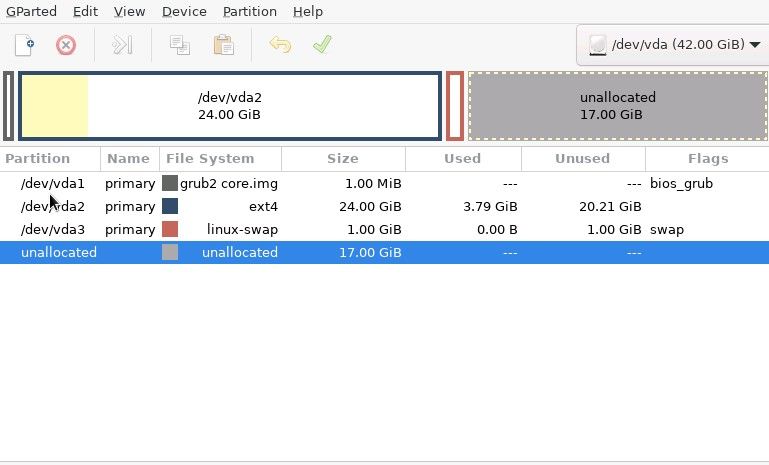
The unallocated space displays the amount of storage space, which your VPS resources were upgraded with. You can either create a new partition or extend an existing one.
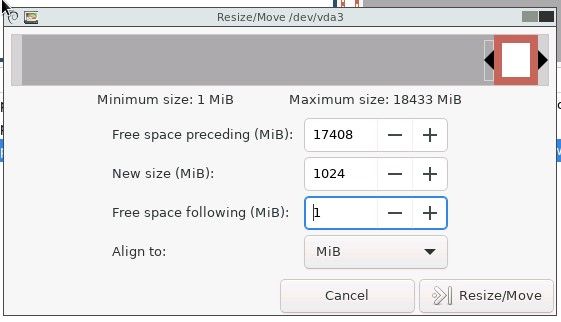
By default, if no custom partitioning was previously performed, your VPS will have a linux-swap partition. If you want to extend your main partition, which in our case is /dev/vda2, we will need to move linux-swap to the back of our partition table. Select it as shown in the images below.
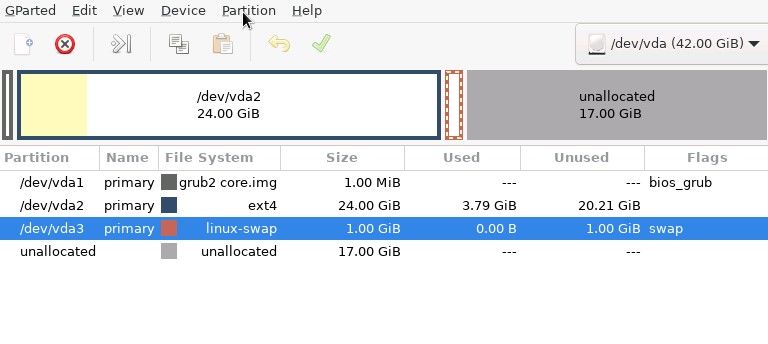
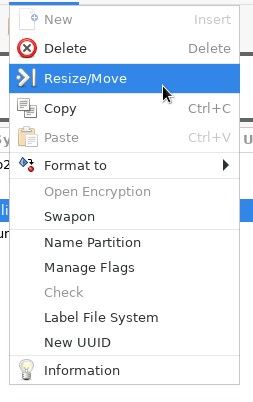
Click on the Partition button in the navbar and select Resize/Move.
Move the swap partition to the back of the partition table as shown below. You can drag its position to the back, but make sure that you do not extend it.
Click Resize/Move and you will be presented with an updated summary of the table.
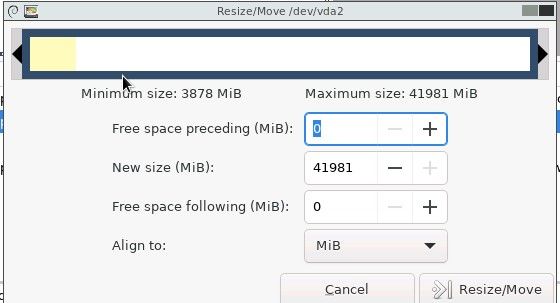
Proceed with the same steps for your /dev/vda2 partition, but instead of moving the partition, extend it with all the available unallocated space.
Confirm all performed actions and apply them.

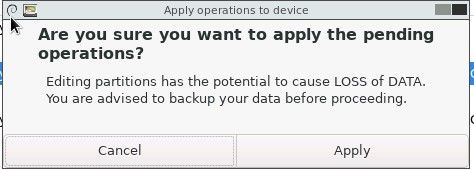
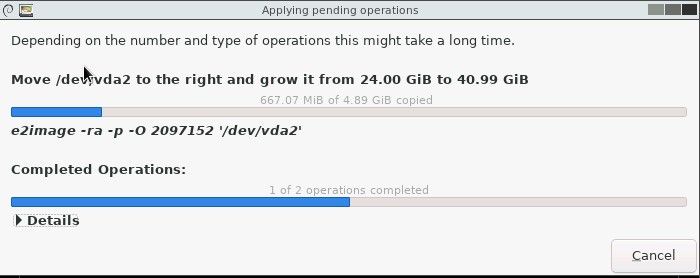
Wait for the process to complete and do not interrupt it by all means.
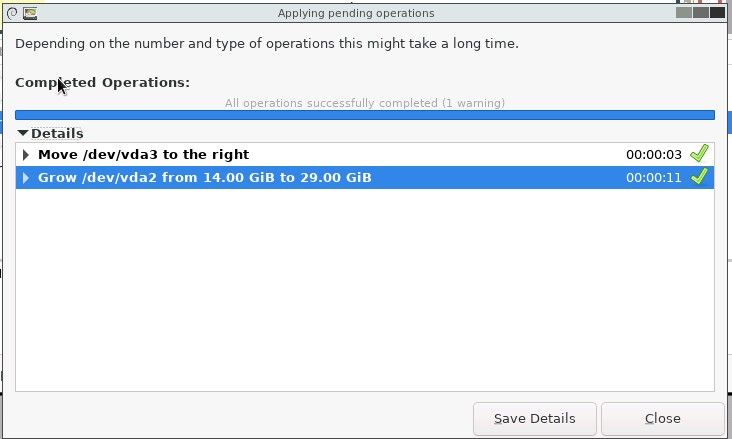
Once ready, exit the application and unmount the ISO from the VPS.
Change your boot order back to normal HDD 1st/CD-ROM 2nd or HDD only.