> ## Content Index
> Fetch the complete content index at: https://blog.alphavps.com/llms.txt
> Use this file to discover other available public pages before exploring further.
# How to create Docker images
- URL: https://blog.alphavps.com/how-to-create-docker-images/
- Published: 2023-05-17T13:06:13.000Z
- Updated: 2026-04-14T07:27:48.000Z
- Author: Vladislav Peev
- Tags: Tutorials, Docker & Containers, #series-docker-basics
Docker images are a component of containerized applications. They are a convenient way to package an application with its dependencies into a package that can be shared and deployed across different environments.
If this is your first encounter with Docker, we advise checking our other tutorials first. They will guide you through the initial idea of Docker containers, images, and how they can be manipulated. You can check them at &
Docker images can be created by either using a Dockerfile with the `docker build` command or using an existing container with the `docker commit` command. In this tutorial, we will show you both ways.
---
## Creating a Docker image via docker commit
As shown in our previous Docker guide [here](https://blog.alphavps.com/how-to-create-a-docker-container/), we are able to operate and customize our containers in the same way as a regular VPS, so they can fit our use case. Of course, this does not mean that the changes that we apply are reflected on the docker image from which the container was created.
If a container is removed via the `docker rm` command, all applied changes will be lost. This is where the `docker commit` command comes in handy. It allows you how to save the actual state of a container as a new Docker image.
The structure of the `docker commit` is the following:
```
sudo docker commit `OPTIONS` `CONTAINER-NAME-OR-ID` `REPOSITORY/IMAGE-NAME`
```
A sample command looks like this:
```
sudo docker commit -m "Installed WordPress" -a "vladislav" 5f033096907f vladislav/Ubuntu-WP
```
- The `-m` flag indicates a message. Here you specify what was modified on the container.
- The `-a` flag specifies the author's name.
- The `REPOSITORY` part indicates the Docker hub repository. It is usually your Docker Hub username. You are also able to create additional repositories there.
- The `IMAGE-NAME` is where you specify the name of the docker image.
## Creating a Docker image via docker build
The preferred way to create a docker image is via the so-called Dockerfile, which is basically a blueprint for the image from which a container is created. It is a plain text file that contains a set of instructions.
A Dockerfile needs to have a base image. It is an existing image that provides a starting point for the new image. From there on it is up to you to extend the base image and fit it for your needs.
You can specify the base image and extend it by using instructions such as `FROM`, `RUN`, `COPY`, `EXPOSE`, and `WORKDIR`. Each of them is used for the following:
- `FROM`: The `FROM` instruction specifies the base image for the Docker image.
- `RUN`: The `RUN` instruction executes a command inside the Docker image. You can use it to install packages, run scripts, or perform any other setup tasks.
- `COPY`: The `COPY` instruction copies files or directories from your VPS into the Docker image. It is often used to copy application code or configuration files into the image.
- `EXPOSE`: The `EXPOSE` instruction specifies which network ports the container should listen on when it's running.
- `CMD`: The `CMD` instruction specifies the command that will run when you start your container.
- `WORKDIR`: When you run a command inside a Docker container, it will be executed within a specific directory in the container itself. The `WORKDIR` instruction sets the default directory where your command will be executed.
A sample Dockerfile looks like this:
```
FROM ubuntu:latest
WORKDIR /app
COPY app.py .
RUN apt-get update && \
apt-get install -y python3 && \
apt-get clean
EXPOSE 8080
CMD ["python3", "app.py"]
```
Once the Dockerfile is created, navigate to its containing directory and run the following command:
```
sudo docker build -t image-name:tag .
```
- `-t image-name:1.0` specifies the name and tag for the image. In this example, the image will be named `image-name` and tagged as `1.0`. In Docker's context, the tag specifies a version.
- `.` indicates the build context. It tells Docker to look for the Dockerfile in the current directory.
Make sure you navigate to the directory containing your Dockerfile before running this command. Docker will read the instructions in the Dockerfile, execute them one by one, and build the image.
You can confirm that the image was successfully created by running:
```
sudo docker images
```
## Pushing a container to DockerHub
In our previous steps, we showed you how to create a Docker image.
One of the key concepts behind Docker is reusability, but at this point, the newly-created image is available only locally on our machine.
Now we will push it to DockerHub. This way our image will be remotely-accessible between multiple servers.
By default, when you push an image to Docker Hub, it is publicly available for anyone to access. However, Docker Hub offers the option to make your images private, allowing you to control access and restrict who can pull or view your images.
### Creating an account in DockerHub
The first step is to create an account at the DockerHub website. Simply follow this [link](https://hub.docker.com/?ref=blog.alphavps.com) and proceed with the registration.
Once your account is activated, you are able to log in to DockerHub via your CLI with the following command:
```
sudo docker login
```
You will be presented with prompts for your username and password.
```
Login with your Docker ID to push and pull images from Docker Hub. If you don't have a Docker ID, head over to https://hub.docker.com to create one.
Username:
```
If you have successfully logged in, you will receive the following output:
```
WARNING! Your password will be stored unencrypted in /root/.docker/config.json.
Configure a credential helper to remove this warning. See
https://docs.docker.com/engine/reference/commandline/login/#credentials-store
Login Succeeded
```
Being logged into DockerHub also allows you to pull private images, which you have access to.
DockerHub also provides a few paid plans with extended features, but for our learning purposes, the Personal plan will be sufficient.
### Pushing an image to DockerHub
You are able to view your local images by running the `sudo docker images` command.
Please, do note that If your DockerHub username is different from the local username that you created the image with, you will have to tag your image with your registry username. You can do this with the following command:
```
sudo docker tag local-username/image-name dockerhub-username/image-name
```
Simply replace the image name and usernames for DockerHub and your local system. This is necessary only if both usernames differ.
Now, you can execute the push command:
```
sudo docker push repository-name/image-name
```
As we previously noted, By default, the `repository-name` will be the same as your DockerHub username. Replace the image name as well.
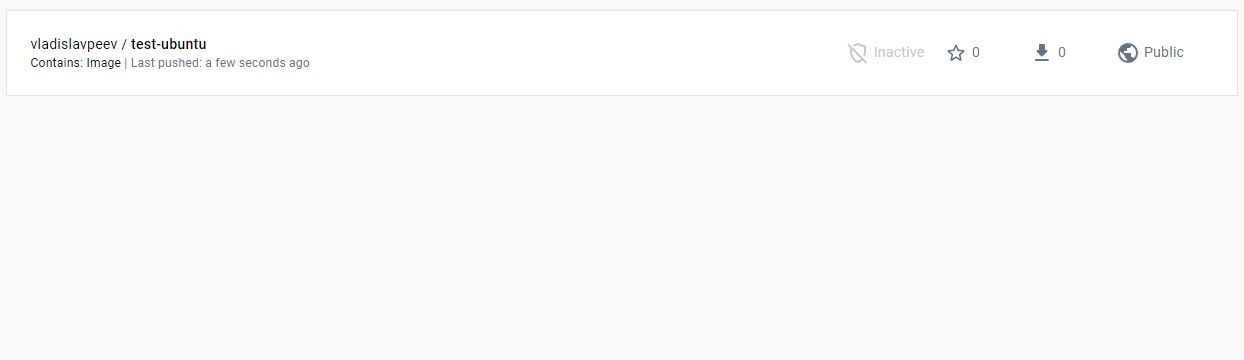
Once successfully pushed, your image should be visible in your DockerHub account.
To find your Docker image via your CLI, you can run the following command:
```
sudo docker search `repository-name`/`docker-username`
```